• Parenting
  • Food
  • Do it Yourself

How to Knowledge

  • Travel
  • Finance
  • Technology
  • Home
  • DIY
  • Finance
  • Food
  • Parenting
  • Technology
  • Travel

How to Get Chalkboard Paint Out of Clothes

March 21, 2022 Leave a comment

Painting is one of those instant gratification experiences you can ever find. This is true regardless of whether you’re a professional painter or are just having fun with paint.

You get to see the fruits of your labor as you advance, and to some people, it could mean more than just painting a wall. It’s a cheap therapeutic exercise that promotes stress relief.

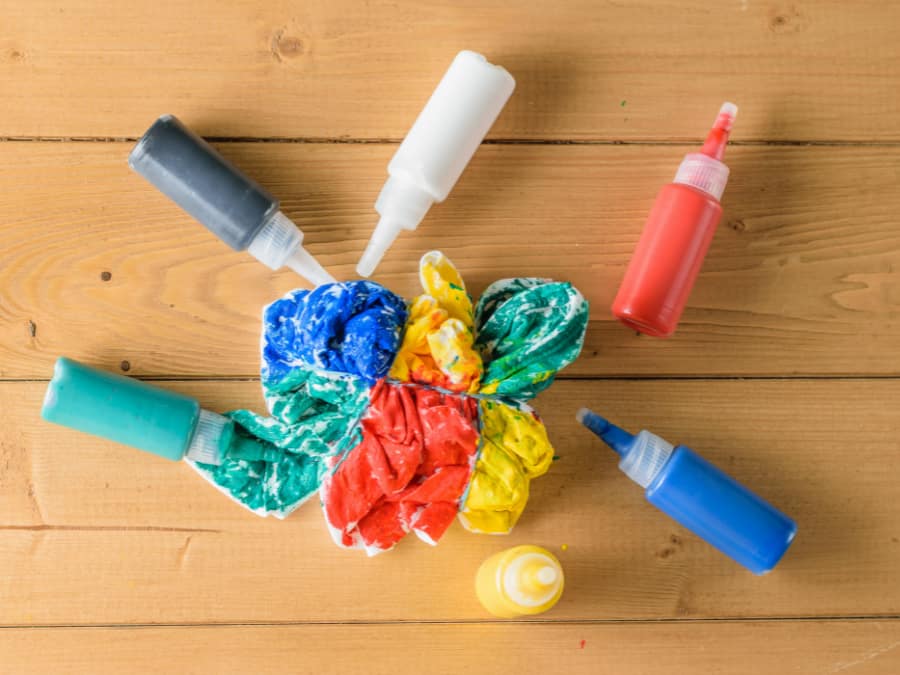
But it’s no secret that painting is a messy task. It’s common to get paint spots or stains in your clothes, especially when using chalkboard paint.

So, what do you do when your clothing gets paint stains? When you notice chalkboard paint splotch on your clothes, try out the simple methods I have outlined in this post to remove it.

Feel free to jump ahead!

large chalkboard wall in living room

What’s chalkboard paint?

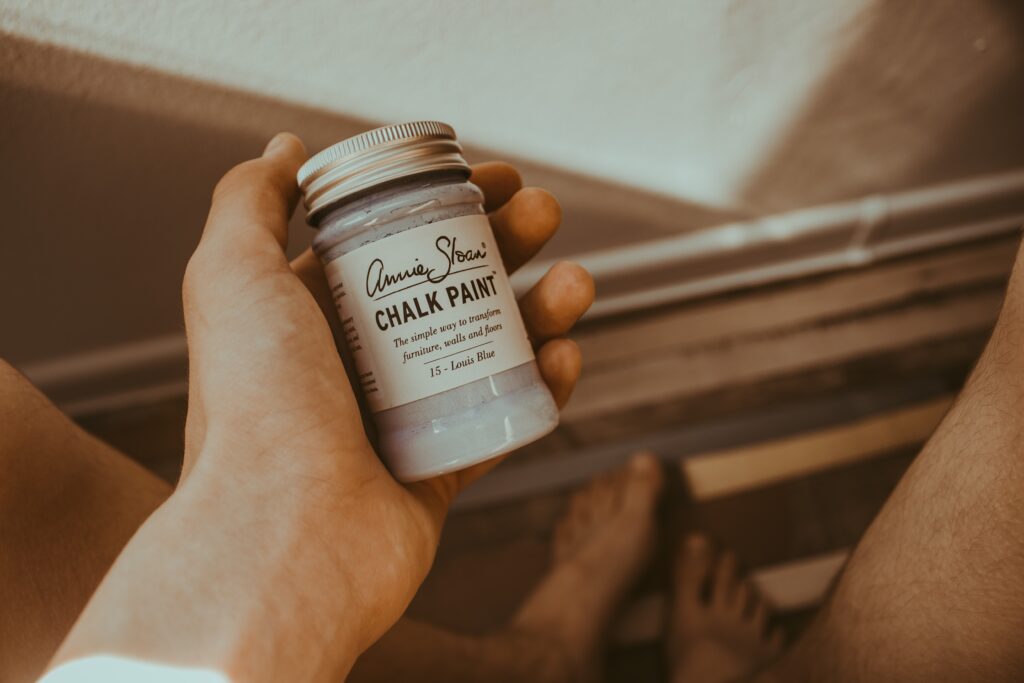
Chalkboard paint is a paint whose ingredients can turn surfaces into instant writing spaces. The paint has silicon dioxide, talc, and titanium dioxide, creating a surface that can hold chalk.

You may paint it on kitchen walls to write recipes, the kids’ playroom for their plays, or a tabletop. However, in any area you decide to paint, you’re likely to end up with spots or stains of the paint in your clothing.

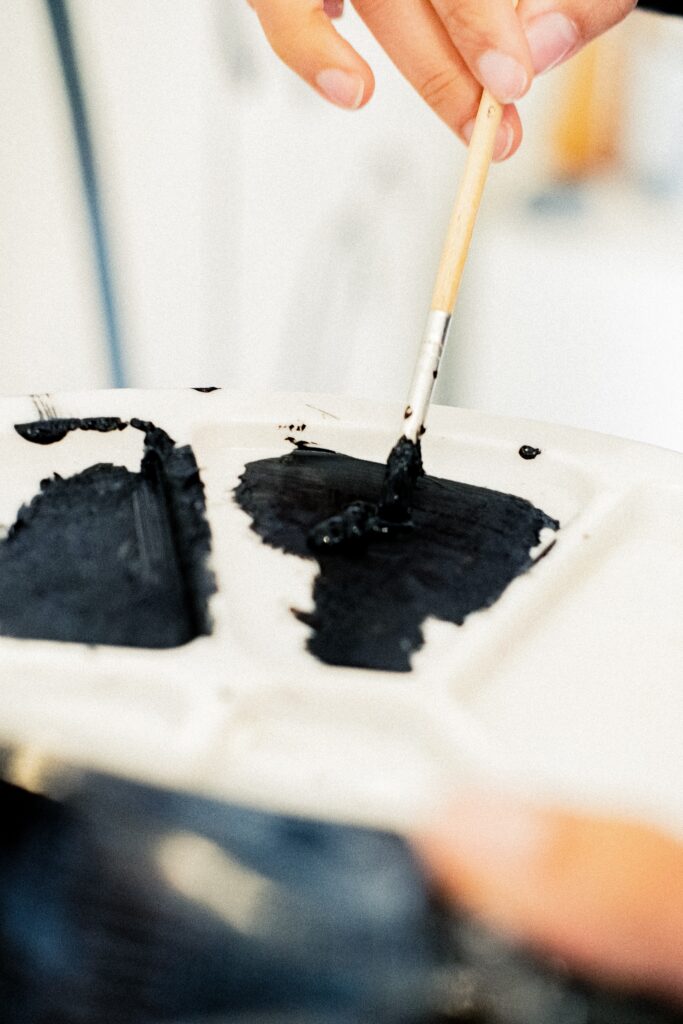
Chalk paint is typically black but it also comes in a variety of colors and can be used on a variety of items.

Here is the equipment you need and how you can remove the paint from your clothes when that happens.

hand holding chalk paint

What do I need?

Before removing the chalkboard paint from your clothing, you should gather a few materials. Among the things you’ll need include:

  • Rubbing alcohol
  • Stain remover
  • Toothbrush
  • Laundry detergent
  • Dishwashing liquid
  • Drying rack
  • Clean rags, paper towels etc.

These are some of the tools and materials you’ll need to get started. We’ll see more as we go through the chalkboard paint removal methods.

Before you start:

When your clothing gets a chalkboard paint splotch, the first thing you need to do is lightly brush off the loose chalk dust. If possible, do this outside to prevent the paint from spreading to other surfaces.

Wash the clothing on a normal cycle if no chalkboard paint is visible. Now, let’s have a look at the methods you can use to remove the chalkboard paint from your clothes.

hand painting with black chalkboard paint

How do I remove chalkboard paint out of clothes?

Getting chalk stains and spots in your clothes is almost inevitable when painting. Luckily, these paint stains and marks can come off easily if you follow the correct procedures.

Here are ten different methods that will help you remove chalkboard paint from your clothes:

1.   Handwash the stain

This is the most basic yet best way of removing chalkboard paint from your clothes. It involves using your hands and a little bit of elbow grease to wash the paint-stained cloth using soapy water.

Here is a step-by-step guide on handwashing the chalkboard stain from your clothes:

a.    Using the back of a spoon or butter knife, scrape the thick dried paint off your clothing.

b.    Remove as much paint from the cloth as soon as possible before wetting it.

c.    Using warm water, flush the chalkboard paint stains from the back, repeating until the color fades. This prepares the cloth for cleaning using a detergent.

d.    Add about 1 cup of warm water to a bowl and add several drops of mild dish soap

e.    Take a none colored sponge and dip in the mixture

f.     Tamp and scrub the stained area with the sponge, repeating the process until the chalkboard paint comes off.

g.    Always rinse the sponge with warm water every time you rub the stained area.

h.    It can take up to four cleaning phases to remove the stains entirely, depending on the degree of the initial stain.

Be careful when rubbing the stained area. You could push the stains deeper into the clothing fibers.

woman drawing on chalkboard wall

2.   Wash with hot water

Yes, hot water effectively removes the chalkboard paint from your clothes. After getting rid of the dried paint off your cloth using a knife or a spoon, wash your cloth at the hottest temperature the fabric can allow.

You can also follow the care label instructions that come with the fabric.

3.   Remove the stains with dishwashing detergent

Dish detergent is perfect when removing water-based paint like latex, chalkboard, or acrylic paint. But how exactly do you go about it?

First, rinse the stained clothing with a little bit of warm water. Then, dab the stained area using a damp rag and a little bit of dishwashing detergent.

Leave the solution sitting for several minutes, and then scrub and rinse using warm water. Repeat this treatment several times and then wash the fabric in cold water.

Note: Before using this method, make sure the clothes are color-safe. Otherwise, washing the fabric material with dish soap will make its color run.

4.   Use rubbing alcohol

Rubbing alcohol (also known as isopropyl alcohol) is a highly effective way to get rid of chalkboard paint stains from your clothes. It’s particularly a great solution if the dishwashing detergent doesn’t work on your clothing.

The first thing you need to do is wet the stained area with warm water. Then, soak a toothbrush or a cotton ball in rubbing alcohol and gently scrub the stained part. 

Rinse the fabric with warm water and repeat the process several times. Finally, wash the garment in the washing machine to remove the final chalkboard paint stains and the alcohol.

5.   Use acetone nail polish remover

If you can’t access the rubbing alcohol, don’t fret. Nail polish remover can work as perfectly as the alcohol to eliminate the clothes’ chalkboard paint.

Soak a rag in it and blot the paint stain to loosen it up. Then, wash the clothing using warm soapy water to remove the remaining paint spots and the nail polish remover.

Note: Make sure that your clothing doesn’t have triacetate or acetate before using this method. The acetone nail polish remover can damage these fibers.

6.   Use hairspray

Many aerosol hairsprays contain alcohol and can thus remove chalkboard paint stains in clothes. Spray the stained area with hairspray until the entire surface is covered.

Then, give the area a good scrub using an old, soft toothbrush. Run warm water over the splotched area after scrubbing it.

Finally, throw it in the washing machine to remove the excess paint and hairspray.

7.   Use hand sanitizer

Like hairspray, most hand sanitizers contain alcohol; hence, they can remove chalkboard paint splotch from clothes. The stains removal process is much similar to that of a hairspray.

You cover the paint-stained area with hand sanitizer and use a toothbrush to scrub it off. Then, you wash the cloth to remove the remaining paint spots and the hand sanitizer.

You can use hand sanitizer and hairspray together for better results. It’ll help in removing the chalkboard paint from the fabric faster.

8.   White Vinegar, salt, and ammonia

Yes, you can use vinegar, salt, and ammonia to remove chalkboard paint from your clothes. And here is how to go about it:

a.    Add two tablespoons of vinegar, one tablespoon of salt, and two tablespoons of ammonia

b.    Add warm water and then stir the solution

c.    Soak an old toothbrush or rag in the mixture and scrub the stain till it comes off

d.    If the stain is huge or the paint won’t come off, fill the sink or a large bowl with water and add ammonia, vinegar, and salt

e.    Submerge the stained clothing in the solution and leave it for several hours.

f.     Then scrub the stain using a toothbrush

If you don’t want to buy extra materials, this is your go-to paint removal method.

9.   Lavender essential oil

This is yet another ultra-easy solution to remove chalkboard paint stains from your clothes. To get started, add a few drops of lavender essential oil to the stained area and leave it soaked for about half an hour.

Use a knife or a spoon to scrape off the loose paint. Then, use a soft toothbrush or a damp rag to remove the stains.

10.Use a paint stripper

Before getting started, here is a quick safety precaution for you: wear gloves, goggles, and long sleeves. Even if the remover is marked to be safe, you can’t be too safe.

After that, follow these guidelines to remove the chalkboard paint stains:

a.    Apply the paint stripper on the stained area

b.    Leave the solution soaked in the area for about 20-30 minutes

c.    Using a wire scraper, a putty knife, or a soft toothbrush, brush off the paint.

There you have it: the different methods you may use to remove chalkboard paint from your clothes. Some experts will also recommend sanding off the chalkboard paint stains from your cloth.

Conclusion

Painting promotes self-relief, bolsters memory, improves problem-solving and motor skills, etc. But painting can also be messy and will probably leave your clothes with paint splotch.

If you splatter chalkboard paint on your clothing, the chances are that it can come off with the right approach. This post provides you with the methods to remove chalkboard paint from your fabric materials.

Good luck as you purpose to use it to get chalkboard paint out of your clothes.

Filed Under: DIY

How to Stop A Toddler From Crying

March 21, 2022 Leave a comment

Toddlers can cry for two to three hours in 24 hours, and living with the toddler cries and temper tantrums isn’t easy. You’ll often be all over the internet and pediatrician’s offices looking for a way to stop the wailing.

Toddlers cry for a variety of reasons, and although it may feel frustrating, there is always a purpose to it. Crying may be triggered by the four primary and universal emotions, including happiness, fear, sadness, and anger.

Understanding which among the four universal emotions makes your child cry is key to stopping the wailing. This article will discuss what causes toddlers to cry and how to stop them from crying.

toddler girl crying on colorful chair

Let’s get started!

Why is my toddler crying?

Generally, toddlers cry when the big emotions of anger, happiness, fear, or sadness are triggered. But these emotions are evoked by a few things, including:

1.   Tiredness

Being overtired is one of the reasons for a crying toddler. The more tired the toddler is, the more difficult it is for them to get sleep – and this may make them cry.

If your little one is rubbing their eyes, breaking eye contact, yawning, or losing interest in activities, it may be time for them to rest. The child may also look restless, and they may pull their legs in pain due to not getting much sleep.

toddler boy throwing a fit

2.   Hunger

If your child starts to fuss as you approach mealtime, hunger should be the first thing to consider. In toddlers, this is the most common reason for tantrums and wailing.

And as the child grows, they’ll likely demand more meals and snack time during odd hours. If that’s the case, you may want to shift the mealtime schedules to match the child’s eating demands.

3.   Stress and frustration

Yes, toddlers too get stressed, and they’ll often cry in response. The stress or frustration may be caused by changes in the environment, a non-functioning toy, failure to meet their demands, etc.

Regardless of what leads to the stress/frustration, your little one may struggle to manage the emotions. Consider what the toddler was doing before they started crying to get a hint of what was causing the frustration.

4.   Overstimulation

Visual effects, too much noise, or people can cause crying in toddlers. If that’s the cause, the child will try to take shelter behind your leg or in a corner before they start wailing. Try removing them from the difficult situation and see if their puddle of tears stop.

5.   The child wants attention

Sometimes, your little one needs your attention and doesn’t know how to ask for it. If you’ve ruled out fatigue, hunger, stress, and overstimulation, the child may be asking for a little time with you. This is especially true if you often work and leave your child with a caregiver, they may suffer from separation anxiety.

Note: if the child uses crying to gain your attention too often, it can become a cycle that’s hard to break.

toddler boy crying

How can I stop my toddler from crying?

Knowing why your toddler is crying is the first step to stopping a crying child. You can help your little one understand, identify and manage the emotions behind the expression.

Here are ten techniques you may use to stop your toddler from crying:

Technique #1: Find missed communication

At first glance, crying may feel like manipulation, but this is what’s happening with a toddler every time they cry: they’re trying to communicate a message to you. And since all children will cry until they’re heard, the whining may not end until you ‘get it.’

Finding the missed communication and validating what the little one wants and your child’s feelings, allows you to help them calm down. Only when the kid knows that you understand them can they entertain the idea of finding a solution and eventually calming down.

For instance, if you’re in the grocery store and your child starts to cry over a favorite toy, letting them know that you understand they want the toy is the first step towards calming them down. You may then in a calm voice, promise to buy them a bigger toy if they stop crying or offer any other solution.

toddler boy laying on his back crying

Technique #2: Meet the underlying healthy need

All toddlers’ behaviors are influenced by three healthy needs: experience, power, and connection. Everything the little one does focuses on meeting these needs. 

If the toddler is trying to meet either of the three needs, and it’s not working, they’ll likely persist repeatedly until the need is met. They may cry to seek attention and help in accomplishing their needs.

Technique #3: Pay attention to your words

There is no doubt that toddlers’ cries and whines can be frustrating. But that shouldn’t be a reason for you to raise your emotional temperature.

Calm down and avoid using words that may cause more frustration in your little one. Saying things like “stop crying” or “Shh, people are looking at you” will not calm the child down – it may even worsen the situation.

Instead, use affirming words, like “I’m here with you” or “Let’s talk about it.” These words will likely calm the child and stop them from crying.

Technique #4: Discover patterns

If your child is crying all the time in a specific pattern, it can be a good thing for you. You can now anticipate the whining before it happens, make a plan and work on it proactively.

Identify the underlying need that could be making your child cry and work on it accordingly. For instance, if the toddler is crying over the power need, you should look for ways to make them feel more control over the specific situation. It could also be they got too little sleep or not enough sleep and need a most established bedtime routine.

Technique #5: Look at the basics

Most parents understandably overlook the basic reasons that may make a toddler cry or whine. And that’s because most of them are busy, often forgetting the core things.

Here are a few questions to guide you in identifying if the child’s basics are being met:

–      Is your little one getting enough outdoor playtime?

–      Is your toddler getting enough rest for their development and age level?

–      Is your kid getting enough nutrients for healthy body development?

–      Do you get time to play or enjoy with your child?

These questions should help you identify the child’s fundamental needs and work towards meeting them.

Technique #6: Turn up the music

You don’t need to limit your lullabies when your little ones threaten to shed tears. Instead, play the lullabies and try other music genres to the child to stop them from crying.

Like movement, music can calm the child’s nervous system, reducing their respiratory and heart rate. This calms your little loved ones, encouraging them to relax and sleep.

And never underestimate the power of your voice. You may not be Adele or a Taylor Swift when it comes to singing, but your voice can soothe your child to sleep. A familiar voice and rhythm will entertain most toddlers, helping them relax.

mom comforting crying toddler girl

Technique #7: Use the five S’s to soothe your child

If you can’t tell what is upsetting your little one, focus on making the environment as comfortable and soothing as possible. You can achieve this using the five S’s, including:

–      Swaddling with a warm blanket

–      Laying the little one on their side

–      Shushing the child

–      Gently swinging the kid

–      Allowing the little one to suck

This will help the toddler feel super relaxed and calm, especially if they aren’t crying for a specific reason.

Technique $8: Put out the lights and cut the music

Toddlers can easily get overstimulated by the noise and lights of everyday life. Remember, they are still trying to adapt to the change from a quiet womb to the noisy and bright days.

Thus, putting off the light and cutting the music can sometimes work to stop the toddler from crying. It will make them calm and relaxed.

Technique #9: Play it back

You may also record your little one when they fuss and cry and let them listen to it when they are about to cry again. In most cases, the child will be fascinated by the sounds of a crying or fussing baby, calming them.

Here is why the technique works: At times, the little ones have difficulty calming down, even after the offending agent is taken care of. However, a distraction like the sound of themselves crying can work wonders to calm the baby.

Technique #10: Seek Professional Help

If you’ve tried every tip on this list and the little one won’t stop crying, consider making an appointment with their pediatrician. The uncontrollable fusing, crying, and whining could be due to underlying medical issues, like an ear infection.

Some indications that it’s time to call a doctor include:

  • When the crying is frequent, prolonged, and unexplained
  • When patterned behavior like fidgeting and rocking accompanies the crying
  • When fever or other signs of sickness accompanies crying.
  • If an illness makes the child cry, the pediatrician will help manage the problem.

The bottom line

Crying is a normal part of child development, and we all benefit from a good cry. It eases anxiety, releases stress, and eliminates emotional pain.

But for toddlers, the crying can get out of hand at times. They can cry for hours and hours, especially if they are sick, hungry, stressed, overstimulated, or when they need a hug from you! The best thing is to always acknowledge your child’s emotions and try to offer a safe place your child can express their feelings when having a hard time.

This post provides you with ten techniques to help you stop a toddler from crying. Good luck as you purpose to use it at home!

Filed Under: Parenting

How to Clean Copper Coins

March 20, 2022 Leave a comment

“Find a penny, pick it up – all day long, you’ll have good luck!” Maybe this rhyme is familiar to you, and perhaps you even have stopped to pick up a lucky penny lying on the sidewalk at some point in your life.

magnifying glass looking at old copper pennies

But in most cases, those pennies you collect look anything but lucky. Many are black or brown, and at times they’re so dirty and covered in rust that you can’t even tell whether they’re pennies!

The good news is, you can clean your luck copper coins in a few steps. And cleaning copper coins can be a fun activity for kids of all ages – so you can leverage this chance to bond with your children.

This post will take you through 6 easy steps to turn the dirty, dull brown copper coins into bright, shiny pennies.

Let’s dive right in!

How to Clean Copper Coins

Before you begin:

Before cleaning the old copper coins, it’s important to note that coins aren’t just fun collectible items; they can also be very precious. For instance, the 1943 copper penny garnered $329,000 in an auction in 2014.

Today the coin is valued at 1.5 million U.S dollars. Of course, when you collect such a coin, you’ll want first to clean it before checking with the local antique shop.

pile of old copper coins

What do I need to clean old copper coins?

Before you can start to clean your old copper coin, you’ll need to collect a few items and tools, including:

  • White vinegar, Lemon juice, Baking soda, an eraser, or Tomato ketchup
  • Table salt
  • Clean water
  • A soft dry cloth/paper towel
  • Small bowl
  • Soap, and more.

Once you gather these items, you can then clean your old pennies as discussed below:

How can I clean copper coins?

There are hundreds of ways to clean your old penny ranging from washing it in warm soapy water to dipping it in cleaning chemicals. But you should be careful how you clean the copper coin as some methods will destroy its value.

Here are tested and proven methods to clean an old copper coin:

old dirty copper coins on a table

Method #1: Using a pencil eraser

This is perhaps the simplest method of cleaning pennies. The technique involves no liquids that may spill and cause a mess.

So, how do you go about it?

First, lay your dirty penny on a clean cloth or paper towel. Then use the pencil eraser to rub the dirt and brown crust off the penny in a circular motion.

Then flip the coin to clean the other side. Rinse the penny using warm water and dry it with a soft paper towel or cloth.

Method #2: Using vinegar (or orange/lemon juice) and salt

White vinegar added in water also works perfectly to clean the old copper coins. This recipe leverages vinegar’s acidic power and salt to create chemical reactions with the pennies to remove copper oxide.

Another great option to use in place of vinegar is lemon or orange juice. Citrus juices are acidic and will remove the copper oxide on coins.

Here is a step-by-step guide to cleaning copper coins using:

  1. Add ¼ cup of white vinegar into a small bowl. You can use a bigger bowl and more vinegar if you plan to clean several coins all at once.
  2. Pour one teaspoon of salt into the bowl with vinegar and stir until the salt dissolves into the vinegar. The salt helps remove the black spots from the coins, but adding more salt can damage the coin.
  3. Leave the coin soaked in the solution for about 5 minutes. If you’re cleaning several coins, spread them out so that the solution reaches both sides of each coin.
  4. For gradual treatment, dip an old toothbrush with soft bristles into the solution and use it to scrub the coin.
  5. Rinse the coin(s) with warm water to remove the vinegar and salt. The acidic power of the solution may wear off the copper if not well rinsed.
  6. Using a fiber cloth, dab the coin(s) and then let them air dry

Soak the copper coins in more vinegar solution if they still look dirty. Then put it in the piggy bank or sell it to coin collectors if it’s valuable.

copper coins soaking in cleaning solution in a bowl

Tip: Put several new bolts and nuts in the bowl with your copper pennies. As you clean more and more coins, the acid dissolves some of the copper on the coins.

The steel nuts and bolts will then attract the dissolved copper, forming a copper coating. And although it might take several pennies to fill the steel nuts and bolts with copper, it’s worth it.

Method #3: Using tomato ketchup

The tomato paste or ketchup also has little acid, meaning it can work perfectly to clean copper coins. The cleaning process is much like the pencil eraser method, only that we add tomato ketchup to help remove oxidation.

You’ll need tomato ketchup, a small container, a soft toothbrush, and a clean cloth to get started. Then follow this guide to clean your old copper coin(s).

  1. Add some tomato ketchup or paste into a small container, enough to cover your copper coin(s). Then put the coins into the ketchup, making sure that both sides are evenly coated
  2. You may also use brown colas or hot sauce to clean the coins. Like with the tomato ketchup, submerge the coin(s) in the hot sauce/brown colas
  3. Scrub the copper coins with an old toothbrush with soft bristles. Rub the coins as gently as possible to avoid damaging them.
  4. Using warm water, rinse the coins to remove the tomato ketchup. The acid in the ketchup will destroy your copper coins if left unwashed.
  5. Use a clean cloth to dry the coin

Once the coin(s) is clean, you can store it in distilled water or contact your local coin collectors.

brand new clean pennies on a white background

Method #4: Using vegetable oil

Using cooking oil is another safe way to clean your copper coins without damage. You’ll need cooking oil, a toothpick, warm water, and a clean, dry cloth to get started.

Then, follow these instructions to clean the copper coin(s):

  1. Use a toothpick to clear off the dirt on the coins. Scrape the dirt found around the engraved parts, including images, letters, and edges.
  2. Run small amounts of cooking oil onto the coins. Then, use your fingers to work the vegetable oil around the penny.
  3. Rinse the coins using warm or hot water to wash away the oil. The debris will come off, leaving you with a shiny copper coin.
  4. You may also use a toothbrush for more substantial treatment. This is mainly for coins that have much dirt.
  5. Dry the coin using a microfiber cloth.

You should leave the coins out and exposed to the open air for about 5 minutes before storing them.

Method #5: Using soap and water

If the pennies are only covered in soil or have some unidentified gunk, you can clean them using soap and water. Performing this task should be as simple as washing dishes.

First, put water into a basin and add dishwashing liquid. Then, dip an old toothbrush into the solution and use it to clean your penny.

Once the dirt comes off, rinse the coin under warm water and dry it with a soft clean cloth. Then store it in a piggy bank or sell it if it’s valuable.

two hands holding pile of old copper coins

Method #6: Shining dulled copper coins using baking soda

If your copper pennies still look dull after cleaning them with a mildly acidic liquid, you may use baking soda to bring out their luster and shine. So, how do you go about it?

Here are simple steps to turn your dull copper pennies shiny:

  1. Add about one tablespoon of baking soda and warm water to a clean bowl and stir to form a paste. The quantity of baking soda to water should be 3:1 to obtain a paste-like solution
  2. Rub the paste over the copper pennies to make them shiny. Use your fingers to spread the paste to all parts of the coin.
  3. Rinse the coin under warm water and dry it using a paper towel or dry cloth. Check the penny after you’re done to see if it’s shiner.
  4. Apply more paste to the coin if it’s still dull

Note: Baking soda is not acidic like citrus juice or vinegar, so you may leave your penny in the paste for a while. And you may also use virgin olive to make your pennies shiny.

The bottom line

Cleaning copper pennies is like performing a fun science experiment at home. All you need is a few materials and solutions, and you watch the copper oxide dissolve away like it’s magic!

Now it’s your time to try these fun methods of cleaning copper coins at home. And who knows, you might be lucky enough to have collected a valuable copper coin, like the 1943 copper penny!

Filed Under: DIY

How to Clean Plastic Retainers

March 15, 2022 Leave a comment

Retainers are key components in your orthodontic treatment. Aligners move your teeth into a straighter position, but it’s the retainers that keep them from shifting back.

In most cases, you’ll need to wear a retainer full time for a while after having your braces removed. So, you should make an effort to take good care of your retainer by cleaning it.

This post provides you with detailed information on the different types of retainers, how to clean plastic retainers, and other tips for proper care.

Let’s get started!

How to Clean Plastic Retainers

What are plastic retainers?

Plastic retainers are clear retainers that have been molded to fit comfortably on your teeth to protect your orthodontic treatment results. The retainer may be used after any treatment: clear aligners and ceramic or metal braces can all precede plastic retainers.

The plastic retainers are custom designed by your orthodontist, with a different set for your top and bottom teeth. You’re often required to wear the retainers at night for several years to prevent your teeth from shifting back.

Why do I need to clean my plastic retainers?

Cleaning your plastic retainers is a necessity: it’s good dental hygiene. When you first get your plastic retainers, you may have to wear them for the better part of the day for several years.

However, as time goes by, you’ll start wearing the retainers only at night or a few hours in the day. But regardless, it’s vital to keep them clean.

Contact with your teeth allows plaque, bacteria, and other food particles to get onto your plastic retainer. Failure to clean the retainers could result in a visible buildup that can’t be easily removed.

Without proper cleaning, your plastic retainers can get pretty disgusting, affecting their durability and ability to keep your teeth straight. Even worse, unclean retailers pose oral health risks to you.

So, how do you clean your plastic retainers? Read on for the best plastic retainer cleaning tips and more.

Cleaning retainers by type

Taking proper care of your retainer begins with knowing the type you have. Generally, there are three types of retainers, including:

  • Hawley retainers: These are removable retainers molded out of acrylic to fit your mouth. They have a wire that holds the retainer in place and is easy to clean.
  • Clear plastic retainers: As the name suggests, these retainers are almost invisible. They are removable, making them easy to clean.
  • Bonded or fixed retainers: Also called permanent retainers, these are retainers attached to your lower front teeth used when your teeth have a high possibility of shifting. They can’t be removed for cleaning but can be washed while in the mouth.

How do I clean my plastic retainers?

Cleaning your plastic retainers is key to better breath, healthier teeth, and a more confident smile. On the other hand, failure to clean your retainers could negatively affect your dental health.

Here are several cleaning methods that will help keep your retainer looking fresh and as good as new:

Using baking soda

Baking soda is one of the safest and most effective ingredients for retainer cleaning. It has antibacterial properties to microorganisms found in the mouth, making it good at killing the bad bacteria.

Baking soda can also help fight bad breath and maintain a more alkaline pH. Even better, it may also whiten retainers that have yellowed or developed black or white spots.

Here is a step-by-step guide on cleaning your retainers using baking soda:

  1. Add about two tablespoons of baking soda to ¾ cup of warm water and stir in a clean stainless steel container. The mixture should be thick and sticky.
  2. Put your retainer in this solution and clean it with a soft toothbrush.
  3. Rinse the retainer with cold or warm water thoroughly before wearing it

You may leave your plastic retainer in the baking soda solution when you’re not wearing it- aid to keep it fresh.

Using white vinegar

White vinegar is a safe, potent, and gentle disinfectant that’ll remove the odors and residues in your plastic retainers. So, how do you go about it?

Create a mixture of white vinegar and water in the ratio of 1:1 in a small dish. Soak your plastic retainers in this mixture for about 20 minutes and use a soft brush to remove mineral deposits.

Rinse your plastic retainer using warm or cold water to remove the vinegar’s strong smell. It’s also recommended that you use a disposable dish to reduce the lingering odor of the white vinegar.

Using the dish soap

It may seem odd, but you can use dish soap to clean your plastic retainers. In fact, using mild soap is a great and safe way to keep your retainers clean and free from bacteria.

Use cold or lukewarm water, a cotton swab, a sponge, or a soft-bristle toothbrush to clean your retainer with dish soap. You can also create a mixture of water and dish soap and soak your retainer in it.

Rinse your retainer with cold or warm water to avoid tasting soap when you put it back in your mouth.

Using a denture cleaner

Cleaning your plastic retainer with denture cleaner from time to time is also safe. However, the solution can turn your clear plastic retainer yellow if used for a long period.

Rinse your retainer first, and allow it to soak in the denture cleaner solution for approximately 20 minutes. Then, gently scrub it with a soft toothbrush to remove the tartar and other materials on it.

Rinse the retainer with cool water to remove the denture cleaner taste.

Using Castille soap

Castile soap is a less toxic alternative to most cleaning products. You may buy a ready-made Castile soap in stores or make yours by mixing coconut soap and olive oil.

Here is a step-by-step guide on cleaning your retainers using Castile soap:

  1. Using a clean, dry stainless steel container, mix cool water with about 1-2 squirts of Castile soap.
  2. Dip your plastic retainers into the mixture and clean it using a soft toothbrush
  3. Leave the retainer soaked for about 2-3 minutes before scrubbing it again
  4. Rinse your retainers thoroughly before putting them back into your mouth or in distilled water.

Castile soap will clean your plastic retainers and add a clean smell and freshness to them.

Using a retainer cleaner

If you don’t have the desire or time to make your solution, you may opt for retainer cleaners sold in stores. Some retainer manufacturers make retainer cleaners for willing customers.

Make sure you follow the instructions and guidelines that come with the packaging. This will help keep your retainers clean and intact while preventing other oral hygiene issues.

An orthodontist may recommend a clear plastic retainer cleaner that meets your needs.

Tips for removable retainers’ care

Your retainers need proper care to serve you as needed and for a long time. Here are a few tips to keep your retainers clean, fresh, and functional:

Use water for cleaning on the go

Although water can’t clean your retainer on its own, it can prevent the overgrowth of bacteria. Drinking water will also combat a dry mouth and keep the retainer moist, preventing damage.

Always soak your retainer in distilled water when not wearing it. If the retainer is dirty and can’t be cleaned at the moment, soak it in a damp paper towel to protect it.

Avoid mouthwash

Although mouthwash has been recommended as a cleaning solution, soaking the plastic retainer mouthwash for long can damage it. Specifically, the alcohol content in the mouthwash can dry out the retainer, allowing bacteria to grow.

Avoid toothbrushes and toothpaste

Unless it’s a soft toothbrush, you should avoid cleaning your retainers with toothpaste and toothbrush. Most toothbrushes have strong bristles that can damage your retainers.

On the other hand, most toothpaste has abrasive particles that will certainly damage your retainers.

Avoid hot water

Hot water or heat, in general, can damage, melt, or warp the delicate plastic material used to make the retainer. Thus, to keep your retainer functional for a long time, keep it away from heat and use lukewarm water when cleaning it.

Do not use hydrogen peroxide

Although some experts recommend hydrogen peroxide for cleaning plastic retainers, never use it. The chemical causes free radical reactions, which are responsible for our aging.

Even worse, hydrogen peroxide will kill all types of bacteria in the mouth, including those we rely on for proper oral microbiome functioning. What’s more, hydrogen peroxide has been associated with oral cancers.

Clean your case regularly

Ensure you clean your plastic retainer case regularly. If possible, clean it once per day and one deep clean every week.

Gently scrub all surfaces in cool, soapy water, and then rinse it using clean, cold, or warm water. You may then store it in distilled water when you’re not wearing it.

The final thoughts

Cleaning your plastic retainers is just as important as brushing your teeth. You should clean them in cool, soapy water once per day to keep them fresh and healthy.

This article provides you with tips to help you clean your retainers and maintain healthy oral hygiene. You may also ask your dentist or orthodontist for specific cleaning and care instructions for your retainers.

Filed Under: Beauty, Health & Wellness

How to Get Sulfur Smell Out of Water

March 11, 2022 Leave a comment

Water is the most crucial component of life and is key for sustenance. It helps our bodies perform specific metabolic tasks and regulates body temperature, explaining why it’s considered the most important nutrient.

So, when you notice that your water smells like rotten eggs, you have all the reasons to be worried. But is this really a call for an alarm, and if so, can the unpleasant odor be removed?

In this article, I’ll discuss everything about the sulfur smell on water, including what causes it and how to get rid of it.

What is the sulfur smell in water?

The foul sulfur smell in water is caused by Hydrogen sulfide gas (H2S) that occurs naturally in wells. The gas results from decay and chemical reaction with rocks and soil.

The smell is the compound’s most offensive characteristic, and it can be dangerous for human consumption. The gas causes nausea or eye tear at low concentrations or death in very high concentrations.

Although rare, the smell may also be a result of iron bacteria. These bacteria appear on surface waters and deposit ‘rusty’ bacterial cells with an unpleasant smell.

Getting rid of the sulfur smell out of water

Let’s face it: no one likes the smell of rotten eggs, whether on the sink or in the shower. And if you’re looking to get the sulfur smell out of your water, this is your lucky day.

Here are four steps you may use to get rid of the sulfur smell from your water:

Step #1: Find the source of the problem

The first thing you need to do to stop the foul sulfur smell is find out where it’s coming from. You may use two methods to tell the source of the stench, as discussed below:

a.   Compare your cold and hot water

If you discover that the cold water tastes and smells fine, but the hot water has a rotten egg odor, then your hot water heater is the reason for the foul smell. Specifically, the anode rod is causing the sulfur smell.

b.   Inspect your water source

If both the cold and hot water have an unpleasant smell, your water source is most likely the problem. To confirm this, inspect the various water sources you have, including the well water, water heater tank and even your water softener. Basically any water system or water filtration system you have needs to be checked. Also be sure to check your water filter too.

Although the foul sulfur smell is an indicator of a presence of hydrogen sulfide, you can also confirm the presence of the chemical by:

  • Using a sulfur stick
  • Taking a water sample to a certified laboratory technician
  • Implementing a Biological Activity Reaction Test using a test kit to test sulfur bacteria

You may then choose a solution that works for you, based on where the problem is occurring and the hydrogen sulfide levels. Below are some of the methods you may use to treat the water source.

Step #2: Replace Your Anode Rod

If only the hot water has a foul sulfur smell, the problem is in the magnesium anode rod. You might want to remove or replace the anode rod to get rid of the smell in your water.

The anode rod is found in the water heater tanks, and it helps reduce rust build-up. Thus, replacing it, rather than removing it completely, is advised to avoid accumulating rust in your water tank.

Step #3: Treatment Options

If the problem is not the water heater, you may want to find a way to treat the water source. You need to look into the well or water tank and find a solution that will help remove the sulfur smell.

Here are a few methods you may use to remove the sulfur smell in water:

Method #1: Chlorination or Peroxide Shock

You may use a peroxide or chlorination shock to disinfect the water source. Although both chlorine and peroxide will kill the bacteria present, a peroxide treatment is more effective in removing the unpleasant smell.

If you choose to use chlorine, you’ll need to replenish the tank regularly and install a carbon filter to remove the excess chlorine in the water. In the end, the chlorine will effectively remove the hydrogen sulfide in your water.

The chlorination and peroxide shock are temporary and will work for about one to two months. However, if the method works, you’ll know that hydrogen sulfide is to blame for the filthy smell in your water.

Method #2: Continuous Chlorination and Filtration

If used properly, the chlorine will help you get rid of medium to high levels of hydrogen sulfide through oxidation. Using a feed pump, you may add chlorine to the water source to remove hydrogen sulfide.

Chlorine converts the soluble hydrogen sulfide into insoluble sulfur through oxidation. You can then use a filter to remove the sulfur stones before getting into your water pipes.

Unlike the chlorination and peroxide shock, this method will continuously sanitize your water source. Even better, the chlorine will keep your water supply clean and safe.

Method #3: Use Potassium Permanganate

Like chlorination, potassium permanganate will clean your water source by making the contaminants insoluble. This includes the Iron, Manganese, and Hydrogen Sulfide in your water.

You can then use a filter to remove the solid contaminants. Also, make sure to continuously replenish and clean the water source and filtration system to remove the stench.

Note: Potassium permanganate is poisonous and will irritate your skin. Thus, ensure you handle it carefully and follow the manufacturer’s guidelines.

Method #4: Baking Soda

Baking soda is undoubtedly one of the best compounds for erasing odors. And when it comes to removing the foul sulfur smell in your water, you can trust baking soda to do the job.

Sprinkle baking soda in your water to get rid of the sulfur scent. It diffuses the odors in the water and the house.

Note: This method will not remove the Hydrogen sulfide from your water – only the smell.

Method #5: Aeration

If the levels of sulfur in your water are low (2 mg/L or less), a little bit of fresh air can do to remove the foul smell. Circulate, mix, or dissolve air in the water to eliminate the unpleasant sulfur smell.

The sulfur bacteria do well in oxygen-deprived areas. Injecting oxygen into the water source will displace hydrogen sulfide gas, making the environment less hospitable to sulfur bacteria.

Note: The aeration method may not clear all the sulfur stench in the water source and surrounding areas. However, you may use ventilation to minimize the reduce the sulfur smell.

Method #6: Ion Exchange

Though not entirely the same, this process is similar to the one used to soften water. Here, you use a charged resin to remove hydrogen sulfide from the water – in exchange for chloride.

Use a salt solution to replenish the resin charge after the process completes.

Note: Some resins may not withstand sulfides. Thus, you may want to consult a professional before buying a resin for use in your water source.

Method #7: Ozone

Another relatively efficient, effective, and safe method of oxidizing hydrogen sulfide is ozone. You’ll not be required to add any chemical or get a filtration system.

All you need is to inject the ozone into the water supply and watch the magic happen. Ozone oxidizes hydrogen sulfide forming solid sulfur that can be filtered out.

Method #8: Activated Carbon Filters

This method is perfect for removing small concentrations (1 mg/L or less) of sulfur from your water. A carbon filter is installed under your sink to treat the cooking or drinking water.

Note: This method demands that you replace the carbon filters regularly for better results.

TIP: The sulfur bacteria are a stubborn nuisance to deep water sources. As such, you should give the inside of the water source a thorough scrubbing with the right cleaning kit.

Step #4: Determine if the Water is Safe to Drink

The taste and smell of water with hydrogen sulfide are so offensive that many individuals find it undrinkable. But is the water safe to drink?

Many individuals often ask, “Can sulfur water make me sick?” Or, “what’s the effect of sulfur water on my skin and hair?”

The right answer depends on the amount of sulfur in the water. If the level of sulfur in the water is too high, you may experience nausea, stomach pains, and in the worst-case scenario, death.

But it’s hard to find high concentrations of Hydrogen sulfide in water systems.

If all else fails, you can hire a plumber to come take a look at your water. They can offer water treatment options along with give you peace of mind that your water is free from water contaminants.

The bottom line

The ‘rotten egg’ odor coming from your water can really put a damper on everything around you – from morning showers to pasta nights. However, the good news is that the unpleasant smell is treatable and can be removed.

The smell comes from Hydrogen sulfide gas, produced by the sulfur bacteria.

Filed Under: DIY, Education, Health & Wellness

How to Stop A Nosebleed in A Child

March 10, 2022 Leave a comment

Did you know that about 60% of individuals will experience a nosebleed at some point in their life? However, frequent nosebleeds are more common in children between 2 to 10 years old and the elderly aged between 50 and 80.

And although nosebleeds can be messy and alarming at times, only approximately 10% of nosebleeds are severe and a serious problem to demand medical attention. Even better, most nosebleeds can be stopped using pressure and patience.

This article will detail everything about nosebleeds in children. In it, you’ll learn what nosebleeds are, what causes them, types of nosebleeds, how to stop them, prevention tips, and more.

Let’s get started!

What is a nosebleed in children?

As the name suggests, a nosebleed involves bleeding from tissues inside the nose, and it’s caused by broken blood vessels. Also known as epistaxis, a bloody nose is mostly painless and is characterized by blood flowing from the nose.

In most cases, nosebleeds in children occur in the front part of the nose near the nostrils. This part has a lot of blood vessels that can be damaged easily when the child is hit or harms themself during nose picking.

Although a nosebleed may seem scary and messy, it’s usually not a serious health problem. They’re common in children and disappear as they approach their teen years.

Nosebleeds occur more often in dry climates or during winter when homes and buildings are heated with HVAC systems. Dry heat can cause drying, crusting, and cracking inside the nose, hence the nosebleeds.

What are the types of nosebleeds?

Nosebleeds are categorized based on their origin. They are either anterior (coming from the front of the nose) or posterior (coming from the back of the nose).

The anterior nosebleed is the most common, originating from the front of the nose. It happens when the small blood vessels, including capillaries, break and bleed.

On the other hand, the posterior nosebleed originates from the deepest part of the nose. Rarer in children posterior nosebleed is characterized by blood flowing down the back of the throat even when the individual is standing or sitting.

Posterior nosebleeds are common among the elderly with high blood pressure or individuals with face or nose injuries.

What causes nosebleeds in children?

Knowing what caused your child’s nosebleeds is key to helping prevent a re-occurrence in the future.

Here are several causes of a nosebleed in children:

a.   Dry Air

Heated indoor air or dry climate such as that during the winter months, may irritate and dry out the nasal membranes, causing anterior nosebleeds in children. Dry air causes itchy crusts that bleed when picked or scratched due to the dryness of the nasal lining. Common colds can also irritate the nose, causing nosebleeds when blown. 

b.   Injuries or blows to the nose

Your child may have a nosebleed when they injure their nose or face. Hitting the nose may break the blood vessels in the nose causing nose bleeding. Same goes for a broken nose.

And although these nosebleeds aren’t serious, you should seek medical care if the bleeding doesn’t stop after 10 minutes of trying to stop it.

c.   Allergies:

An allergy and its associated medication may also cause nosebleeds in children. The allergy and the medications may make the nose dry, itchy, stuffy, and runny, leading to nosebleeds.

How do I stop a nosebleed in a child?

Although sometimes scary, inconvenient, and filthy, most nosebleeds will stop independently and can be managed at home. Here are six things that the parent or caregiver should do to stop a nosebleed in a child:

a.   Sit the child upright

The first thing you need to do is sit the bleeding child upright. You may have them sitting down or standing up with their head bent forward.

This prevents the blood from flowing back to their throat, leading to vomiting or choking. Help the child to breathe through their mouth instead of their nose.

b.   Apply pressure:

Applying firm pressure on the soft front part of the child’s nose will help stop the nosebleed. The blood vessels are located near the nostrils, and applying pressure on the soft part of the nose prevents them from bleeding.

c.   Use a nasal spray

If you have an over-the-counter nasal decongestant such as phenylephrine or oxymetazoline, you may use it to stop the bleeding. Spray it into the nose of the child on the side that’s bleeding.

d.   Use ice

You may apply a cold compress or ice pack o the bridge of the child’s nose to stop the bleeding. The cold constricts the blood vessels, bringing the blood flow to a stop.

e.   Keep calm

The more the child panics, the longer it’ll take for the bleeding to stop. So, as the parent or guardian, you need to remain calm, and the little one will more likely follow suit.

f.    Repeat the steps for 10-15 minutes

If the nosebleed doesn’t stop after applying pressure for 10 minutes, try the same steps again. That is, reapply pressure on the nose, use a nasal spray, and use ice to stop the bleeding.

If the bleeding doesn’t stop after about 30 minutes, seek emergency medical treatment.

Three don’ts when a child is nose bleeding.

When you’re attending to a nose bleeding child, there are some things that you shouldn’t do, even though they may feel like the right things to do. The chances are that you’ve come across this misguiding information regarding what to do when your child has nosebleeds.

Here are three things to avoid:

a.   Don’t tip the child’s head back:

You may have used or heard this advice growing up, but physicians say it’s not advised. Tipping the child’s head back drains the blood in their throat, which can cause choking.

Also, blood in the child’s stomach may cause discomfort and vomiting.

b.   Don’t stuff the child’s nose:

Some individuals will stick tissues, tampons, napkins, or cotton pads up the nose to stop bleeding. I know it might feel like the right thing to do, but doctors advise against it.

This worsens bleeding as it irritates the fragile blood vessels and the lining of the nose further, causing more bleeding when the stuffing is removed. You may use a tissue or a damp cloth to trap blood as it comes out of the child’s nose.

c.   Don’t keep checking on it:

After applying pressure to the nosebleed, keep the pressure on for about 10-15 minutes. Refrain from checking every other minute to see if the nosebleed has stopped.

Taking the pressure off frequently will take longer for the nosebleed to stop. So, stay calm and patient, and the bleeding will stop.

When should I call the pediatrician?

As mentioned above, nose bleeding happens when the tiny blood vessels in the nose get dried out, experience regular blowing or picking, or if the child takes a hit to the nose. In most cases, the nosebleed is not a cause for concern and will stop on itself after following the right measures to stop it.

However, if the nose continues to bleed, seek medical attention for the child. Visit a pediatrician or emergency department if the child:

  • Bruises easily and bleeds more from minor injuries
  • Has frequently occurring nosebleeds
  • Continues to nose bleed after two trials to curb the bleeding
  • Has been bleeding for more than 15 minutes
  • Is pale, dizzy, and doesn’t seem okay
  • Has a foreign object in their nose
  • Has a nosebleed after taking new medications
  • Had a fall or head injury that caused the nosebleed

The pediatrician will review the child’s injury or current medication to determine the cause of the nosebleeds. They’ll then stop the bleeding and provide you with information to prevent its reoccurrence.

How do I prevent nosebleeds?

Although you can’t always prevent nosebleeds from happening to a child, certain things can help reduce the chances of getting them. Here are five things that will lower the chances of a child’s nose bleeding:

a.   Use a humidifier:

A Cool mist Humidifier can help maintain humid air in the house, preventing the mucus membrane from drying out. Thus, using it in homes prevents the child from nose bleeding.

b.   Trim the child’s fingernails:

Sharp and long fingernails can cause a child’s nosebleed when they pick their nose. Cut and trim the child’s fingernails to prevent a nosebleed.

c.   Keep the inside of the nose moist:

Dry air can lead to nosebleeds in children. Using a cotton swab, smear a thin layer and small amount of petroleum jelly in the child’s nostrils every few hours, including before they go to sleep.

You may also use a saline spray or an antibiotic ointment like Polysporin or Bacitracin.

d.   Ensure the child has protective equipment:

Make sure that child has protective equipment when engaging in an activity that might cause nosebleeds. For instance, the child should have headgear when riding bikes or playing soccer.

e.   Don’t give the child allergy and cold medications too often:

Allergy medications can dry out the child’s nose, causing nosebleeds. Discuss the medication with the pediatrician before administering it to a child who has a history of nosebleeds.

The bottom line

Nosebleeds can be a nuisance but shouldn’t be a cause for alarm. If you follow the preventive tips and the right treatment measures, the chances are that it’s going to end by itself fairly quickly.

Filed Under: Education, Health & Wellness, Parenting

How to Tell When Bacon Is Bad

March 8, 2022 Leave a comment

From bacon-infused bourbon to bacon-flavored seasoning, it feels like nothing can’t be made better with bacon. For the last few years, people have become obsessed with bacon, and the hype is here to stay.

But like any other meat, bacon doesn’t last forever – even if you store it in the freezer. After buying it, it will only last for a few days before it becomes a slimy mess.

Bad bacon may contain huge amounts of bacteria, including Salmonella and Escherichia Coli, that cause food poisoning. So, you shouldn’t eat bad bacon.

But how do you tell if the bacon is actually bad? This post will provide you with five methods to tell if your bacon has gone bad and more.

Feel free to jump ahead!

How do I tell when the bacon is bad?

We all have been in this dilemma: it’s too early in the morning or late at night, and you feel hungry. But then, you can’t go to the store for one reason or another, and the only meal you can do is bacon.

But as you approach your refrigerator, you try to remember the last time you bought bacon. You turn to Google to check how you can tell if your bacon is bad.

If you bump into this article, it’s your lucky day. Here are five ways you can tell if the bacon is bad:

Smell the bacon

A piece of fresh bacon will have a natural meaty smell. Thus, if you smell a sour, fishy, rotting, or unpleasant odor in your bacon, the chances are that it has gone bad.

If you question the smell, the possibility is that the bacon has started to deteriorate. If that’s the case, it’s best thrown out.

Taste the bacon

Although not recommended, you may taste the bacon to tell when it is bad. Spoiled bacon will be sour due to the bacteria forming on it.

Check the expiry date

This is perhaps the easiest way to tell when this piece of meat is bad. If the indicated ‘use by’ date has expired, it’s not safe to eat the bacon. Only use the bacon within seven days of purchase to be on the safe side.

You can also thaw and cook the bacon within four months of freezing the meat.

Note: Please do not confuse the ‘Use by’ and ‘Sell by’ dates. The first is the manufacturer’s expiration date, while the latter is the store’s guidance date.

The ‘Sell by’ date can have passed, but the bacon is safe for consumption. However, make sure that the bacon has no other signs of poor storage before consuming it.

Look at the bacon

You can tell if the bacon is bad by just looking at it. A slice of fresh bacon should have the color pink and be bright. The meet should also have white (or sometimes yellowish) fat.

If your meat looks dull, is turning gray-brown, or has noticed green dots on it, then it’s turning bad. If that’s the case, throw the meat away in a safe manner.

Feel the bacon

You can also tell if the bacon is bad by touching it. If the piece of meat feels slimy when you touch it, then the chances are that it has spoiled.

If that’s the case, throw it out safely and wash your hands. You may have carried the bacteria and transferred it into your body when you eat something.

What does bad bacon look like?

  1. A spoiled bacon will lose its color and freshness, looking dull. It will turn brown, grey or have green spots.
  2. The bacterial growth may appear as black or green dots.

What happens if I eat bad bacon?

Bacon may go bad in two ways; the first is through the bacterial growth, which makes it dangerous to consume, and the second is rancidity that makes it smell nasty.

And although high temperatures may kill the bacteria, some can survive cooking, making you sick when you consume them. Specifically, eating bad bacon means that you’re consuming E. Coli, Toxoplasmosis, Listeria and Yersinia, Campylobacter, etc., all that cause food poisoning.

You can also develop trichinosis disease, which arises when you eat undercooked pork products.

The symptoms of food poisoning include fever, diarrhea, fatigue, abdominal pains, etc. So, don’t mess with spoiled bacon unless you’re ready to suffer these symptoms.

How do I properly store the bacon?

If you want your bacon to stay long in the refrigerator or freezer, you need to store it properly. And the best way to do this is by an airtight container such as glass, an unopened package or a plastic container.

To store the opened bacon pieces, wrap them in aluminum foil or put them in a zip-top bag. You can then store it in the freezer or fridge, as discussed below.

Storing in the fridge:

The opened bacon pieces can be stored in an airtight container such as their original package, glass container, in a zip-top bag or several layers of aluminum foils.

The opened bacon may stay in this condition for about seven days storing in a refrigerator. On the other hand, the cooked bacon should be stored in an air-tight container, which will last for 4-5 days.

The unopened bacon package may last in the fridge for up to 2 weeks. If your bacon goes past this timespan, throw it out.

Storing in the freezer:

You may also store the unopened bacon packet in a freezer. You can freeze your bacon for up to 1-4 months at 0ºF/-17ºC or lower.

But frozen bacon loses its quality and flavors after the first 1-2 months. This is so because rancidity still develops in the freezer.

To protect your bacon from going bad, wrap it tightly with aluminum foil or several layers of plastic wrap, squeeze the air in the package and store it in the freezer.

The air trapped in a container is what makes the bacon go bad.

You can also freeze raw, opened bacon by placing it in a zip-top bag, squeezing the air that may be trapped in the bag then sliding it in the freezer.

Cooked bacon can be stored in the freezer by arranging the strips between layers of paper towel, placing it on a large zip-top bag, and then placing it in the freezer. You’re also advised to do away with the air trapped inside the container or other material.

To thaw this piece of meat, relocate it to the fridge, and leave it to rest there overnight. The bacon may be on a container or inside a zip-top bag and using cold, running water to defrost it.

You may also use the defrost function on your microwave, but don’t leave it for more than 5 minutes. What’s more, don’t leave the package unattended to prevent any dangers of burning plastics.

Note: although bacon may last for several months in the freezer, the Food Marketing Institute advises people to preserve it for a shorter period to enjoy its quality and flavor.

How long can bacon sit out?

Cooked or uncooked bacon should not rest out of the fridge or freezer (at room temperature) for more than 2 hours. Bacteria thrive best at a temperature ranging from 40 to 240 degrees Fahrenheit, or basically room temperature.

If you leave your bacon at room temperature for more than 2 hours, you should throw it out.

How long does bacon grease last?

If stored in an airtight glass or plastic container, the leftover bacon grease should last in the fridge for up to 6 months and nine months in the freezer. After this period, the grease will develop a rancid odor and mold visible signs.

If this happens, you should throw it out!

Shopping for bacon

If you want your bacon to stay longer before going bad, you’ll want to shop for the perfect piece. Here are a few tips to help you shop bacon that lasts:

Buy bacon as the last item

Eliminate the time you’ll take between selecting the bacon and the check-out counter. Also, once you’ve bought the bacon, head direct home and place it in the refrigerator.

Buy the bacon with as few ingredients as possible

The additives in the bacon may be why it goes bad for a short period. Plus, the extra preservatives and chemicals may not be good for your health.

So, aim for bacon with four ingredients, including pork, salt, water, brown sugar, etc.

Don’t be a prey of the ‘no nitrates’ sticker

This is just a marketing language but doesn’t mean that the bacon doesn’t have nitrates. Instead of sodium nitrate, they use celery, which has loads of nitrates.

The bottom line

Bacon for dinner, lunch or breakfast? No problem. This piece of meat is so good that you can use it in meals, snacks, or toppings.

Our love for this piece of meat is so obvious. It is among the most popular meat products in the market, with the average American consuming over 18 pounds of bacon each year.

The sizzle, crackle, taste and aroma of the bacon could be the reason why people love it so much. Few types of meat, let alone foods, inspire as much excitement and enthusiasm as bacon.

Filed Under: Food

How to Cook A Tomahawk Steak on A Gas Grill

March 7, 2022 Leave a comment

It’s hard to imagine a better meal for dinner than a properly grilled Tomahawk steak. Also known to some as a Cowboy Steak, a Tomahawk steak is indeed a steak fit for royalty.

But as is with most high-quality pieces of meat, grilling the Tomahawk steak perfectly can be challenging. You’ll be constantly worried about maintaining the right temperature or adding the right ingredients.

But, cooking a Tomahawk steak on a gas grill should be super easy. All you need is a meat thermometer, some salt to make the perfect steak, and the right guide to make your barbeque like a boss.

Whether it’s your first- or hundredth-time grilling, this is the post for you. In it, you’ll learn everything about grilling a Tomahawk steak.

Let’s get started!

What is a Tomahawk steak?

Also known as a bone-in ribeye or a Tomahawk chop, the Tomahawk steak is a thick ribeye steak with a long bone attached to it. It borrows its name from the Tomahawk ax with a bone “handle” on it.

The Tomahawk steaks are widely known for being flavorsome and tender. The meat is usually obtained from the meat’s loin, which is similar to the Porterhouse steaks and T-bone.

The Tomahawk steak is considered a lump of luxury meat as not all local butchers or supermarkets stock them. The meat packs a lot of flavors when cooked, largely because of its huge amounts of fat and long bone.

It offers an amazing flavor that’s worth its cost. It’s great for BBQ-ing and roasting due to its size.

What do I need to cook my tomahawk steak on a gas grill?

Before diving into the steps, you need to grill a tomahawk steak on a gas grill. First, let’s look at the equipment you’ll need to grill like a pro.

A probe meat thermometer

It’s possible not to use a meat thermometer when you grill a traditional steak – the steaks are thinner, and even an amateur grill enthusiast can eyeball it to tell if it’s ready. This is different with the tomahawk steak, however.

You should use a probe meat thermometer to know when the meat cooks. You can’t tell when it’s ready otherwise and might end up with uncooked meat.

A gas grills

This is obvious – you’ll need a gas grill to cook a tomahawk steak on a gas grill. And although you may use other cooking tools like the charcoal grill, a gas grill is recommended for faster results.

Aluminum foil pan

Although not a necessity, it’s highly recommended to use a shallow aluminum pan. Place it underneath the steak as it cooks to catch drippings.

The drippings will vaporize and rise back up to flavor your steak.

The right ingredients

You’ll also need several ingredients to make the best barbecue for your family and/or friends. Here is a list of the essentials:

  • A tomahawk steak
  • Freshly ground pepper
  • Kosher salt
  • Garlic clove
  • Four tablespoons of unsalted butter
  • Two tablespoons oil
  • Fresh thyme
  • Herbs
  • Spices of choice

Watch out for the spices you add! Some may make your steak less tasty.

Cooking a Tomahawk steak on a gas grill

While there are several ways to cook the tomahawk steak, the meat is best on a barbecue. But how exactly do you grill the tomahawk steaks on a gas grill?

Here are step-by-step instructions on cooking a tomahawk steak on a gas grill:

a. Prepare your tomahawk ribeye

Like all other pieces of meat, the tomahawk steak needs some preparation before grilling it. Thaw the steak for about 48 to 72 hours using a home refrigerator.

Then remove it from its packaging and season both sides with pepper, coarse or Kosher salt, or any perfect seasoning you know. Leave the meat sitting at room temperature for about 1 hour after seasoning it.

Wrap the exposed bone in foil to prevent it from burning before placing it on the grill.

b. Preheat the Grill

Heat your gas grill before adding the meat to make sure that your meat cooks quickly and evenly. A temperature of about 225 degrees is recommended for best results.

c. grill your tomahawk steak

Once the grill achieves the desired temperature, add the tomahawk steak. At this point, you may use two different methods to grill your steak.

The first method is known as the traditional route, and it involves placing your steak over direct heat, flipping it every three to four minutes. You can sear the steak as you flip it for the best results.

The second method is called the reverse sear method, and it involves placing your steak as far as possible from direct heat. You’re also advised to close the grill’s lid for the best results.

In the reverse searing method, you should leave your steak to grill for about 45 minutes, flipping it every 10 minutes until the internal meat temperature reaches 130 degrees. You then sear the piece of meat on a pan.

Either way, you’ll end up with a delectable meal.

Use a meat thermometer to check the internal temperature of the steak. It should range between 125 to 130 degrees Fahrenheit for medium-rare doneness.

d. Sear for the best crust

Once the tomahawk steak has reached the desired internal doneness, sear it for a great crust. Turn the burners on high heat and place the steak over direct heat to achieve the best crust.

Flip the meat every 30 seconds for about 3-5 minutes or until you attain your desired level of browned crust.

e. Rest your steak

Remove the steak from the grill and allow it to rest for about 10-15 minutes before serving it. This allows the juices to redistribute, resulting in a juicy and tender steak.

f. Serving your tomahawk steak

How you serve your tomahawk steak depends on your personal preference or how your family loves it. But the advice of pro wouldn’t hurt your cooking and serving skills.

Grilling experts recommend that the steak be cut into ½ inch slices after allowing several minutes to rest. Cut it against the grain of the steak for the best results.

Serve each tomahawk steak to 2-4 individuals depending on its size. You may serve it with side dishes like simple salad, greens, baked potatoes, or these BBQ Wok vegetables.

You may even serve it with mushrooms! Literally, anything you love can be served with the tomahawk steak.

What temperature is perfect for grilling Tomahawk steak?

Grilling experts recommend that you grill your tomahawk steak at a high temperature of about 400 degrees Fahrenheit. This will ensure that your steak cooks quickly and evenly, resulting in a juicy and flavorsome finished product.

How long do I cook my Tomahawk steak?

The time needed to cook a tomahawk steak on a gas grill depends on its thickness and size. However, it’ll take you about 3-4 minutes per side on the grill, or about 8 minutes in total.

But the final result of the steak should be determined by a meat thermometer. Check the internal temperature of the meat to ensure it’s cooked to your liking (a temperature of 125-130 degrees is recommended).

How do I reverse sear tomahawk steak in a gas grill?

Knowing how to reverse sear a tomahawk a steak should be a rite of passage for all serious grill enthusiasts. But if you don’t know how to reverse sear a steak, don’t fret.

To get started, allow the Tomahawk steak to attain room temperature. The meat is sold at a temperature lower than room temperature, so you should leave it to rest for about 30 minutes before cooking.

Then, follow the instruction listed above for cooking a tomahawk steak on a gas grill, as follows:

  • Preheat the grill to about 400 degrees Fahrenheit
  • Season the steak with pepper and salt
  • Place the tomahawk steak on the gas grill and leave it to cook for about 3-4 minutes for each side
  • Using a meat thermometer, check the internal temperature of the meat. A temperature of about 125-130 degrees Fahrenheit is recommended.
  • Use high temperatures to burn the steak to the desired crust

Remove the steak from the grill and serve it.

Tips for grilling Tomahawk steak in a gas grill

Want to take your tomahawk steak grilling skills to the next level? Here are a few tips to help you in your endeavor:

  1. Marinate your tomahawk steak before grilling it. Marinating it will add flavor and keep it moist while grilling it
  2. Use high-quality grill seasoning to elevate your steak’s flavor
  3. Maintain a consistent grilling temperature, adjusting the heat as necessary.

With these tips at your fingertips, you’ll have the ability to cook a perfect tomahawk steak on your gas grill. It’s time to fire up the grill and grill like a pro!

The bottom line

There you have it: a step-by-step instruction to help you grill mouth-watering steak on your gas grill. Now it’s time to impress your family or friends with your grilling prowess.

Filed Under: Food

How to Air Condition A Tent

March 4, 2022 Leave a comment

I love to camp but sometimes when it’s really hot outdoors, camping isn’t the dream place to be. The summer months bring about hot, dry air, often at record-breaking temperatures.

Wouldn’t it be nice to have the fantasy camping life that also included a nice cool tent? You are in luck!

This post will not only remind you of how awesome camping can be, but it will help you to see how you can maintain the authentic outdoor experience camping brings while keeping your tent nice and cool.

person camping inside tent by the lake

8 Ways to Air Condition Your Camping Tent

I’ve listed eight ways you can air condition your tent:

  1. Window AC Unit
  2. Free-standing Air Conditioner
  3. Tent Fan
  4. Tent Insulation
  5. Maximize Ventilation
  6. Improvised swamp cooler
  7. Set Up in a Shaded Area
  8. Create Your Own shade

#1. Window AC Units

The most common way to air condition your tent is with a window air conditioner unit. When you choose this option, a smaller-sized unit works best, and here is why: you will have to transport and move the AC unit around, so the smaller the better.

Also, a smaller window AC unit will typically have fewer BTUs. That is a good thing because it will keep the tent from becoming too cold or damp inside.

Even though a tent is not very insulated it is an extremely small space and using a large window unit meant for a large room can overwhelm a tent with cold air.

One thing though, if you use a window AC unit for camping you need to make sure your tent has an AC port. Having that will allow you to attach the window AC unit to the side of the tent.

There are a couple of different ways to accomplish this, but the best and easiest approach is to purchase a camping tent with an AC port or AC flap already built into the tent. The other way is to cut a hole in the side of your tent and DIY a camping tent with an AC port.

DIY is not for the faint of heart, especially when it comes to having to cut a hole in the source of protection and comfort for your camping experience. So, tread lightly with this, and seek help if you need to.

If you choose to go this route, make sure to take your time as you only get one shot at cutting the right size hole in the side of your tent. You will also need to seam the edges of the hole to prevent the fraying of the tent material.

Also, using a window AC unit to cool your tent requires a stand to support the weight of the air conditioner. Tent walls are too flimsy to support the weight of an AC unit by themselves.

A lot of things can serve as a stand, like a milk crate or a storage tote. To have the most supportive stand without having to spend a lot of money, you may want to DIY if you’re looking for a more professional-looking stand.

#2. Free Standing Air Conditioner

The other way to air condition your tent is with a portable AC unit or freestanding air conditioner. Rather than having the AC units on the side or outside of the tent, the unit can sit inside the tent with you. It comes equipped with a hose that runs outside.

These types of AC units are great to work with because of their stealthiness and the fact that they do not require a tent with an AC port. With a free-standing AC unit, the only thing visible on the outside of the tent is a small hose that can be run outside of any hole that can accommodate a 6 or 8-inch hose.

Having a stealth tent air conditioner is a great option because it doesn’t attract unwanted attention and it reduces the chances of theft. Another advantage is that they do not require an AC stand. They sit directly on the ground.

However, one drawback to the free-standing AC units is that they can take up precious interior space. As you know, spacing is limited when it comes to camping.

So, having to give up even a little of your already small space can seem like an inconvenience. On the other hand, you get to sleep comfy in nice, cool air at night, so, you be the judge of what’s the priority.

Power Source

However, if you decide to air condition your tent, air conditioners use too much electricity to run them practically from batteries or solar power. It will need a source of electricity.

Because of this, a reliable source of 120V electricity is a must when camping with air conditioning. If you don’t have access to 120V electricity while camping, you might want to consider an evaporative cooler or swamp cooler instead of an air conditioner, as they use 75% less power than a standard AC unit and can run off of batteries.

You might also want to consider powerless ways to cool your tent.

#3. Tent Fan

Outside of using an AC unit, a tent fan is an affordable and space-saving option for creating more air throughout your tent. Understand, the results won’t be as effective as having an AC unit, but they are a lot more compact and can be hung from the ceiling of your tent.

Some also double up as a light, which makes it more practical, especially if you have a smaller tent.

tent fan to keep tent cool

#4. Tent Insulation

Insulation doesn’t just work for cold-weather temperatures, it’s also just as effective in extreme heat conditions. While in the winter you’d insulate your tent from the inside using a reflective foam or emergency foil blanket, in the summer months you can reverse this principle by covering your tent on the outside.

That ensures the reflective side is facing up to send any heat back to where it came from.

#5. Maximize Ventilation

Tents often feel stuffy and dry due to a lack of ventilation, particularly in single-walled tents. Some double-walled tents allow you to maximize ventilation by removing the rainfly.

Some tents also allow you to open the windows, however, leaving a mesh covering to keep bugs out. Maximizing your ventilation is an easy way to stop the air inside the tent from becoming stale.

However, this way is not always practical if it’s raining during your camping trip, as you’re sure to let water inside your tent.

green tent camping at a lake

#6. Improvised swamp cooler

Another way to increase the effectiveness of a tent fan is to place a bucket of ice water in front of your fan. As the water evaporates, the fan will blow the cool water over you. That works well as an improvised swamp cooler but won’t be as effective in very humid conditions.

#7. Set Up in a Shaded Area

If all else fails, you can also make it as easy as possible to keep your tent cool by selecting the shadiest spot to set up your tent. This sounds obvious, but being out of the sun, or shaded by some trees and bushes will make a big difference.

green tent in the shade

#8. Create Your Own shade

If finding the shadiest spot is not an option, DIY and create your own shade out of a tarp and some rope. You can even tie it to some trees and hang it directly over the tent as an extra layer to block out the sun, or alternatively take along some extra poles to fix it to.

This is also extremely handy and can double as a rain shelter. You can set it up to be away from your tent to have an area to socialize or cook under.

How To Reduce Costs Air Conditioning your Tent

Depending on how you choose to air condition your tent, it can get costly. Here are some tips to keep costs down when air conditioning your tent, especially if you’re purchasing an AC unit:

  • Adding extra insulation to your tent can save lots of money. Tent fabric has no insulation. Adding just half an inch of any type of insulation would increase the value.
  • Check for air gaps. Air is in constant movement, even inside a tent, especially if it’s being blown by a fan or AC. Sealing all the gaps will increase the performance of the AC unit and lower the costs.
  • Choose the properly sized unit. A smaller unit will have difficulties cooling down the required volume of air, and a much bigger unit will turn on and off too many times to be efficient. Having the proper size AC for your tent will reduce costs.

Bringing It All Together

There’s no exact science when it comes to air conditioning your tent. You may have to try a few of these options before you find the one that works for you.

The easiest and most effective way to air condition your tent is with a specially designed AC unit, however, if you don’t have the power outlet or space available to accommodate one of these, you may have to consider other options.

You may even need to combine some of these options to get the most comfortable cooling remedy for your tent. If you’re a DIYer, this is a great time to get creative. If you’re not a DIYer, you may be able to get some ideas here.

Hopefully, at least one of the options I’ve listed here will work for you.

Filed Under: DIY, Travel

How to Wash Out Tie Dye

March 3, 2022 Leave a comment

We can name a bunch of the most satisfying things in the world – that sound of dry leaves when you step on them, untangling your earphones in one quick swoop, cracking open an egg perfectly, etc. And cutting the rubber bands off a freshly tie-dyed shirt and seeing the starbursts of color for the first time should be added to this list!

However, dyeing your shirt is just the beginning if you want to keep it attractive and vibrant. You’ll need to learn how to wash tie-dyed shirts to keep them colorful and eye-pleasing.

In this article I’ve provided all you need to know about tie-dyeing, including what tie-dyeing is, methods of washing a tie-dye, and how to wait wash out tie dye.

What is tie-dye?

Tie-dye is a method for drying natural fabrics that leads to fascinating, colorful patterns. The technique involves pleating, crumpling, or folding the fabric into various patterns, then tying it with rubber bands or strings, giving it its name.

You dip the fabric into dye vats to form the color patterns, then remove and rinse it. Tied parts of the material accept the dye unevenly amidst the folds, creating varied patterns in the final product.

What to know before washing a tie-dyed material

After tie-dyeing your garments, you need to stay away from the washing machine for about 24 hours. This will give the dye plenty of time to set on your clothes.

You’re also advised to wear gloves when it’s time to give your clothes their inaugural scrub. Then, give them a good rinse under running cold water to remove the excess dye.

You’ll see additional colors in the water during the first few washes. This is normal and isn’t going to harm your shirt’s design.

Methods of washing a tie-dye shirt

You can wash your tie-dyed shirt using several methods to keep it vibrant and colorful. However, regardless of the technique you use, make sure to clean the shirt by itself or with other freshly dyed shirts.

Here are the five most efficient methods of washing a tie-dye shirt:

Wash by hand

Washing your tie-dyed shirt by hand will take more time but keeps it in the best possible condition. Plus, this avoids wasting a lot of water and protects your other clothing.

Here is a step-by-step guide on washing tie-dyed shirts by hands:

  1. Add cool water and a tablespoon of gentle laundry detergent to a bucket or a washbasin. You may also use a sink or a bathtub, but that would mean many dye cleanups.
  2. With rubber gloves on, use your hands to swish around the soap to create foam
  3. Gently submerge the shirt into the water
  4. Leave the tie-dyed shirt soaked for about half an hour
  5. Remove the shirt from the washbasin and rinse it using cool running water. You may see some dye rinse away if it’s your first time washing the shirt.
  6. Don’t squeeze and twist the shirt, as that could damage or stretch the fabric
  7. After rinsing the tie-dyed shirt, gently press it between your hands to remove some water. Then use an old clean towel to remove more water
  8. Finally, air dry your shirt by hanging it.

Your tie-dyed shirt should look fresh and vibrant after air-drying it.

Using a washing machine

You can also wash your tie-dyed shirt using a washing machine. For the first few times, you may want to use hot water to clean the shirt to help remove the extra dye.

However, you should use cold water mostly to help the shirt maintain its vibrant and colorful appearance. Here is a step-by-step guide on washing your tie-dyed shirt using a washing machine.

  1. If it’s your first time washing the tie-dyed shirt, wash it separately to avoid dyeing other clothes. If you’ve washed it severally, you can mix it with other clothes.
  2. Set your washing machine to a gentle cycle and cold water if you have that option
  3. Add the laundry color-safe detergent like Woolite Darks Laundry Detergent or the Laundress Darks Detergent.
  4. Promptly remove the shirt from the washing machine after the wash cycle ends.
  5. Air dry the shirt by hanging it. You can use a dryer for the freshly dyed shirt, but don’t try this with older shirts as they’ll fade.

Your tie-dyed shirt should look vibrant after drying it.

Vinegar

Applying vinegar solution during the first wash is one of the best ways to protect your tie-dyed shirt. You’ll need a bucket, vinegar, and water to clean your shirt.

Please note that vinegar only works well while washing cotton shirts. As discussed in the next section, if your shirt is polyester, you should use the synthrapol detergent.

This method is perfect when washing a freshly rinsed dyed shirt. Do not wash a tie-dye shirt in vinegar more than once!

Here is a step-by-step guide to washing your shirt in vinegar:

  1. Add cold water to a cheap plastic bowl or bucket
  2. Add two cups of white vinegar to the water
  3. Dip your shirt into the resulting solution
  4. Leave the shirt soaked for about half an hour
  5. Remove the shirt and place it in the washing machine. Add detergent to the machine and set it to delicate cycle and cold water
  6. Remove the shirt from the machine and air hang it to air dry

Since the vinegar smell is strong, you should clean your shirt outside. If applied right, this home remedy solution is going to leave your shirt looking sharp for years to come.

Synthrapol

Synthrapol is a fabric cleaner that works best for polyester tie-dyed shirts. Like the vinegar wash, you should use this solution only once – immediately after tie-dyeing your shirt.

Here is a step-by-step guide on washing your shirt using the synthrapol solution:

  1. Leave your polyester shirt to air dry after dyeing and rinsing it
  2. Add water two-thirds full into a pot and heat it to around 140℉.
  3. Add about one tablespoon of synthrapol for every gallon of water in the pot
  4. Submerge the dry tie-dyed shirt in the solution
  5. Using an old wooden spoon or long stick, stir the shirt in the hot synthrapol solution for approximately 10 minutes.
  6. Remove the shirt and put it in your kitchen sink. Rinse it with warm water until all the dye washes away.

The shirt should be ready and look all colorful after drying it.

The Tulip tie-dye method

Tulip is among the popularly known dye producers on the market. And, yes, they also provide their clients with easy-to-comprehend instructions on washing tie-dyed shirts.

Here is the step-by-step guide on washing tie-dyed shirts, as recommended by Tulip:

  1. Leave the tie-dyed shirt wrapped in plastic wrap for about 8-12 hours.
  2. Rinse out the excess dye using running cold water. Don’t squeeze and twist the short; move it back and forth under the tap
  3. Wash the shirt separately severally before cleaning it with other clothes
  4. Keep the wet tie-dyed shirt away from others to prevent the transfer of dye to other clothes

Tulip tie-dye doesn’t work on polyester shirts. Use it when tie-dyeing cotton shirts only.

How to Wash out Tie Dye

It’s vital to rinse your garment after the die sets. It helps outline the edges of the design and prevents more dye from bleeding out.

With rubber gloves or old clothes tied on your hands, rinse your tie-dyed clothe as discussed below:

  1. Use tongs to hold a tie-dyed polyester shirt under hot running water in the kitchen sink. Control the water cooler gradually until it turns cool.
  2. Rinse the cotton tie-dyed clothes using cold running water. You can do this in the bathtub or the kitchen sink

Drying tie-dye shirts

Hanging a tie-dyed shirt to air dry is best to dry it. This prevents your shirt from fading over time and prevents the wet dye from bleeding onto other garments or surfaces.

Some experts also recommend drying the shirt in a dryer after washing it for the first time. This can help avoid dye bleeding.

However, check the instructions that come with the dye packet to ensure that your dryer is safe. Some brands recommend heating the tie-dyed material; others don’t.

Washing the dye off your hands

Whether you wash the tie-dyed clothes using gloves or bare hands, it’s possible to have splashes of color on your hands. Mix baking soda water and use the resulting solution to wash the color off your hands

The bottom line

Tie-dyeing is becoming a trend in the fashion industry. It leaves your garments looking vibrant and colorful.

Washing the tie-dyed clothes outlines the edges of the design and prevents more dye from bleeding out. It’s what leaves the clothe looking all fresh, vibrant, and attractive.

You can wash the tie-dyed clothes by hand-washing them, placing them in a washing machine, using vinegar or a synthrapol solution. Using cold water and air drying your clothing keeps its colors vivid and crisp for a long time.

Filed Under: DIY, Fashion

  • « Previous Page
  • 1
  • …
  • 3
  • 4
  • 5
  • 6
  • 7
  • Next Page »

Popular How To’s

How to Contact TikTok About a Banned Account

How To Cook Frozen King Crab Legs

How to Pick a Mini Watermelon

How To Care For Air Plants

Categories

Food

Travel

DIY

Finance

Parenting

Technology


Copyright ©2026, How to Knowledge. All Rights Reserved. Custom design by Pixel Me Designs