• Parenting
  • Food
  • Do it Yourself

How to Knowledge

  • Travel
  • Finance
  • Technology
  • Home
  • DIY
  • Finance
  • Food
  • Parenting
  • Technology
  • Travel

How To Boil Crawfish

July 16, 2022 Leave a comment

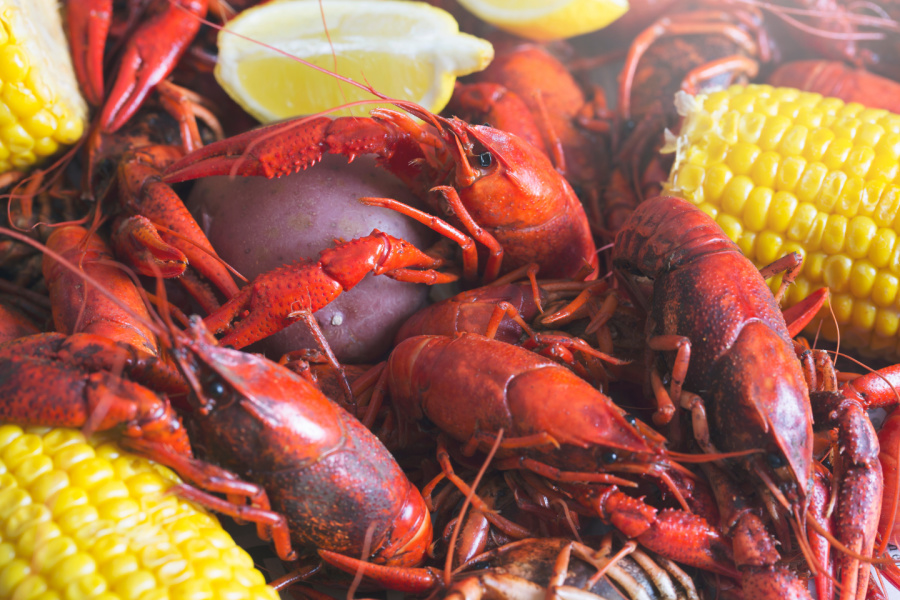
Crawfish may look unsightly at first glance, but boil and soak it in seasonings and spices, and you’ll have one of the best main course meals for spring. It’s delicious, filling, and can be served with a wide

However, unless you’ve grown up with the crawfish boiling tradition, being in charge of crawfish boil can be scary. But with the basics and the right guidelines, boiling a crawfish can become your go-to hobby.

This post discusses the crawfish, including what it is, how it tastes, and how to boil it – to help ease your mind.

Let’s get started!

boiling crawfish in large pot

What’s a crawfish?

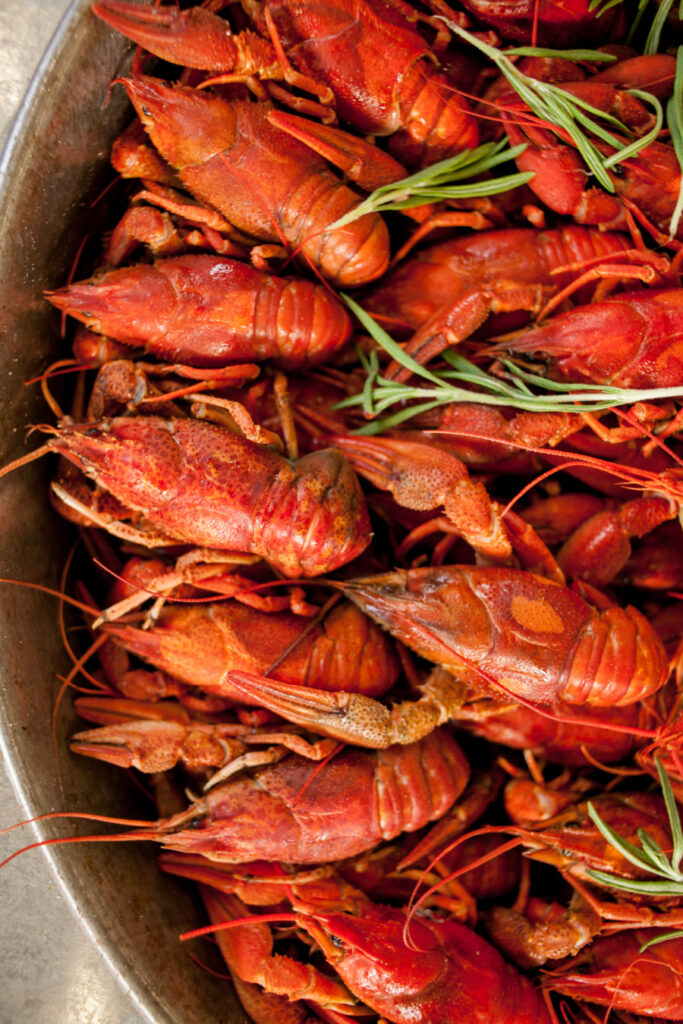
A crawfish is a crustacean that resembles a small lobster that measures between 3-6 inches long. These miniature and tasty creatures have ten walking legs (two of which are large front claws) and a hard protective exoskeleton.

Crawfish live in rivers, freshwater wetlands, swamps, and lakes. You can find them on the floor of almost all oceans worldwide, although they live close to the shoreline.

These tiny creatures are the staple food for Southerners in Louisiana, Alabama, and other states in the country’s southern region. They are widely known for their health benefits, including low fat, low calories, and high protein density.

A crawfish can live as long as 50 years, especially when left alone in the wild.

tons of crawfish inside large pot

What does crawfish taste like?

For those of us who aren’t lucky yet to have tasted these tiny, delectable creatures, you may be interested in how they taste, right? Although crawfish is considered seafood, it doesn’t have a strong natural flavor like others in the same group.

However, crawfish have a stronger flavor than crabs and are meatier. Many individuals describe them as a combination of crab and shrimp, mainly because they have a bit of mineral flavor, are a little sweet, and are slightly salty.

However, the final taste of the creature depends on how it’s cooked or prepared and the part you are eating. In a crawfish, you can eat the claws, legs, roe, tail, outer shell, and tomalley.

The legs, tails, and claws are people’s favorite mainly because they contain most of the meat. The claws are sweet with a smooth texture, while the tails are hearty and thick but tough to chew.

There are many ways to prepare and cook crawfish, including grilling, broiling, baking, pan searing, and steaming and boiling. And like lobster, steaming and boiling is the most preferred method of cooking these hearty tiny sea creatures.

We’ll discuss more about how to boil crawfish later in this article.

When are crawfish in season?

Crawfish season doesn’t have a specific time; it all depends on the part of the United States you reside in. For instance, crawfish are in season from November to July in Louisiana and April through June in Alabama.

You’ll get the best crawfish in Louisiana during spring and early summer. On the other hand, April and May are the best months to cook up an exceptional crawfish boil.

Regardless of where you live in the U.S., however, you can get fresh crawfish anytime. And once you have these sea creatures, you can prepare them by washing and then boiling them, as follows:

How do you wash crawfish?

Crawfish will give you a tender and delicious meal when boiled, but you must clean them first in a process called purging. This process helps you eliminate impurities in the intestinal tract, such as grass and mud, to make it pleasant-tasting.

Here is how you wash the crawfish:

  1. First, you should use running water to wash your crawfish. If you are washing them in a container, use a large instrument to stir to remove mud, dirt, and debris from their gills and shells
  2. Then, remove the crushes and discolored crawfish and place the larger ones in a cooler. Also, throw away the floating crawfish, in case you used a container.
  3. Rinse your crawfish several times. You can add table salt to the water when washing and rinsing them.
  4. Then, dump ice over the crawfish to keep them cool until when you cook them

Your crawfish should be ready and dirt-free after 2-3 soaks, depending on how dirty they are.

Tip: Buy live crawfish ahead of time and store them in a cooler with ice. To separate the dead (not fresh) and live crawfish, add them to salted water; dead crawfish will float.

How do I boil crawfish?

Boiling crawfish is super easy – you only need the right cooking equipment and a few ingredients, and your meal will be ready in a few minutes. Mainly, boiling the crawfish depends on the crawfish season.

In Louisiana, this translates to anytime between January to June. Yes, it’s slow going and expensive in January, but it starts to gear up in February.

This section will take you through my favorite Louisiana crawfish boil – from the ingredients to a step-by-step guide on boiling the delicacies.

crawfish boiling in a pot

Ingredients:

Crawfish is among the easiest meals you can ever make, demanding only a few ready-to-find ingredients. These includes:

  • Ears of corn
  • Carrots
  • Garlic
  • Small red potatoes
  • Lemons
  • Crab boil Louisiana (Louisiana crawfish seasoning)
  • Andouille sausage
  • Cayenne pepper
  • Mushrooms
  • 30-40 pounds of crawfish (live) in one sack
  • Oranges
  • Yellow whole onions
  • Cajun seasoning – this is optional

Once you have your ingredients ready, you can proceed to prepare and boil your crawfish as follows.

Instructions

I’m thankful for whoever came up with the idea of boiling and eating the crawfish. Then properly boiled, this tiny sea creature makes one of the mouth-watering meals that stick to your ribs.

Here are steps to help you boil crawfish the right way:

Step #1: Untie the sack of crawfish and empty it into a huge ice chest. Add fresh water and stir the crawfish using a paddle

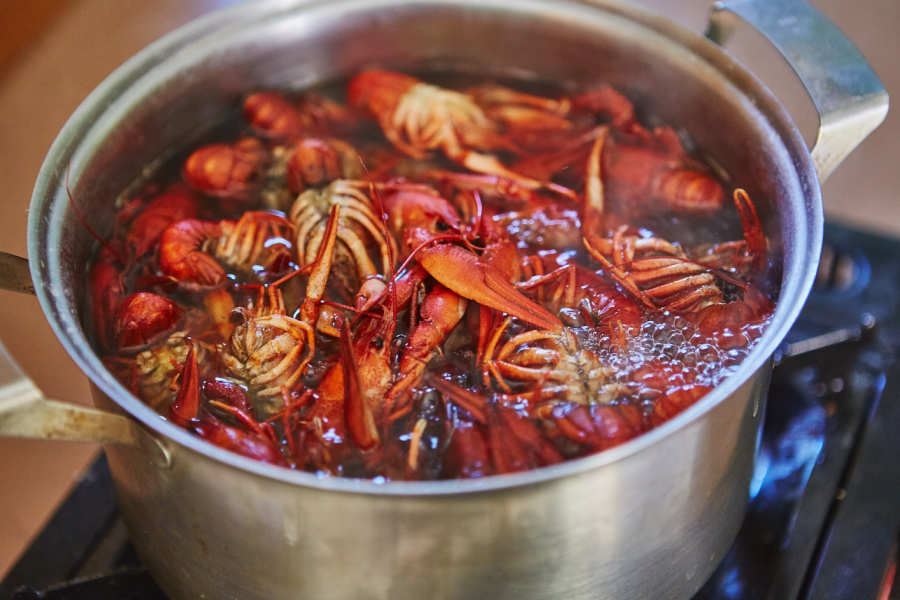
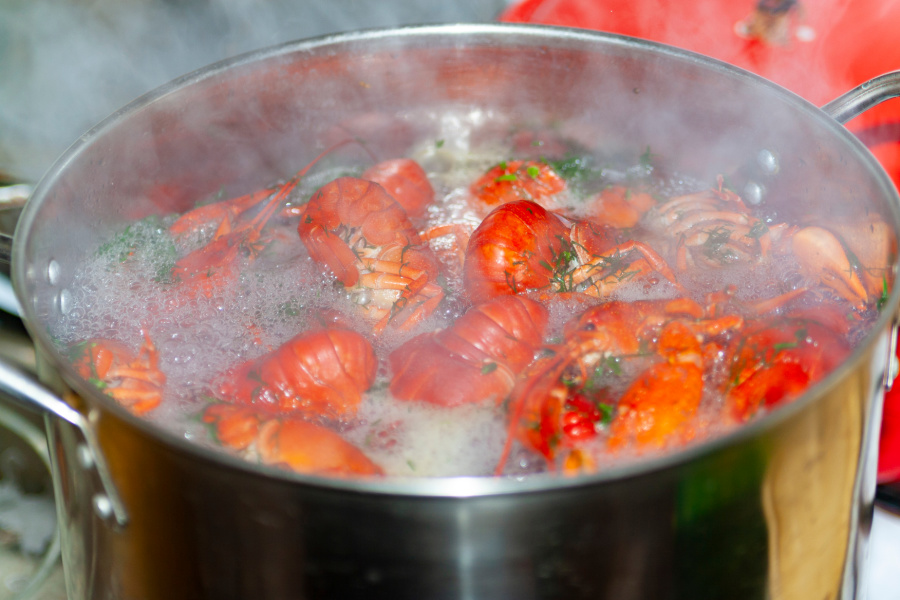
Step #2: Add a crawfish boil seasoning to the crawfish boil pot with a basket. Then, add enough water to the pot and apply high heat to achieve a rolling boil, and add sausage and veggies

Step #3: Once your water is hot, remove it and wedge the basket, allowing it to drain

Step #4: Add your crawfish to the basket

Step#5: Return the basket to the re-seasoned water and heat until you get a rolling boil (this should take about 4 minutes). Turn the burner off and soak the basket in hot water for about 10 minutes

Step #6: Lift the basket again and let it drain

Step #7: Add your boiled crawfish to serving platters and enjoy your meal.

You can add various main ingredients to your crawfish, including eggs, tamales, vegetables, hot dogs, turkey necks, etc.

crawfish cooked with vegetables in pan

Equipment

To boil your crawfish, you should use the right equipment (pot size and type). The most basic and cheapest way to boil crawfish is to use a large pot (preferably aluminum) with a basket insert and an outdoor propane burner.

You may also use other equipment like a Dutch oven, crawfish trays, the right crawfish seafood boiler, a good ice chest, etc.

How do I eat a crawfish?

Like any other meal, you can eat your crawfish using different methods. Regardless of your method, the aim is to get the meat from the tail.

If it’s your first time eating crawfish, here is a step-by-step guide on how to get the tiny hunk of the lobster-like meat:

  1. Hold the crawfish’s head with one hand and its tail with the other
  2. Straighten the tail so that a straight line appears from the crawfish’s nose to its tail
  3. Push the tail into the head to disconnect it
  4. Turn 90 degrees clockwise or anti-clockwise
  5. Pull the tail out. The meat should remain intact
  6. Eat or suck the meat from the tail
  7. Repeat the process with other crawfish until you’re full

Note: Some people eat the head and claim that the green, gooey brain is delicious. However, this is an optional step, which most people like to skip.

How long can I preserve a crawfish after it’s cooked?

The crawfish boil leftovers should last for 3 to 4 days, provided you store them within 2 hours after cooking them. Experts recommend you use the leftovers in fantastic potato salads or fry them and serve them with your favorite side dish.

Tip: You can add ice to the ice chest instead of trying to create space in your refrigerator. This way, you can peel the crawfish and make crawfish mac and cheese, crawfish pies, or something you like using the leftover crawfish.

You can check this site for several amazing crawfish recipes for leftovers.

The bottom line

Who doesn’t love springtime in the U.S…I mean, they have everything you want. Trees and plants come back to life, flowers start to bloom, BBQ season kicks off, and the crawfish prices drop!

But unless you are a kitchen connoisseur, having the prices drop may not excite you. However, that will change after reading this post that helps you boil crawfish.

Filed Under: Food

How To Take Care Of Succulent Plants

July 11, 2022 Leave a comment

Succulent plants are a darling of the gardening world – and for a good reason. Their amazing green foliage, exciting shapes, and an assortment of bright colors know how to create joy and calmness and uplift our moods.

Succulents come in hundreds of varieties and can be grown indoors or in your backyard. You can also find them in a rainbow of colors from purple to green, pink, and turquoise –it’s no wonder they are so popular!

Succulents are often considered the ultimate low-maintenance plants, but they’ll need your care to stay alive. This post will discuss succulents, including what they are and how to take care of them.

Let’s get started!

What are succulents?

Succulent are drought-tolerant plants with thick fleshy tissues that store water. Some of these plants, like cacti, have no leaves and store their water in the stem, while others, like agave, have fleshy leaves that store their water.

Most people prefer succulents as houseplants because of their unique leaves and the ability to add a modern yet natural element to your home. Their appearance and natural look provide feng shui in a space, meaning they create a favorable environment for you to thrive.

There are different types of succulents depending on their care. Some are grown indoors, while others thrive well outdoors.

The common types of succulents include; Jade plants, Aloe vera, Echeveria, Aeonium, and Aeonium, to name a few.

How do I grow succulents in my home?

Naturally, succulents grow in dry and warm climates with a lot of sunlight. You’ll need to replicate these conditions in your home, especially if you don’t live in a warm or dry area.

Here are important things to note as far as growing the succulents is concerned:

Hardiness

Yes, succulents thrive in deserts, but most are fairly cold-hardy. Deserts get pretty chilly at night – even below freezing.

However, the exact hardiness will vary based on the species. Some will die at the first sign of frost, while others can survive the winter weather on the outside.

Where to grow the succulents

Whether you want to grow your succulents indoors or outside, ensure you keep them in a dry location where they can get bright light. The plants will thrive well in pots or on the ground, provided they get the right care.

Container

The pot you use highly determines the success of your succulents. Always use containers with good drainage holes; Ideally, the holes should be 1 to 2 inches larger than your nursery containers during repotting.

Don’t use glass containers for long-term potting as they usually prevent the roots from breathing, making them rot with time. Instead, it would be best to use pots with breathable materials like ceramic and terracotta pots, which promote air circulation and water drainage.

Also, remember to add about a third full of pre-moistened potting mix to your container before placing your plant. After that, fill the remaining part with pre-moistened cactus mix and see your plant flourish!

How do I take care of succulent plants?

It turns out that having the perfect succulents isn’t as straightforward as it seems on Pinterest or in the garden and home magazines. Yes, the plants can thrive even when neglected, but they’ll die if the environment isn’t right.

Here is how to take care of succulents:

Choose the right succulents first

Choosing the right succulent plants for your indoor or outdoor spaces is the first step to achieving the perfect plants. However, when asked to choose from beautiful varieties in the greenhouse, the chances are that you’ll ignore this advice and pick what looks nice, right?

That’s a recipe for disaster – trust me! Different succulent plants will perform differently under different settings.

Some are best fit for indoor growing, while others thrive in outdoor spaces. For instance, picking succulent plants that don’t like full sun and thrive in the shade and low light will be perfect for indoor settings.

Generally, succulents with bright colors (like purples, oranges, and reds) perform poorly indoors. They demand direct sunlight that’s only available in the outdoor spaces.

If you want succulents for indoor spaces, it would be ideal if you started with natural green succulents; most of them don’t need too much light to thrive. Examples of such succulents are Gasteria, Haworthia, and Snake plants

Keep them watered

Watering is one crucial part of caring for your plants. While most succulents can last long without much water, that doesn’t necessarily mean you shouldn’t water them completely.

These plants use less water, and the rule of thumb is to water succulents thoroughly at least once every week during summer, twice a month in spring and autumn, and once every month in winter. Also, remember to water your plants only when the soil is completely dry.

Succulents hate wet feet, so putting in excess water will only make them rot and die. So, always check the soil before you water succulents – you can stick your finger at least two inches deep and only water if it’s bone dry.

Provide them with enough sunlight exposure

Succulent plants offer brilliant colors and thrive well under enough light – at least six hours of full sun daily. While you can grow them in the shade, their colors will not be as intense – the more the sun, the better!

While achieving long hours of direct sunlight can be easy for outdoor succulent plants, the same is hard for indoor succulents. Indoors, place your succulents in or near a sunny window during winter and fall, and provide them with filtered light during the summer months.

If you notice that the plant is trying to reach for the window, move it to a sunnier spot or use a frow light. However, check the plant’s ideal exposure to avoid sunburn.

Pest control

Like any other plant, succulents are prone to certain pests. For instance, Aphids and thrips attack the plants’ flower buds; mealybugs attack the leaf axils and scale colonize stems.

You can control these pests by giving the plants excellent air circulation. You can also spray the plants with 70% rubbing alcohol diluted using 50% water.

Scrape off the scale and wash it using horticultural oil and soap if it persists. You can also isolate the affected plants immediately to avoid the spread of pests and diseases, then clean the area thoroughly.

Keep the plants dry to avoid mold, especially if you live in humid climates.

Feed them

Succulent plants do not need much fertilizer, but you can add a little fertilizer during the summer and spring growing season. Ensure that you do not overfertilize your plants, as this stimulates faster growth and weakens your plants.

Also, do not fertilize your plants during the colder autumn and winter months, leading to weak and leggy growth.

Use the right soil

When caring for succulent plants, soil matters a lot, so watch out to ensure you are not using the wrong soil mix. You need less dense soil that allows for fast draining, meaning the everyday compost doesn’t work.

You can buy a dedicated soil mix, like The Succulent Cult Store’s Organic Potting Soil, designed for succulent plants. Make sure you repot your plants at least once every two years during the growing season.

Watch the temperature

Succulents perform the best in temperatures ranging from 60 degrees to 80 degrees. Also, the plant can survive cooler or warmer indoor conditions but not extreme heat or frost. It’s advised that you take your outdoor succulents inside when temperatures drop to below 50 degrees.

Pruning

Certain succulents like Crassula, Graptopetalum, Echeveria, and Aeonium should be regularly pruned to maintain their size and shape. However, most others survive well without pruning during their lifetime.

If your succulents start to get sparse and leggy, you can trim or pinch them to maintain their compact shape. Prune the weak and leggy extension by snipping it off with sharp clippers, pinching it using your finger, or cutting it with heavy-duty shears for thicker stems.

You can remove spikes and dead flowers at any time. Also, remember that summer or spring is the best time to prune for shape.

Keep your succulents clean

Your indoor plants will inevitably pick up dust on their surface, affecting their growth. To avoid this, wipe off your succulent spines and leaves using a damp cloth or a soft paintbrush to clean the hard-to-reach areas.

Are succulents toxic to pets?

This is one of the most asked questions about succulents, but it bears repeating: are succulent plants toxic to pets? Unfortunately, some succulents can be poisonous to pets, while others are completely non-toxic.

So, if you’re planning to grow some succulents in your home and are concerned about your pet’s safety, I’d recommend you research your specific variety. Here is a website that names some of the toxic and non-toxic succulents.

The bottom line

Today, succulents are understandably everywhere. Their low maintenance, easy-to-grow nature, and jaw-dropping beauty and variety make them almost irresistible.

But unless you want to buy the fake (but real-looking) versions of these plants, you’ll need to take care of succulents to help them stay alive. This post provides ten succulent care tips to help you take care of your succulents.

Good luck as you use it to improve your home’s appearance!

Filed Under: DIY

How To Pick A Ripe Watermelon

July 5, 2022 Leave a comment

Nothing screams summer like a ripe, juicy watermelon – except maybe drinking it, grilling it, or enjoying it in a salad. Packed with lycopene and vitamins A, B-6, and C, watermelon is one of the most nutritious fruits worldwide!

Ripe watermelons are even believed to offer protection against diabetes, heart diseases, and certain types of cancer! Unfortunately, the only best way to tell whether or not a watermelon is ripe is by slicing it and taking a bite.

But, if you don’t want precut products, it can be hard to pick a juicy and sweet watermelon based on its appearance. This article will discuss the nine best ways to pick a ripe watermelon.

Feel free to jump ahead!

ripe watermelons in green bins

What is a watermelon?

Scientifically known as Citrullus lanatus, the watermelon is a vining and flowering plant that belongs to the Cucurbitaceae family of species. Botanically, watermelon is a fruit because of its development process – its plant bears fruit after the flowers bloom.

Ripe watermelons have a light sweetness that accommodates a bunch of summer flavors. And unlike most fruits, the watermelon doesn’t continue to ripen after it’s plucked, so the timing matters a lot.

Let’s see some indicators that your watermelon is ripe and ready for picking.

ripe cut watermelon on table

How do I pick a ripe watermelon?

Picking ripe watermelons doesn’t have to be complicated. And while gardening experts advise thumping the fruit with your knuckles and listening to a hollow sound, there are more ways to tell if the watermelon is ripe, including through its appearance.

Here are nine tips to help you pick the ripe watermelon:

Tip #1: Find the field spot or the yellow belly

The ‘field spot’, or where the watermelon rests on the ground, is the first thing you need to check when picking a watermelon. If the watermelon is ripe, the spot should have a butter-like yellow color.

However, if the spot is pale, smaller, or looks more white than yellow, the watermelon isn’t ripe and should be left longer before picking it.

Tip #2: Look for webbing

Vein-like webbing and dry weathering spots are excellent indicators of ripe and extra sweet watermelons. These brown marks show bees pollinated the flower well during its growth.

So, the next time you go shopping for watermelons or pick some from your garden, ensure you inspect all sides of the fruit before committing to one.

large ripe watermelon on white background

Tip #3: Hollow thump

Another very effective method of picking ripe watermelons is to tap them with your knuckles and listen to the hollow thump. A deep and rich sound indicates that a more significant percentage of the melon is water, ready for consumption.

Avoid the melons with a dull or high-pitched sound, as most are overly ripe or not ready.

Tip #4: Heavy weight

The perfectly ripe and juicy watermelon should feel heavy for its weight. Remember, 92% of the watermelon is water content, making it heavier than usual.

However, the weight isn’t always the most reliable trait for sweeter and ripe melons. A heavy watermelon may be overripe and less sweet, so use the melon’s weight with other indicators like the field spot to pick ripe fruit.

man holding watermelon in hands

Tip #5: Check the shape

Symmetry is key when picking ripe watermelons.

Round and symmetrical watermelons are the best. The uniform shape indicates that the melon is watered evenly throughout its growth.

Watermelons with irregular bumps, odd lumps, or one bigger side than the other may have experienced seasons of overwatering and drought. The oval or oblong melons (males) tend to be waterier and less flavorful and sweet.

Tip #6: Inspect the color

A darker-colored melon means that the fruit was allowed to ripen more fully on the vine and will most likely be sweeter and juicy. Again, it’s always advisable to use this tip along with tips listed in this post to land yourself the perfect watermelon.

Tip #7: Texture and rind glossiness

This is one of the best visual indicators of ripe watermelons. If the rind is smooth and glossy, your fruit isn’t ripe yet. The rind becomes rougher and dull to the touch when it’s in the sweet, juicy stage.

Also, you may puncture the rind using your fingernails: if it breaks easily, then it’s not ripe yet. However, if you can’t penetrate it using your fingernail and it has other indicators described here, then your melon is ripe.

Some experts also state that the green stripes become darker when your watermelon is ripe and ready to be picked. However, this tip is only helpful if you already have an unripe watermelon to compare with.

person holding watermelon slice over pool

Tip #8: Plant Indicators

The watermelon plant will ‘tell’ you when the melon fruit is ripe and whether it will have the perfect deep color and sweetness inside. The curly tendril on the main vine closest to the fruit will turn crispy and brown, indicating that the melon is sweet and ready to refresh you and your friends.

Also, the leaf growing nearest to the fruit may develop the color yellow when your melon is ready for harvesting.

Tip #9: Time to maturity

You can sample the ripeness and sweetness of your melons by randomly picking several of them from the field around their estimated time of maturity. This method works, but only for commercial watermelon growers.

If you have a few watermelon plants in your garden, you may not have the luxury or will to sacrifice some. Other better indicators can help you determine if your melons are ripe if that’s the case.

How do I spot a damaged watermelon?

At times, the spoiled watermelons smell and look just fine. This is especially the case with already-cut melons sitting in a container in your refrigerator for days.

Spoiled or damaged watermelons may not be safe to eat and may lead to such diseases as diarrhea. The good news is that you can tell between a bad and good watermelon using several tips, including:

  1. Black spots: These spots show the presence of bacteria or fungus, meaning the watermelon is bad
  2. Rind worm injury: Resulting from insect feeding, this injury presents itself as an irregular white to a light-brown pattern on the melon’s rind.
  3. Tangy or sour smell and taste: This one is pretty obvious; your watermelon is likely gone bad if it has a fermented or tangy smell and taste
  4. Water-soaked flesh: If the melon’s flesh starts to sag, disintegrate, and darken, it can indicate the presence of a fungal infection.
  5. Internal rind spots: This is a bacterial illness that manifests itself as a tan or dry brown tissue on the inner side of the rind.
  6. Target cluster: If you notice a target-like configuration on your melon, it can indicate the presence of a virus.

How do I store watermelons?

Storing watermelons and keeping them fresh is not a straight forward process. Below are some tips on how to storing watermelons and keeping them fresh:

  • Keep your watermelon in a cool place. Room temperature is ideal for storing watermelons, but it is even better if you have space in your refrigerator.
  • Just make sure that it isn’t too warm or too cold — somewhere around 50 degrees F is perfect for keeping your melon fresh for a long time.
  • Keep it away from sunlight. Watermelon does not like light at all — expose it to direct sunlight too much, and it will turn brown or even rot!
  • Don’t wash it before storing it. Watermelons can retain their flavor for up to two weeks if they aren’t washed before storing them. Washing removes part of the flavor molecules from the surface of the fruit, so don’t do it unless absolutely necessary!

Watermelons Storage: Which Is Better: Refrigerator or Counter?

The answer depends on what type of watermelon you’re buying. Watermelons are divided into two main types: “icebox” and “field” varieties.

The icebox variety has a thin skin and tends to be more cylindrical, while field watermelons have a thicker rind that is more spherical in shape.

If you buy an icebox variety, it’s best to keep it out of the refrigerator. Icebox watermelons don’t hold up well when chilled, so keeping them at room temperature will make them last longer than putting them in the fridge.

Field varieties, on the other hand, should be stored in the fridge because they have thicker rinds that can withstand being chilled without getting mushy or damaged by ethylene gas (this happens when other fruits are stored near each other).

Refrigerators are great at preserving food because they keep it cool and moist, which slows down the growth of microorganisms that cause spoilage. But when it comes to watermelon, refrigerators can still get too cold for long-term storage.

Watermelons need a temperature range between 45 and 55 degrees Fahrenheit for best quality.

Temperatures lower than 45 degrees will cause chilling injury in the fruit, which shows up as cracks in the rind and discoloration on the flesh inside. Chilling injury will also make the flesh taste bland or bitter.

If you have a refrigerator that stays below 45 degrees, consider putting your watermelon on top of a tray of ice cubes.

The final thoughts

Watermelon, one of summer’s cool, shivery treats, can be a blast or a bust. You know that feeling when you expect sweetness but instead, get a ho-hum mouthful of watery nothingness.

Picking a sweet and ripe watermelon can be tricky. Internal indicators, such as a sweet taste and red flesh, are the only definitive factors when determining the ripeness of a watermelon.

If you want to eat a sweet melon this summer, use this guide to help pick the best one. Once you’re done using these guidelines, any melon shopper should be able to pick out a sweet, juicy melon.

Filed Under: Food

How To Deal With An Infected Nose Piercing

July 3, 2022 Leave a comment

The nose is among the most popular body parts to have piercings – next to the ear. Nose piercings add a touch of personal style to individuals and can accentuate the nose.

However, nose piercings can be problematic – they come with the risk of infection, especially when the piercing is still new. You should treat an infected nose piercing as soon as you see it to avoid unnecessary trips to the doctor.

This post will help you know how to clean nose piercings, what causes nose piercing infections and how to deal with them.

Let’s dig in!

How do I clean a nose piercing?

Cleaning your nose piercing for the first time can be tricky as the area will be tender and painful. However, cleaning the area is necessary as it will help soothe it and reduce swelling and pain.

Experts recommend cleaning your nose piercing site at least twice daily until it heals fully. Here are a few things you need to clean your nose piercing correctly:

  • Cotton balls
  • Saline solution (or simply salt water)
  • Paper towels
  • A mug, small bowl, or eggcup to hold the saline solution
  • Q-tips

Then, you can proceed to clean the nose piercing as follows:

  1. Add small amounts of saline water to the bowl/mug/eggcup
  2. Then, soak the pierced area in the bowl with the saline solution, and leave it for about 3-5 minutes.
  3. Rinse your piercing site with clean water and dry it using a clean paper towel
  4. Alternatively, you can dip a Q-tip or cotton swab in a warm saline solution and apply it to the piercing site for several minutes

These items will help remove crusted or dried lymphatic blood or fluid from the piercing site or jewelry.

Note:

Before cleaning your nose piercing, first wash your hands using liquid soap and warm water. Dry your hands using clean paper towels before cleaning the piercing.

When cleaning the nose piercing open wound, avoid products like:

  • Hydrogen peroxide
  • Isopropyl alcohol
  • Betadine
  • Chlorhexidine

Nose piercing aftercare

Getting a nose piercing is relatively easy and fast. However, the healing process can take longer – up to several months.

The nose piercing aftercare is a vital part of the healing process, with proper cleaning being the first step. A professional body piercer is likely to recommend the following guidelines:

  • Avoid touching the piercing site except when cleaning it.
  • Clean the piercing area at least twice a day using saltwater
  • Moisturize the affected area using coconut oil or diluted tea tree oil
  • Clean the site with gentle, unscented soap after the piercing has fully healed

Piercing aftercare is vital as it prevents infections and other complications, such as piercing bumps, nasal trauma, and scarring.

Nose piercing risks

Yep, piercing your nose makes you all cute, but it’s associated with varying risks and possible complications. For instance, poor nose piercing aftercare services is likely to lead to such problems as nasal trauma, nose infections piercing bumps, etc.

Let’s go through some of these risks:

Nasal piercing infection

If you fail to clean your nose piercing correctly, the site will possibly become infected. And when this happens, your nasal piercing will take longer to heal.

The infection may also lead to complications, such as nose bumps and scarring. A nose bump is among the most prevalent nose piercing infections and warrants a more comprehensive discussion.

Nose piercing bumps:

Once you get a nose piercing, you’ll likely have some swelling, bleeding, redness, or bruising for weeks. And as the piercing heals, you might feel itchy around the pierced area, whitish pus might ooze from the site, and a small crust may form around the jewelry.

The piercing may take as much as six months to heal completely. If your piercing sites worsen and the symptoms increase, you could be having an infection.

If it’s a nasal piercing bump, you might have any of the three things:

  • An abscess – is a pimple or blister that has pus
  • A granuloma – a lesion that occurs about six weeks after piercing
  • Keloid formation – a thick scar around the piercing site. This is also a common problem for ear piercings

These bumps may result from several things, including:

  • Allergic reaction to the jewelry
  • Poor piercing technique
  • Using the wrong products for piercing aftercare
  • Touching the piercing site with dirty hands

If you have a nose piercing bump, do not drain pus or remove the crust, which can worsen the condition. Instead, use the correct nose infection treatment methods (discussed below) to prevent further irritation and treat the affected area.

Nasal trauma

This is an injury to the nose and the surrounding areas that support your nose. Common types of nose traumas include fractures, nosebleeds, injuries to the inside of your nose, and obstruction by a foreign object.

This condition is characterized by pain in and around the nose, blood coming from the nose, trouble breathing, etc. Visit your doctor if you get a nose trauma due to your nose piercings.

Changes to nose shape

If your piercer doesn’t piece correctly or the nose infection isn’t treated, this may change your nose shape.

How do I deal with an infected nose piercing?

Here are the best ways to deal with an infected piercing:

Change your nose jewelry

Most jewelry is made using metal nickel, which can trigger an allergic reaction in some people, making the bump form. You may also experience the following symptoms:

  • Discolored skin
  • Intense itchiness
  • Blistering
  • Redness.

To deal with the infection, you should try using other hypoallergenic jewelry materials, including:

  • Stainless steel
  • 18- or 24-karat gold
  • Niobium
  • Titanium

If you have a fresh nose piercing, consult your piercer regarding the best type of metal to use. Also, have them help you swap the jewelry to avoid complications like tearing the nose tissue.

Use sea salt solution

A sea salt solution is a natural way to keep the piercing site clean, help it heal faster, and reduce swelling that’s causing unsightly piercing bumps. To use this solution:

  • Dissolve ⅛ to ¼ of a teaspoonful of sea salt in 1 cup of warm bottled or distilled water
  • Rinse the piercing with the solution
  • Dry it using a clean paper towel

Ensure that you wash your hands thoroughly before touching the piercing area to reduce the risks of infections.

Observe proper aftercare

Following the piercing aftercare instructions should prevent tissue damage or an infection that could lead to a bump. Your piercer should advise on how to take care of your piercing area, which involves cleaning it regularly.

Here are a few nose piercing aftercare tips:

  • Clean the piercing site at least twice daily using a saline solution
  • Do not remove the jewelry before the pierced area and the surrounding skin is healed
  • Avoid moving jewelry
  • Cover the nose piercing with waterproof dressing when swimming
  • Avoid cosmetics, lotions, or hair care products around the piercing site

Use tea tree oil

Some piercing connoisseurs recommend using tea tree oil to dehydrate and shrink a piercing bump. And although there is limited research to show its effectiveness, most people have used tea tree oil to treat infected piercings.

Add a few drops of tea tree oil to warm water and use it to clean the fresh piercings. You can buy the product from a local store or online.

Apply warm compress

Trapped fluid under your skin can lead to a bump, but pressure and heat will help drain it gradually. You can make a simple warm water compress by soaking a clean washcloth n hot water.

Then, apply the warm compress to the piercing and hold it with gentle pressure for several minutes. Do not try to force the bump to drain, as this can cause further irritation and scarring.

How can I prevent nose piercing bump?

Tissue damages and infections are the leading causes of nose piercing bumps. Going to an experienced and reputable piercing studio is key to safe piercing free from infections.

The Association of Professional Piercers has a directory with a list of trusted piercers to help you make the right piercing studio. Also, observing the aftercare instructions listed above will help avoid infections.

When do I seek medical attention?

Although redness and minor swelling are expected, seek medical care if:

  • You have an uncomfortable level of throbbing, much pain, and a burning sensation around the piercing site.
  • You have an extreme redness or unusual tenderness at the piercing site
  • You have an unpleasant odor with yellow or green pus coming from the piercing site.

If you’re experiencing these symptoms, visit your piercer for further guidance. They may recommend the best treatment methods or refer you to a medical professional for treatment.

The bottom line

After a new nose piercing, piercing aftercare should begin and last until the nose is fully healed. Learning to clean your nose piercings is vital, as cleaning prevents infection and other complications, like nasal trauma, scarring, and difficulty breathing.

This post explains everything you need to know about nose infections, including what causes them and how to deal with them. Good luck as you purpose to use it to have faster healing on the nose piercing.

Filed Under: Health & Wellness

How To Fly With A Puppy

July 2, 2022 Leave a comment

It’s everyone’s dream to tag along with their fur friends on all their trips, right? Unfortunately, this dream might not be possible for pet parents with certain dog breeds but the story is different for owners with small dogs.

If you are lucky enough to travel with your pup, you should keep several important things in mind for your dog’s well-being, comfort, and safety. This post will take you through the ten best things to remember when flying with your puppy.

Let’s get started!

puppy on an airplane seat

How do I prepare to fly with my young puppy?

If you have a dog, you probably know the struggles that come with traveling with them on an airplane. The bright lights, loud noise, changes in temperature and pressure in main cabins, and limited ability to use the bathroom can be stressful for your fur friends.

Here are a few tips to help you ensure your pup has a comfortable and safe flight:

Find a comfortable pet carrier

The first thing you need to do when flying with your pup is to find a comfortable carrier. You should research your airline’s specific requirements for the type and size of the carried allowed to bring your pet on board.

And although the size of the pet carrier will differ from one airline to the other, most will require it to be between 16-19 inches long or less and around 10 inches tall. However, don’t force your pup into a small carrier; this can stress them and make their flight awful.

A well-ventilated travel carrier with good airflow is vital if you are traveling with a short-muzzled (brachycephalic) breed. These dogs can have respiratory problems in confined areas with increased humidity and temperature.

If you haven’t decided which airline to choose yet, you should check the International Air Transport Association (IATA). They have guidelines that most airlines follow, including the pet carrier requirements.

Pomeranian dog on lap on plane

In addition to buying a suitable carrier or travel crate, it’s important to help your pup relax and feel comfortable in the carrier. With the help of a dog trainer, you can put your pup into the carrier for a nap and place it under a table or desk to help them get used to it.

Also, remember that the dog’s carrier will become your carry-on luggage. This means that you can only bring one other personal item into the cabin. As such, you need a carrier that can handle most of your needs – such as one with side pockets for your immediate needs.

Pack all your pup’s necessities

The busy human traffic, blinding lights, and unfamiliar environment can stress your furry friend. You should pack your pup’s necessities when flying to help create a familiar environment.

Pack enough toys, food, and other treats to get your puppy through several days in the plane and when you land. For instance, you can carry food, water – in a non-spiller carrier – and maybe a bone to keep your pooch busy during the flight.

Don’t worry if your fur friend fails to eat their favorite treat or doesn’t play with the bone. The puppy may be undergoing travel anxiety – it’s normal!

But remember, you can’t pack everything. The flight attendant may help you get some of the dog’s treats available on the plane, such as an ice cube.

Get in touch with your airline

Most airlines will only allow a certain number of animals per flight, so it’s always advised that you call to confirm that the plane has a space for your fur friend. For this reason, it’s always recommended that you book a flight for you and your pup simultaneously.

Here are some of the commercial airlines’ pet travel pages to ease your work:

  • Alaska airlines
  • American Airlines
  • Southwest Airlines
  • JetBlue Airlines
  • Delta Airlines
  • United Airlines

Visit a vet

Both international and domestic flights require that your puppy be healthy enough to travel, so visit the vet before flying out. Some airlines will demand that you have a veterinary health certificate issued within a specified number of days before travel.

Your pup should deworm at least three days before the flight. Also, remember that your puppy won’t be accepted for travel if they have signs of recent surgeries, so ensure they’re fully healed if they underwent any procedure.

dog dressed up with bag at airport

Always bring your documents

Whether or not your airline requires you to, get a veterinary health certificate before flying out. It won’t cost you much, and it’s always better to be safe than sorry.

The certificate shows that your furry friend has had all the vaccinations and shots and is A-OK to travel in the passenger cabin. For instance, most international flights will demand that your pooch has received a rabies vaccine, be dewormed, and be free from diseases.

Don’t forget about your destination

Different countries and states have different rules and animal importation laws, so you should consider local laws when planning your trip. Trust me, running into trouble for bringing your fur friend to your final destination is the last thing you want!

Research the departing and arrival airports thoroughly before your flight to know the rules you must abide by. This will also help you with important information, such as the location of the pet relief area.

Ensure that your pup is old enough

The U.S. Department of Transportation requires that puppies be at least eight weeks old and have been weaned for five days or more to travel via planes. If you have a small breed dog, there may be the minimum age and weight requirements, too.

However, big adult dogs aren’t allowed into the airplane cabin, mainly because of the weight restrictions.

The Centers for Disease Control and Prevention (CDC) also requires dogs entering the country to be immunized against dog rabies. And for most international travels, the puppy should be vaccinated at least a month before the travel date, and the rabies vaccine isn’t administered to pups three months of age or younger.

Thus, dogs getting into the U.S through international flights must be 16 weeks of age or more. So, check your pup’s birth date and ensure they can be allowed into the country.

Ensure your dog has the temperament to fly

Unlike driving, dogs don’t really like flying. Most of them develop travel anxiety and stress, making their flight tiring and exhausting. They may start crying unbearably during the flight, making your journey nerve-racking.

Unfortunately, some airlines require your pup to be well-trained or quiet to be allowed to fly. This makes it a mistake to have vocal dogs in a plane.

If you feel your pup would be affected by the flight, do them a favor and leave them behind. Many great dog-sitters and dog resorts are available to take great care of the pup while you are away.

Line your dog carrier with a DryFur pad

I know: your dog could be potty-trained well and may not need a DryFur. However, accidents occur, especially when your fur friend is in high-stress environments.

So, line your puppy’s carrier with a DryFur pad to be on the safe side. It wicks away moisture to keep your pup dry and comfortable during the flight.

You can carry your furry friend to the restroom whenever they show you signs of peeing. The pad will help you avoid the mess if they can’t hold their bladder.

Prepare your puppy for the flight

Always consult with your vet about water, food, and medications to pack for the flight. Some may advise you to sedate your furry friend to keep them quiet. However, check whether your airline allows travelers to have sedated an animal with them.

Also, remember that the idea of sedating your dog isn’t clear (even the American Veterinary Medical Association doesn’t have one good answer). So, weigh the pros and cons before sedating your fur best friend.

You might also want to check with the recommendation from the humane society of the United States.

Moving on from medical concerns, familiarize your pup with the carrier or crate before the trip. You can also take them for a long walk before the flight to make them tired.

A tired dog is less antsy and will probably sleep throughout the flight. Also, take them to the airport’s departure area several times to familiarize them with the new, ‘tiring’ environment.

Handling the flight day with your pup

During the flight day, avoid solid foods or other foods – as advised by the vet – a few hours before the flight. However, put little water in your pup’s water bowl and take them outside to exercise.

Place a few dog pee pads (like a DryFur pad) inside the puppy carrier or crate and carry more to add during the flight. Then, walk into the airport with relevant documents (including the CDC dog import if needed) and sign the required paperwork.

Remember, the Federal Aviation Administration considers the pet’s carrier carry-on luggage, so you must take it through the metal detector device. Remove your pup momentarily as you screen the luggage.

What do I take during the travel day?

We know that the day of the flight is busy, so we made this checklist to ensure you don’t forget anything for the flight. Here are the things you need to meet entry requirements and fly safely and comfortably with your furry friend:

  • Health certificates, such as the rabies vaccination certificate
  • Pup harness and leash
  • ID tag for your puppy and carrier
  • A dog carrier that meets the airline’s requirements
  • Pet fee and reservation receipt
  • Pee pads
  • Paper towels, wet wipes, and plastic bags
  • A water bowl and water
  • Soft toys and treats for your pooch
  • Pup meals
  • Ensure your pup is in good health
  • Carry extra fees
  • Change of clothes for you in case it gets messy

How much will it cost to fly with my pup?

If the airline of your choice allows you to tag along with your furry friend, it must be one of your happiest days – you’re finally going to show your new puppy the world. But how much will that cost you?

Although the price will vary from one airline to the other, most charge an average of $125 per trip. However, it’s important to note that the price is affected by several factors, including your dog’s weight and the flight distance.

The bottom line

Let’s face it, flying with a dog can be nerve-racking. Luckily, we have gathered some tips to help you safely and comfortably fly with your puppy.

The key is planning to help ensure your fur friend’s trip is more comfortable, calm, and safe. Good luck as you use this post to fly safely with your canine companion.

Filed Under: Pets

How to Care for a Lavender Plant

June 26, 2022 Leave a comment

Lavender is well-known in both the gardening and design community for its bright colors and hearty foliage. It brings a chic yet casual elegance to your home or garden, no matter where you live.

lavender plant in pot

Thankfully, growing lavender is so easy that even a novice gardener is up to the task and can enjoy its fragrant blooms. It is a perennial herb, meaning it will come back year after year, typically blooming early spring and planting it is a breeze.

But what are some of the benefits of growing lavender? Well, the first and most obvious one would be that it is a beautiful plant.

Its lush, upward-pointing greens and richly-colored blooms can brighten up just about any space, but that isn’t the only reason why lavender is a prized plant. Once in bloom, lavender provides a soothing scent.

You are probably already familiar with how lavender smells if you have used a soap or candle that contains its essential oil. It is a light and fresh floral scent that can sometimes have undertones of sweetness or balsamic.

Most people say that when they smell lavender they feel calmer, which is why it is an ingredient in products used at places like spas and yoga studios. Linalool, the alcohol component in lavender, has been studied by neuroscientists and was found to produce an anxiety-reducing effect.

With all of these positive benefits, it seems like a no-brainer to want lavender in or around your home. Let’s take a look at how to make that happen!

How to Care for a Lavender Plant

Your first order of business is looking for cutting-grown rather than seed-started lavender plants. This is crucial especially if you are planning on caring for a bigger lavender plant, such as a hedge.

If you are confused already, no worries – most nurseries will be able to tell you how their lavender plants got going. And if all they have is seed-grown lavender, just be aware that the end size of seed-grown lavender varies depending on its early life.

As with most plants, there are a wide variety of different types of lavender to choose from. This can be daunting even for an experienced gardener, but the best way to figure out which type to get is to know what you want it for.

fresh lavender plant with purple blooms

Lavender is grown for many purposes, from its essential oil to use in cooking and crafting. Picking the variety (or varieties) that you want for your personal use ensures that you will be happy with your plant. Overall, Lavender is a great drought-tolerant plant making it a perfect addition to any garden.

To that end, here is a quick breakdown of some of the most common types of lavender as well as their uses:

  • English lavender is a particularly fragrant variety commonly used in perfume, but its strong scent means it is also good for flavoring things like jam or a meat rub. This is the most common variety of lavender and is probably one you have seen before!
  • Buena Vista lavender has dark blue-purple flowers and pairs well with rosemary in a glaze or a cookie.
  • Grosso lavender is known as the “commercial” variety, planted far and wide across Europe. It often repeats blooms in late summer, and it is the perfect lavender for drying and crafting purposes.
  • Spanish lavender comes in shades of purple and pink and grows in a large variety of planting zones, from 4 to 24. It blooms spring into summer and the flowers (or “bracts” as they are sometimes called) are said to resemble rabbit ears.
  • Edelweiss lavender has white flowers and is of a medium size. It is most commonly grown as a landscaping plant.

The types of lavender available to you locally may vary depending on what grows the best in your region. Remember that lavender is native to the area near the Mediterranean Sea, so it particularly enjoys a dry soil and full sun.

If you are not sure what type of lavender plant is best for you, feel free to ask your local greenhouse or nursery worker. They should be able to point you in the right direction, and also advise you on the number of plants to get.

Now that you have your lavender, you are probably wondering what it needs to thrive. Lucky for you, growing lavender is much easier than many other varieties of plants.

How much sun does Lavender need a day to grow?

Lavender is a laid-back herb that does not require much in order to provide you with fragrant blooms. Full sun (meaning 6+ full hours of direct sunlight) and well-drained soil are a must, with organic matter added to your dirt if it is particularly dense.

What type of soil does Lavender need to grow?

If you are in an area where your soil drains poorly, it is a great idea to grow your lavender in a raised bed or be placed in terracotta pots with drainage holes to supply good drainage. Regardless of where you plant, full-sized varieties of lavender should be set 3 to 4 feet apart, and dwarf sizes need only 18 inches.

If you decide to mulch where you have planted your lavender, be sure to use decomposed gravel or granite–no compost or bark. Those types of mulch can inhibit drainage and cause root rot, which can be a death sentence for your lavender.

Starting with the best conditions possible is essential to good lavender growth, so be sure to follow the instructions provided about your soil. You should water your lavender deeply but when the soil is almost dry, to avoid flooding the roots.

Like most other plants, you want to prune lavender every year immediately after it blooms. If you have never pruned a lavender plant before, it is easy if you follow these steps:

  • If your lavender is low-growing like the Buena Vista variety, trim back the foliage by 1 to 2 inches.
  • Starting in the second year of growth, any variety of 2 to 4 foot lavender plants should be cut back by around a third of its size.
  • If your lavender plant becomes “woody” (overgrown) and opens up in the center, there is a simple fix. Just remove a few of the oldest branches and be sure to take out more when new growth comes in.
  • If new growth does not start, you will have to dig out and replace your lavender plant.

If you are growing lavender for harvest, there are a few things you can do to ensure it goes smoothly. Many varieties of lavender only bloom once per season, so you do not have to worry about them trying to rebloom.

If you chose a variety like Spanish lavender that will want to bloom more than once and you will not be harvesting the second round of blooms, that’s okay. Just be sure to cut off any faded flowers to keep new blooms from forming.

To harvest lavender, snip its stems when the bottom third of the plant’s blossoms are open. It is important to look at all of your lavender blooms closely, as not all stems will be ready to harvest at the same time.

lavender bloom

Take off all the leaves from the stems and gather the stems together in bunches. You can secure these bunches with a rubber band, but be sure to put together no more than 100 stems per bundle.

Those are instructions for harvesting lavender for decoration or food, but what about drying? If you want to use your lavender for potpourri, cut the flower spikes or strip the flowers as the blossoms begin to show color.

Once you have lavender around your home, you will discover that bees absolutely adore lavender in bloom. Bees will travel up to 6.5 miles from their hive in order to retrieve pollen, so it is entirely possible that you could be the source of the lavender flavor in someone’s honey!

Due to the endangered nature of bees, you may consider leaving a certain percentage of your lavender plants uncut when you go to harvest so they have something to eat. It may also be a good idea to grow various varieties suited to both your needs and the needs of your local pollinators.

If you have a lot of space, it may be tempting to consider starting a lavender farm. Whether you are considering this for fun or for a business venture, be sure you know what you are getting into first.

Visit a lavender farm in your area, or look some up online. Do your research and understand that this is a long-term commitment that will require much more work than growing a few plants in your backyard.

Regardless of where or how you decide to grow your lavender, it is important to remember to have fun doing it. All it takes is a little work for your lavender to thrive, so get out there and plant some!

Filed Under: DIY

How to Stop a Puppy from Crying

June 22, 2022 Leave a comment

You’ve brought your little puppy home, and your family members are excited, but then, it’s the middle of the night, and your little fur friend starts to cry. And when the dog barks turn into sleepless nights you may even consider returning your canine companion.

Don’t panic or return your fur friend just yet; it’s normal for a puppy to cry, especially on the first night. They’re probably going through separation anxiety as they settle into their new environment.

The good news is that you can stop your pup from crying using several simple methods. This post will explain why pups cry and provide you with 8 of the best tips to stop a puppy from crying.

Let’s dig in!

sad puppy laying down

Why is my puppy crying?

There are countless possibilities for why your pup may be crying, ranging from loneliness to fear and boredom. Understanding the root cause of the problem is key to stopping the puppy from crying.

Here are the common reasons why your fluffy friend might be crying:

Loneliness

A young or adult dog is a social animal well adapted to living in groups, including with its owners. A pup will be needier as it tries to adjust to being separated from its siblings and mother and often cries when left alone.

sad puppy laying on carpet

Fear

As your pup explores the new home, its behaviors may range from being daring and playful to being fearful and withdrawn. If this is the case, your pup will whimper or cower under furniture or in a corner instead of greeting the visitors.

Your fur friend may also run away from you when you introduce new objects, like a backpack, stick, hat, umbrella, etc.

Boredom

Like a human baby, your puppy will respond to boredom with a rising wave of emotions, including fussiness and crying. This is especially true if the puppy lacks enough physical and mental exercise.

Hunger

If your pup cries in times leading to meals, it could indicate that they’re hungry. However, note that this may not always be the case, so don’t give them food every time they cry.

Potty break

Like a human baby, puppies can’t ‘hold it’ and often cry when they need to go to the toilet, so factor in potty breaks.

Sickness

Although rare, your pup may be crying and whimpering because they are sick. However, this will be accompanied by other symptoms, including loss of appetite, lethargy, diarrhea, dizziness, vomiting, or increased breathing rate.

Excessive scratching, biting, or licking may also indicate an infection, parasites, allergy, or other skin problems in one area. If your normally social puppy doesn’t want to be touched, it could be in pain or suffering an injury.

sad pug laying on orange couch

How do I stop my puppy from crying?

Once you understand why your pup is crying, you can now choose how to approach it. Generally, there are several tested and proven methods that work to stop your pup from crying, including:

Method #1: Crate train your pup

If your pup is crying because he is unfamiliar with the new environment, crate training them can help them adapt. This training leverages your pup’s instincts to create a quiet, comfortable, and safe place when their environment becomes overwhelming.

However, you must figure out whether this training is right for you and your fur friend. You’ll need some research, as crate training isn’t as simple as putting the puppy into the crate and leaving them there.

Crate training means creating a bold, positive association with the crate so that your pup feels safe and comfortable in there. However, if you master the art of crate training, the crying will soon turn into snoring.

So, how exactly do you crate train your pup?

You can start feeding your pup all their meals in the crate, rewarding them for entering the crate, and ensuring they remain unbothered when they’re in their crate. You can also refrain from opening the crate door unless they are quiet to avoid the habit of crying to be set free.

However, ensure you get the right dog crate for your pup – one that they’re comfortable in. You can buy a crate with a dividing panel so that it grows as your pup grows.

This is a great way to save you money as it ensures that you don’t have to buy a new puppy crate every year.

Method #2: Provide comfort but not attention

Yes, I know: the puppy cries may feel like the end of the world, but it sounds more dramatic than it is! And the drama can end with simple methods like providing your canine friend with a companion and comfort.

But be careful, as you trying to provide your pup with comfort may turn into a dangerous habit. Comforting your pooch will only ensure they repeat the same tactic the next time, and again, and again…then you’ll never stop your pup from crying.

So, how do you provide comfort to your fur friend without giving them attention?

You can start by allowing the pup to sleep in a crate or dog bed placed in your room, so they can know you’re around. Then, you can slowly move the crate from your room to the family room as the pup starts to get used to sleeping undisturbed in their bed.

However, ensure that you don’t give your pup any attention whenever you’re in the room. Please note that your pup can interpret a simple word as ‘Shh!’ to be attention, so only allow them to sleep in your room if you’re sure you won’t chat with them.

You can also place clothing or other items that smell of you into your pup’s crate to create familiarity. The pup may think you’re around and will most likely be comfortable.

Method #3: Limit water and food intake before bed

If a toilet break is the main reason why you’re your pup cries in the middle of the night, then you should limit water and food intake before your puppy sleeps. If the pup goes to bed with a full stomach and bladder, you’ll need to wake up at least once in the nighttime to let them out.

Method #4: Use music

Yep, you read that right. Music has proved very effective in calming and comforting young puppies when crying; it helps them sleep.

Soothing sounds and music are therapeutical to humans and dogs as well. The right sounds will relieve your young puppy’s stress levels and help them relax and fall asleep.

Method #5: Don’t make it a big deal

I’ll agree with you on this one: it can be tough to hear your pooch cry at night, but if you want the cries to cease, you need to be indifferent. Resist the urge to run to your fur friend whenever they cry.

Giving your young pups close attention when they cry teaches them that this behavior gives them what they want – which is not what you want!

Method #6: Limit access to distractions

Your canine companion doesn’t need a lot to get a good night’s sleep – a safe environment, soft beddings, and the fewest distractions are all they need. But, this isn’t a walk in the park for most pet parents.

Most like to keep playing with the pup even during their bedtime, discouraging them from sleeping at night. Avoid leaving favorite toys or treats in their sleeping area, as most puppies will get naughty when trying to make their fun.

Method 7: Give your pup a good time out

Give your puppy an excellent alone time during the day, not just at bedtime. Put them in their own space, like a crate or pen, and give them a fun chew toy they like – you want them to think of being alone as a good thing.

Method #8: Check other issues

You’ve given your puppy a bathroom break, reduced their distraction, tried playing classical music, or used other methods mentioned here, but none seems to work? Your pup may be experiencing distress from several factors, including a health problem.

If your furry best friend has been crying for a couple of weeks, take it to a vet or dog expert for further examination.

A quick tip: Give your pup plenty of exercise before bedtime

A tired puppy is a sleepy pup, so use playtime to stop them from crying. Give your furry best friend a toy filled with treats, to increase their work rate. For instance, you can smear peanut butter on the pup’s toy to increase their activity.

What not do when trying to stop your puppy from crying

So, you’ve been trying to make your pup love their crate and stop crying, and now it seems like it’s never going to happen. You may sometimes resort to several methods that seem to work in the short term but could hurt your puppy’s crying behavior in the long run.

Here is what not to do:

  • Don’t pet your pup immediately after they cry; wait until they settle first. Otherwise, you’ll teach your pup the wrong lesson – that crying gives them cuddles.
  • If you want them to end up sleeping in the living room, don’t entertain the idea of having them sleep in your room. Otherwise, they’ll demand to sleep in your room again and again.
  • Avoid using your puppy’s crate as a punishment, which can create stress at bedtime.

The bottom line

Bringing in a new puppy at home can mean playtime all day, but no time is better than bedtime when your puppy starts to cry. This article provides you with eight tips to help you stop your pup from crying the entire night.

Good luck as you purpose to use it to get you and your canine companion a good night’s sleep!

Filed Under: Pets

How to Tell If Wisdom Teeth Are Coming In

June 22, 2022 Leave a comment

Yes, I know: the wisdom teeth have an important-sounding name, but they have no purpose in your dental formula. They are additional molars that usually emerge during your teenage years (mainly from 17 to 21).

Sometimes, these teeth can be problematic for you, causing overcrowding or growing at awkward angles and leading to serious dental problems. For this reason, 5 million Americans get their wisdom removed each year, costing about $3 billion.

Knowing when the wisdom teeth are coming in is key to helping you avoid pain and unwanted procedures with an oral surgeon. This post will take you through seven common signs that indicate that your wisdom teeth are coming in.

Let’s dig in!

3D image of skill with wisdom teeth pain

What are wisdom teeth?

Wisdom teeth are the last permanent teeth (third set of molars) that come last and furthest back in your mouth, usually during your late teen years. There are usually four wisdom teeth – two in the lower jaw and two in the upper jaw – although some people have fewer, more, or none.

Some wisdom teeth erupt without leading to any problems, but others lead to issues and may need removal, among other orthodontic treatments. Your dentist may advise a wisdom teeth removal if it grows at an odd angle or is impacted (becomes stuck below your gum’s surface).

Usually, the main reason your wisdom teeth are at risk is that your mouth doesn’t have room for four new molars. If that’s the case, you need the wisdom teeth removed.

How do I tell if wisdom teeth are coming in?

Knowing when your wisdom teeth are coming in is key to avoiding unwanted procedures. Here are seven indications that your wisdom teeth are coming in:

Irritation around the gums

With mild periodontal illnesses prevalent, most individuals will experience dental irritation at least once in their life without taking caution. However, if the pain is at the back of the mouth and at the right time, it may not be due to inconsistent brushing or flossing with force.

Instead, it may indicate that your wisdom teeth are coming in. If that’s the case, one of the common symptoms you’re likely to notice is a red swelling of the gums, which is expected given that new teeth are emerging.

Seek the help of a dentist if you experience gum irritation, but don’t be surprised if you’re told it’s the wisdom teeth coming in. If that’s the case, removal surgery will help cure the condition.

inside woman's mouth where wisdom teeth pain is happening

Bad breath

Let’s face it: impacted wisdom teeth are a nightmare for most individuals, but they are common. They often happen when there is not enough room to grow and start growing sideways or under the gum.

In most cases, the impacted wisdom teeth cause discomfort, intense pain, and irritation, but it’s also associated with another unpleasant symptom – bad breath. A wisdom tooth growing awkwardly can make pockets around the teeth and gum hard to clean, leading to bad breath.

Bacteria are often trapped there without regular visits to a dental clinic and will build up over time. If that’s the case, you may have a bad breath that doesn’t end no matter how much you clean your teeth.

See a dentist if the bad breath or unpleasant taste in the back of your mouth doesn’t go away with some floss or brushing.

Pain and aches

Wisdom teeth don’t only cause pain in the back of your mouth; they also lead to headaches and jaw pain. The first sore sign of a wisdom tooth will likely first be in the mouth but extend to other body parts, including the jaw and the head.

The wisdom tooth often forces other teeth to move aside as it makes enough space for itself. This leads to pain and discomfort in your jaws as the whole mouth tries to shift to make way for the tooth.

Sometimes, it becomes a challenge to open or close your mouth. In other rare-but-possible cases, the wisdom teeth will push against your sinus as they grow, causing headaches.

Infection in the gums

As the wisdom teeth start to come in, the roots are often positioned awkwardly, causing only part of the tooth to emerge. This leaves the gum tissue susceptible to active infections.

Even with small openings, food particles can easily get stuck there, making it very hard to remove, even with thorough flossing and brushing. This can turn into a severe pericoronitis infection if not corrected soonest possible.

drawn illustration of wisdom teeth pain

Biting your tongue accidentally

Sometimes, the impacted wisdom teeth move your teeth aside as they make way for themselves. This process happens so slowly that you may not notice it for a while.

You may brush off the occasional redness or ache that comes with impacted wisdom teeth, but ultimately, you may notice that your teeth have moved aside to make room for the new teeth. If that’s the case, you’re likely you bite down on your tongue or the inside of your cheek.

If you notice this happening frequently, check for other signs of the impacted teeth or seek help from a dentist.

Look – the signs may be visible

An obvious indication that your wisdom teeth are coming in is their appearance. Stand in front of a mirror and, using a flashlight, look whether some teeth appear on the furthest end of your mouth.

You might not see the teeth, but a lump or swelling you’ve not seen before may indicate that new molars are coming in. If that’s the case, you don’t need a doctor to tell you that your wisdom teeth have arrived.

Dental X-ray

This is perhaps the best solution for knowing if your wisdom teeth are coming in. Specifically, the panoramic X-ray can help capture all your teeth and jaw bones in one image, revealing your wisdom teeth’s position and if they are almost coming in.

When do I see a dentist?

You should visit your dentist if your wisdom teeth are leading to severe pain. The physician will check your teeth and provide the best course of action.

If the dentist believes you need a wisdom tooth extraction, they’ll usually order an X-ray of your mouth. The X-ray image will give them a better view of your teeth’ position, including the impacted wisdom tooth.

As with all teeth problems, you should visit a dental clinic as soon as possible, rather than waiting for regular dental checkups.

x-ray of wisdom teeth

Why should I have my wisdom teeth removed?

There is no need to remove your wisdom teeth if they’re impacted but aren’t causing any problems. This is mainly because there is no proven benefit to doing so, and the procedure carries the risk of dental complications, including dry sockets and infections.

Specifically, dry sockets happen when a blood clot from the surgery becomes dislodged from your tooth socket prematurely, leaving your jaw exposed. This scenario can be avoided by drinking fluids using a straw after a wisdom tooth extraction procedure.

However, sometimes the impacted wisdom teeth or teeth that have not fully broken through the surface of the gums can lead to dental problems. Bacteria and food debris may get trapped around the wisdom teeth’ edge, causing a plaque build-up.

In turn, the plaque build-up can lead to several problems, including:

  • Gum disease – also known as periodontal disease or gingivitis- is a severe gum infection that damages the soft tissue or the entire gum line if not treated.
  • Tooth decay – also called dental caries- are the permanently damaged areas in your teeth’ hard surface that develop into holes or tiny openings.
  • Abscess – this is a collection of pus in your wisdom tooth or the surrounding tissue due to bacterial infection
  • Cellulitis – this is a bacterial infection in your tongue, cheek, or throat
  • Pericoronitis – this happens when plaque leads to a serious infection of the soft tissues surrounding your teeth
  • Cysts and benign growths – although in rare cases, this may happen when the wisdom tooth that hasn’t cut through the gum develops a fluid-filled swelling (cyst)

A significant percentage of these problems can be treated using antiseptic mouthwash and antibiotics. If all other treatments fail to work, your dentist will likely recommend the removal of wisdom teeth.

Impacted wisdom teeth further explained

Impacted wisdom teeth occur when your third molars become fully or partially trapped in your jaw bone or gums. This can lead to several oral health problems, including tooth decay, oral infections, and gum diseases.

Surgical extractions are the most recommended treatment method for impacted wisdom teeth. Pain relievers are often administered to help you manage post-operative pain and discomfort.

Here are some of the most common impacted wisdom teeth symptoms:

  • Red, swollen or bleeding gums
  • Unpleasant taste in your mouth
  • Swelling or mild pain on your face or jaw
  • Halitosis
  • Difficulty opening your mouth

Although you can’t prevent impacted wisdom teeth, you can minimize the risk of issues they cause by observing good oral hygiene.

The bottom line

Wisdom teeth don’t make you smarter; instead, they can be a cause of pain and other dental problems. They earn their name because they come in when you’re older, mainly in your early 20s.

This post provides you with the seven first signs of wisdom teeth. Good luck as you use it to know when your last teeth are coming and take the necessary precautions.

Filed Under: Health & Wellness

How to Clean Pee Out of Carpet

June 22, 2022 Leave a comment

Having a pet in your home is undoubtedly a source of joy, but life with the man’s best friend can be complicated at times. For instance, pee sometimes happens regardless of how well trained your pup is and how diligently you observe your potty-break schedule.

Thus, knowing how to get the urine and its smell out of the carpet is a no-brainer if you have a pet. Incorrectly cleaning your dog’s pee from your carpet can lead to foul odors, permanent stains, and repeat accidents.

This post will take you through the best ways to clean pee out of a carpet. But before that, let’s first see why pee smells so bad.

man cleaning pee out of carpet

Why does urine smell bad?

Urine is a metabolic waste made up of urea and uric acid, among other things. When the pee sits around for some time, bacteria start to decompose the urea, giving off the unpleasant ammonia smell.

If you have a cat pet, you might have noticed how disgusting its urine smells – worse than a dog or human urine. This is because dog and human pee smells are more diluted than cat pee, so there isn’t much urea for bacteria to decompose.

Why is my pet peeing on the carpet?

Before you clean the pee from your carpet, you should know why your pet is peeing on the carpet. This will help you avoid a repeat of the incident in the future.

If your puppy or kitten is still in the process of potty training, inappropriate urination should be a call for concern. Housetraining takes time and requires you to be patient with your pup or cat.

However, you should seek medical attention if your pet has already passed the potty training process, but urination is becoming an intractable problem. A vet behaviorist or a certified trainer may help diagnose a medical condition and offer the best advice.

Check with the vet to rule out any underlying health problems if your potty-trained pet keeps urinating on your carpet. Urinary tract issues, diabetes, Cushing’s syndrome, and kidney disease may cause bladder inconsistency in your young pup.

Pets suffer from bladder inconsistency and other attributing illnesses as they age. For instance, your dog may have dementia, making it forget its house training, hence urinating on your carpet.

Luckily, if you need to clean cat or dog pee stains from your carpet, it’s not a difficult task if you do it correctly.

puppy with pee stain on carpet

How do I clean pee out of a carpet?

Before scrubbing the pee from your carpet, ensure you have all the necessary cleaning supplies, including:

  • Paper towel
  • Rubber gloves
  • Baking soda
  • A spray bottle
  • Distilled white vinegar
  • Dish sponge
  • Trans can

Then, you can proceed to clean the pee from your carpet as follows:

Before cleaning:

If you notice that your pet has stained your carpet, don’t panic. Like most other stains, it’s vital to absorb the urine as soon as you see the stain to make it easier to remove.

Here is a step-by-step guide to help you dry the stained area:

  1. Place paper towels around the fresh stain to blot the stain and remove as much moisture as possible
  2. If the urine stain is already dry, pour cold water to help rinse it out. Leave the water to sit for about a minute to absorb the urine.
  3. Absorb as much urine as possible using a clean towel, rag, or paper towel. Don’t rub the stain aggressively; instead, use small strokes and slight pressure.
  4. Use a shop vac to vacuum up the urine for the best results. Its powerful suction capabilities mean it can dry even the stubborn stains more effectively.

Once the urine is soaked, you can use homemade solutions or store-bought cleaners to clean the pee out of your carpet. Here is how each of these methods works:

The homemade solution to clean pet stains and odor from a carpet

Before considering harsh chemicals to clean pee from your carpet, you should consider homemade solutions. These DIY solutions will save you costs while guaranteeing you safety since they have no chemical compounds.

However, you should test each method before using them to ensure it doesn’t discolor or damage the carpet fibers. You may also use rubber gloves if you’re allergic to any homemade solution.

Here are the homemade solutions to clean pee out of a carpet:

Method #1: White vinegar

White vinegar solution effectively cleans urine and foul smell from a carpet. So, how do you go about it?

  • Pour about one tablespoon of white vinegar on the stained area
  • Cover it using a damp towel and leave it for sometime
  • Remove the already dried white vinegar and rinse the area with cool water
  • Dry the stain using a clean towel

Method #2: Baking soda

This method is used to remove the stinky smell from your carpet. Below are step-by-step instructions to use this product:

  • Spread about ¼ cup or less of baking soda on the affected area
  • Leave it to sit overnight to soak up the urine odors
  • Then, vacuum your carpet thoroughly
  • Repeat the process until the area feels clean to the touch
foam spray over pee on carpet

Method #3: Liquid dishwashing detergent

Dishwashing detergent is ideal for cleaning the stain and removing the foul dog or cat urine smell. Here is how you use this product to clean the mess left by your furry friend:

  • Combine about ¼ teaspoon of a liquid dishwashing detergent (not dish soap) with 1-2 cups of warm water (not hot water).
  • Spray the stained area and repeat the application if needed
  • Area dry the spot

Method #4: Ammonia

Rinse the affected area using about two tablespoons of ammonia and 1 cup water. Repeat the process as needed and towel dry when finished.

Method #5: Hydrogen peroxide

Combine about four tablespoons of hydrogen peroxide, two tablespoons of warm water, and a few drops of dish soap in a spray bottle. Then, spray the stained area and leave it to sit for about 10 minutes.

Repeat the process as needed, rinse it, and towel dry it.

Method #6: Vacuum the area with a cleaner

Dish detergent, hydrogen peroxide, or soda ash methods are a surefire to eliminate dog urine stains and smells. After practicing the best-fit method for you, vacuum or clean out the area with your cleaner.

Tip

If your pet keeps peeing on the same spot on the carpet, the chances are that you haven’t entirely removed the smell from the previous incidents. Your dog or cat will urinate in an area where they can smell their urine.

Use store-bought cleaners to clean pet urine stains and odor

If you want quicker results, you may use store-bought cleaners to clean the pee and its smell. Ensure you pick a safe brand for you, your children, and your pets.

You can buy enzymatic cleaners and pet odor neutralizers from pet stores to clean your carpet. Specifically, the enzyme cleaners break down urine molecules more effectively while eliminating strong odors and stains.

Here are some of the best urine carpet stain removers on the market:

adorable puppy next to pee stain on carpet

Rocco and Roxie Supply Stain and Odor Remover

This is one of the best cleaning products for eliminating pet urine stains from carpets. This cleaner has natural bacteria that feed on the ammonia crystals found in pee, breaking down the stain and odors.

It’s relatively expensive than most pee stain removers, but it’s worth it. You can buy it online or from a local store.

Resolve Urine Destroyer Spray Stain and Odor Remover

This is for pet owners who are on a budget. It neutralizes the disgusting urine smell on contact. It breaks down odor molecules, preventing your pet from remarking the area.

It’s best for cat or dog owners dealing with stubborn odors. You can buy this stain and odor remover here or from your local store.

TriNova Natural Pet Stain and Odor remover

This is made solely of organic and natural ingredients, ideal for pet parents who want all-natural stain and odor remover products. It contains a blend of natural enzymes that break down and disintegrate urine molecules in your carpet.

Nature’s Miracle Urine Destroyer with Accushot Sprayer

Nature’s Miracle Urine Destroyer should be your go-to product if the standard spray bottles aren’t working. It has an extendable wand known as an Accushot Sprayer that enables you to aim and spray the urine stains accurately.

This product covers the stained area tremendously and doesn’t damage the area rugs you use it on. It’s highly recommended for pet owners who live in houses with unpleasant smells due to pet pee.

Bonus information: Dealing with old urine stains.

It may be challenging to fight old urine stains – and sometimes even hard to locate them. You may use a UV urine finder like the Black Light UV Flashlight 100 LED or UV Flashlight Pet Urine Detector.

After finding the stains, you may remove them using oxygen-activated enzyme cleaner to remove the stains and destroy the smell.

The bottom line

Pet urine stains are common problems associated with having a pet – especially when your pet is potty training. The good news is that you can easily clean the pee and its foul smell with the right products.

This article provides the best methods and products to clean pee from your carpet. If everything fails, contact a professional carpet cleaner from your local area.

Filed Under: DIY, Pets

How To Clean Your Ears With Peroxide

June 15, 2022 Leave a comment

Let’s face it: a clogged ear from earwax is everyone’s nightmare. It limits your ability to hear clearly and makes the ear uncomfortable.

And whenever you have a clogged ear, you may be tempted to use a cotton swab to clean it – but don’t. Research shows that using the swab or other objects to clean your ear can cause ear irritation, ear infection, and a perforated eardrum.

So, how do you clean your ears safely at home? This post will show you how to clean your ears with hydrogen peroxide and other materials.

Let’s dig in!

woman wiping ear with cotton swap

Why do my ears make wax?

The wax in your ears results from a substance called cerumen – produced by your body to keep your ear safe. It has anti-fungal and anti-bacterial properties and protects your ear from things that can hurt your eardrum.

If not for the cerumen, you could have a dry and itchy ear. The wax traps things like dirt and dust, so they don’t go deep inside.

When you move your jaw, such as when you eat, you help move the old earwax out of the ear canal to the ear opening. That’s where it dries up and falls out.

You’d experience an earwax blockage because you tried to clean your ears using a foreign object and pushed the wax in deeper. In addition to the blockage, foreign objects can lead to other serious problems, including:

  • Rupture of the eardrum
  • Infection
  • Hearing loss.

Should I clean my ears?

Since ears are self-cleaning, you don’t have to clean them. They produce earwax that acts as a natural cleanser, gathering hair, dirt, and dead skin cells from the inner ear canal and migrating them outwards.

But if too much earwax builds up and begins to cause symptoms, it may be time to clean them. However, before washing the ear, you should first rule out any other condition, including the swimmer’s ear, ear infection, or Eustachian tube dysfunction.

How do I clean my ears with hydrogen peroxide?

The medical term for earwax is cerumen, and hydrogen peroxide is a potent cerumenolytic agent – a chemical that softens, dissolves, and breaks down earwax. So, how do you clean your ears using this chemical?

Before getting started, gather the following:

  • 3% bottle of hydrogen peroxide solution
  • A towel or a soft cloth
  • A medicine dropper

Then, you can proceed to clean your ears as follows:

  • Add a small amount of 3% hydrogen peroxide to a medicine dropper
  • Tilt your head to one side and add two to three drops of hydrogen peroxide to your ear. You can request someone to help you do this.
  • Leave your head tilted for several 4-5 minutes. You may feel some fizzing in the ear as earwax dissolves.
  • Slowly turn your head against the towel or soft cloth to drain the peroxide solution and excess earwax.
  • Use a hand towel or soft cloth to clean your ear. Don’t forget to clean the outer ear canal.
bottles of hydrogen peroxide

Warning:

Make sure you follow the instructions that come with the eardrops. Again, don’t use hydrogen peroxide on an injured ear as that can cause infection or pain.

Again, if you add hydrogen peroxide, don’t use a foreign object into the ear to remove the wax. Instead, leave the chemical in your ear for some minutes to dissolve and break down the excess wax.

Generally, the following tips will help avoid complications:

  • Follow the instructions that come with the package
  • Talk to a healthcare provider before using a new eardrop solution
  • Avoid over-the-counter ear drops if the ear is injured, as this can lead to infection or ear pain
  • Don’t use high concentrations of hydrogen peroxide, as that can lead to inner ear infections
  • Avoid this solution if you have a middle ear infection, tympanostomy tubes (ear tubes), or a perforated eardrum
  • Avoid inserting foreign objects to remove wax – this includes cotton buds which can push wax further into the eardrum.

If you experience discomfort, ear pain, blocked ears, or the peroxide solution doesn’t work, visit the doctor’s office for treatment.

You may use Otic carbamide peroxide in place of hydrogen peroxide.

Alternative methods to clean your ears

While hydrogen peroxide should work just fine in cleaning your ears, several other methods may help you remove the earwax. They involve using natural substances, like salt and white vinegar, to clean your ear.

Here are other six effective ways for ear cleaning:

Ear irrigation

You may use an over-the-counter ear irrigation kit to clean the earwax. However, ensure that you follow the instructions that come with the kit.

Also, avoid the kit if you’ve had recent ear surgery or an active ear infection. You can use the kit 2-3 times a day or as directed by your care providers.

Saline solution

You may rely on a homemade salt water solution to soften and break down the earwax. To get started;

  • Mix a tablespoon of salt in one-half cup of warm water
  • Stir until the salt is completely dissolved
  • Wet a clean cotton ball using the saline solution
  • Tilt your head to one side and squeeze the ball so that the solution drips into your ear.
  • Leave your head in this position for about 5 minutes, then tip the other side to drain the solution
  • Repeat the process to the other ear if it’s affected
cleaning ears with bulb syringe

A bulb syringe

If the cleaning drops fail to work, you may flush the ear using a bulb syringe available at grocery or drug stores. Fill the ear syringe with warm water, place it close to your ear opening, and squeeze the bulb.

The warm water will break down and dissolve the wax. Tilt your head to the side over a bathtub or sink to allow the water (with wax) to flow out.

For safety purposes:

  • Be gentle to avoid eardrum injuries
  • Watch the water’s temperature
  • Avoid this method if you have an injury or a surgery, as this can impair your eardrum repair.

Use a hair dryer

The heat from a hair dryer can help break down and melt the wax in your ear canal. If you have some water in the ear, the dryer can help evaporate it and unclog the ear.

Here is how you do it:

  • Switch the blow dryer to its lowest setting
  • Hold it about one foot away from your ear opening and move it back and forth
  • Allow the warm air to blow into your ear.

Use oils

You can use a few drops of mineral oil, olive oil, glycerin, or baby oil to soften ear wax before washing it off. To get started:

  • Warm the oil in a small bowl. Test the temperature using your inner wrist
  • Using a dropper, add a few drops of baby oil or any other oil into the affected ear
  • Leave the oil in the ear for about 10 minutes before cleaning it off with a wet washcloth

Use vinegar or alcohol

Alcohol works well to evaporate water in your ear and get rid of the growth of bacteria, preventing fungal infections. If the trapped water results from an earwax buildup, white vinegar may be used to remove it.

To get started:

  • Combine equal amounts of vinegar and alcohol to make eardrops
  • Apply 3-4 drops of the mixture in your ear using a sterile dropper
  • Rub your ear’s outside gently
  • After 30 seconds, tilt your head sideways to let the earwax drain out

Again, avoid this method if you have middle ear infections, tympanostomy tubes (ear tubes), or a perforated eardrum.

Which methods should I avoid when cleaning my ears?

Not all earwax removal remedies are created equal. Professionals recommend staying away from these methods:

AVOID cotton swabs:

You shouldn’t insert cotton swabs into your ear canal. The swab will only push the earwax deeper, making it hard to clean if you do this.

Plus, you can rupture your eardrum if you push too much and too far. Scratching your ear canal can lead to inner and outer ear infections because bacteria and dirt can penetrate your skin.

Note: Avoid inserting stainless steel earwax tools, tweezers, bobby pins, or any other foreign object in your ear. These are some of the most common causes of hearing loss that can be avoided.

AVOID earwax removal candles:

Ear candling is a common practice, with people believing that it works in removing wax from the ears. However, the truth is that ear candles don’t work and can even burn you!

cleaning ears with hydrogen peroxide
Ear wax removal drops, dispenser

When to visit the doctor’s office

Too much wax can be a health issue, especially if it starts to cause symptoms or keeps your physician from doing a proper ear examination. If that is the case, you might have a medical condition called cerumen impaction, whose symptoms include:

  • The pain of feeling of fullness in the ear
  • Discharge, itching, or a foul smell coming from your ear
  • Tinnitus
  • Coughing
  • Dizziness

Ear health professionals advise that you seek medical attention if home remedies fail to work.

The bottom line

There you have it, lads: the safe ways to clean your ears using natural substances. Remember, earwax is necessary to protect you against infectious illnesses, so don’t always wash your ears.

This post details how to clean your ears with peroxide and other natural substances. I hope you liked our piece

Filed Under: Beauty, Health & Wellness

  • « Previous Page
  • 1
  • 2
  • 3
  • 4
  • …
  • 7
  • Next Page »

Popular How To’s

How to Contact TikTok About a Banned Account

How To Cook Frozen King Crab Legs

How to Pick a Mini Watermelon

How To Care For Air Plants

Categories

Food

Travel

DIY

Finance

Parenting

Technology


Copyright ©2026, How to Knowledge. All Rights Reserved. Custom design by Pixel Me Designs