• Parenting
  • Food
  • Do it Yourself

How to Knowledge

  • Travel
  • Finance
  • Technology
  • Home
  • DIY
  • Finance
  • Food
  • Parenting
  • Technology
  • Travel

How to Thicken Chili

April 13, 2022 Leave a comment

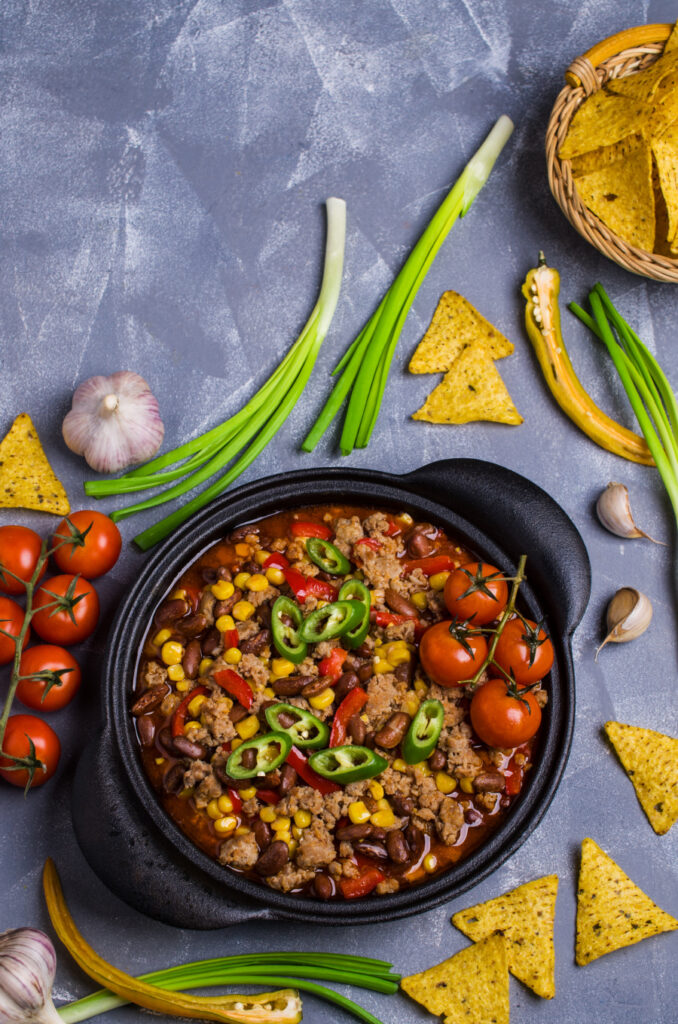
We can all agree on the same thing: there is nothing as better in overcoming your hunger pangs as a thick, hearty bowl of chili. Whether you serve it with cornbread, baked potatoes, or on its own, chili is the ultimate hearty meal that is surefire to warm your soul.

However, your chili may turn too watery – and that’s normal. The good news is that you can always turn your thin pot of chili into a thick one in several easy ways.

This post will look at the several causes of thin chili and how to thicken them.

a black bowl filled with thick chili

What is chili

Chili is a thick sauce with beans, meat, and spices, although you may add your favorite ingredients for a personal touch. Whichever ingredients you decide to add to your chili recipe, a longer cooking time can benefit your meal.

The best chili recipes allow for flexibility and versatility of the ingredients to produce the best flavors. The typical chili includes white chicken chili, turkey, and classic beef chili.

How you cook your chili may vary depending on your preferred equipment – like a Dutch oven, stockpot, slower cooker, or pressure cooker – and the time you have available. This is because every method demands different levels of cooking time and attention.

What causes thin chili?

Although several factors contribute to a thin chili, they all trace back to one main problem: lack of liquid evaporation, which occurs because of:

Too much stock:

Yes, beef or chicken stock will add flavor to your chili, but it can also make your mixture thin. Add solid ingredients like meat, veggies, and beans or let the chili cook for a longer time.

Short cooking times:

A short cooking time means that not all the water in your chili will evaporate. You may fix this problem by allowing the chili to simmer for longer, which works best to enhance your meal’s flavor.

Too many fresh tomatoes:

Fresh tomatoes are perfect for adding color and flavor to your chili recipes. However, the tomatoes may make your dish runny when heated.

If you find yourself with thin chili, you may fix the problem in several great ways, as we’ll see below.

How to Thicken Chili

Chili is personal, and everyone can have their favorite recipe. But whichever recipe you use, ensure you make the final product thick – it allows you to achieve the best flavors.

Here are 13 easy ways to turn your thin chili into a thick, flavorful dish:

Method #1: Remove the Lid

This is perhaps the easiest way to thicken your chili; remove the lid from the pot and allow your chili to simmer. Leave the meal to cook for about 20-30 minutes on low heat so that the excess liquid can evaporate.

Remember to maintain a low temperature, as too much heat will burn your chili into a bitter substance. Specifically, temperatures below 212 degrees F are recommended.

Method #2: Thicken your chili post cooking

You can serve your chili with crackers to make it less runny if you can’t wait for it to thicken up while cooking. Oyster crackers, crumbled saltine crackers, or other flavored crackers will be perfect for improving your meal.

You may use grated cheese, potato flakes, or cornbread, too.

Method #3: Add oats

Yup, oats, too, can serve your purpose to thicken the chili dish. In fact, it’s recommended over all-purpose flour or cornstarch, as it is healthier.

Add a tablespoon of quick oats to your chili dish and leave it to cook on medium-high heat for about three minutes. The oat will absorb the excess liquid, leaving you with a thick chili dish.

Method #4: Add xanthan gum

Xanthan gum is a sugar extracted from corn, wheat, and soy. The ingredient is mainly found in toothpaste, ice cream or bubblegum, although it’s also used as a stabilizer or thickening agent.

Xanthan is entirely flavorless, meaning it won’t affect the flavor of your chili.

To use the thickening agent, dilute a few tablespoons in cold water and add it to your runny chili meal. Adding the xanthan gum directly to the meal will create small lumps.

Method #5: Use masa harina

Masa harina is a type of flour obtained from dried corn kernels cooked and soaked in a lime solution to form hominy. The flour works perfectly to make your runny chili thicker.

Don’t mistake masa harina for cornmeal, however. Masa harina has a flour-like texture and a white shade.

To thicken your chili dish:

  1. Add two tablespoons of masa harina to your meal. Too much specialty corn flour can turn your chili dish into a solid stew.
  2. Wait for about 5-10 minutes and check for consistency
  3. Repeat the process if the chili is still watery

Method #6: Use cornmeal or polenta

Cornmeal or polenta is another perfect alternative to masa harina – they, too, absorb the excess liquid in the chili dish, leaving it thicker. Unlike masa harina, this alternative will leave your meal with graininess.

Mix one tablespoon of cornmeal or polenta with water and add it to the chili mix. Diluting it before adding it to the mix helps avoid a lumpy stew.

Method #7: Add corn chips

You may also use corn or tortilla chips to absorb the excess liquid in your chili and make it thicker. To use this method:

  1. Crumble the corn or tortilla chips
  2. Boil your chili and cook it over low heat
  3. Add the crushed tortilla or corn chips
  4. Stir for about 10 minutes, and the chili will have thickened.

Method #8: Add beans to your chili

Beans are also ideal thickening agents for chili. It’s a perfect alternative for individuals that don’t like using cornstarch or wheat flour.

To use beans as thickening agents:

  1. Grind them using a potato masher or a spoon. This will help the beans to release more starch to soak up the excess liquid
  2. If your beans have water, drain it
  3. Add the crushed beans to your chili
  4. Cook with low heat until your chili becomes thick.

Large beans like black beans, pinto beans, and kidney beans are the best thickening agents. Ensure you taste your chili and adjust your season to maintain a balanced flavor.

Method #9: Use wheat or corn starch

Corn starch and wheat flour have high levels of starch that will absorb the excess liquid in your chili, making it thicker. And the best thing about this method is that it doesn’t change your meal’s flavor.

To thicken your chili:

  1. Mix wheat flour or corn starch with water in a ratio of 1:2. Adding the powder directly will make your chili lumpy.
  2. Add the viscous mixture to the chili and stir.
  3. Heat it until the dough is cooked and the chili thickens.

Method 10: Use tomato paste

Using tomato paste is yet another best way to thicken your runny chili. In addition to enhancing your chili’s texture, this method improves its flavor.

To get started:

  1. Add about 6 ounces of paste, 2 ounces after several minutes, during the last 60 minutes of cooking
  2. If the paste makes your chili bitter, add a tablespoon of sugar to counterbalance it.

Method #11: Add cornflour

Corn flour is a refined form of cornmeal but with a rougher texture than masa harina. This product may also be used to thicken your chili.

To get started:

  1. Add about two tablespoons of flour (all-purpose flour) to a bowl and pour ¼ cup of cold water into the bowl.
  2. Stir well and add the mixture to your chili
  3. Allow it to cook on medium-high heat for several minutes. Keep stirring to avoid lumps in your chili

Method #12: Add more vegetables

This is one of the best methods because it improves your meal’s texture and adds nutrition. You may choose from various veggies, including onions, tomatoes, corn kernels, potatoes, and peppers.

Whether it’s mashed potatoes, small pieces of diced onions, or blended tomatoes, they’ll work perfectly to thicken your chili. The vegetable release starches as they cook, which works as a thickener agent and boost the meal’s flavors.

Method #13: Use pasta

If your chili isn’t thick enough, you may add uncooked noodles to soak up the excess liquid. For instance, you may add pasta to simmering chili to absorb the extra chili liquid.

Elbow macaroni, small shells, curly spirals, ziti, and penne are some pasta varieties to consider. Note that the pasta will cook for 8 to 12 minutes and become less effective after cooking.

Expectation vs. Reality

Knowing how to thicken your chili is one thing and actually doing it is another. If you want to have the best chili meal that tastes better, you should consider your ingredients and do it carefully.

Remember, you may not get the perfectly cooked chili the first time!

The bottom line

There you have it, folks – the 13 best, easiest ways to thicken your chili. Removing the lid and cooking your chili at a low temperature is the easiest, but all methods work perfectly to thicken your chili.

Good luck as you purpose to use this post to finesse your chili cooking skills.

Filed Under: Food

How to Get Rid of Stink Bug Smell

April 8, 2022 Leave a comment

The chances are you’ve also experienced it, too: you’re sitting on your back porch, enjoying your favorite meal or drink, and you notice a creepy brown insect. You squash it, and it releases one of the most foul smells you’ve ever come across!

Too bad! You’ve just killed a stink bug, and however hard you try to wash it, the stench won’t come off easily. The good news is that stink bug odor won’t harm you but will need to be removed nevertheless.

This article will discuss everything about stink bugs, including what they are, why they smell, and how to remove the odor from your hands, clothes, pets, etc.

Let’s get started!

a stink bug on a green leaf

What is a stink bug?

Stink bugs or shield bugs are pests believed to have originated from various east Asian countries, including Taiwan, China, South Korea, and Japan. The U.S. Environmental Protection Agency classifies stink bugs as invasive species, alongside fruit flies and hornets.

These bugs resemble the boxelder bugs and were accidentally introduced to the U.S through a shipping transportation system. You can expect to find them mainly in the mid-Atlantic region.

Thousands of species of stink bugs exist globally, with over 200 in the United States and Canada. The Brown Marmorated Stink Bugs (BMSB) are the most common in the United States and were first discovered in the late 1990s in North America.

Unlike ants and cockroaches, you won’t find Brown Marmorated stink bugs in your food sources. Instead, you’ll find them on house plants, ornamental shrubs like sunflowers, and other host plants, trying to suck the plant juices and destroying their beauty.

Adult stink bugs prefer warm places or warm weather and are thus more active in the spring and summer seasons. As the seasons change to winter, there will be no bug problem as the bugs become inactive due to the cold winter months and don’t reproduce.

The porch light also attracts the bugs, so if you have powerful light in your home, the chances are that they’ll be hiding there.

stink bug on a white flower

Why do stink bugs smell?

The stink bugs smell for a reason; they release the unpleasant odor and smell as a defense mechanism. The foul odor is meant to discourage and ward off predators when they are disturbed or threatened.

The Brown Marmorated Stink Bugs release the bad-smelling fluid through its scent glands. Unlike bed bugs that stink when squashed, the stink bug sprays the smelly fluid to cover several inches when you disturb, stress, or threaten it.

What do the stink bugs smell like?

Knowing how the stink bugs smell will help you tell when the insects are in your house. Different individuals describe the smell of the stink bug differently.

Generally, what you detect from the odor will differ depending on the stink bug species and your olfactory senses. For instance, some people describe the fluid released by stink bugs as fermenting sour apple, while others state it’s like a skunk emission or burn tires.

How long does the stink bug smell last?

The stink bug odor will last for several hours when you aggressively interact or squash them. However, the smell will last for a shorter time if you remove it soon enough.

Is the stink bug smell dangerous on skin and plants?

The stink bug odor is not dangerous to the skin but can irritate a selected few individuals who are allergic to the fluid. However, the fluid has an unpleasant smell that most people can’t handle or perceive.

The stink bugs are not harmful to your skin, hands, house, pets, or clothes. The bugs don’t bite, and their secretion isn’t toxic but will be sticky to your pets or clothes.

However, the pests are dangerous to indoor plants and can cause plant structural damage without proper stink bug control measures. The bug attacks garden produce and will lead to total losses of tomato plantations.

The bugs may also cause agricultural damage to beans, green peppers, and fruits like peaches and berries. Generally, the destruction of crops and the odor produced are the most severe stink bugs’ effects you should worry about.

stink bug on white background

How do I remove the stink bug smell?

Although the stink bugs won’t harm you, your pets, or your clothes, their smell can be unbearable. The good news is you have numerous ways to get rid of the stink bug smell.

Below are ways you can use to remove the unpleasant odor:

Method #1: Scrub the affected surface

If you mistakenly squash the stink bug with your hand, the best way to get rid of the foul smell is to scrub the affected area repeatedly. Scrub the surface you squashed the bug against to remove the unpleasant odor if it’s in the house.

You may scrub the affected surfaces as directed below:

  1. Scrub using toothpaste and warm water: Apply little toothpaste to the affected spot and rub it using your fingers. Then, wash and rinse off your hands with warm water.
  2. Use lemon juice or other juices: Pour the juice into a bowl and use it to scrub the affected area. Then, rinse your skin using warm water, and the smell will be gone.

Method #2: Ventilate the room

Ventilation is one of the simplest yet effective ways of removing the unpleasant smell from your house. Let fresh air replace the stale, unpleasant smell in your home by opening as many windows and doors as possible.

You may also create a mixture of baking soda, mild dish soap, and hydrogen peroxide to deodorize your furnishings.

Method #3: Use odor eliminators

If the stink bug’s foul smell is stuck inside your home, the best way to remove it is to overpower it. And creating your own strong odor eliminator is the best bet you have.

To do this:

  • Soak a cotton ball in peppermint and lemon extract
  • Put the damp cotton ball into a glass jar with a lid and holes drilled at the top

You may also use several fresh, unused coffee grounds. Put them in clean pantyhose and hang them in the room – they’ll also work perfectly to kick out the foul smell.

Method 4: Prevent the stink bugs from getting to your house

The easiest and most effective method to keep the stink bug smell from your house is to stop them from entering your house. The national pest management association offers simple yet effective techniques that an average homeowner can use to ward off these agricultural pests. They include:

Examine the entry points:

A good place to start preventing bugs from getting into your house is checking all the possible entry points and sealing them. Give special attention to door and window frames, exterior wood sidings, electrical outlets, light fixtures, and fix any broken window pane.

Seal up any crawl spaces using caulk (a silicone-based formula), or call in a professional to fix the larger entry points.

Use chemicals:

If you still notice the stink bugs in your home even after sealing the possible entry points, it may be time to use chemicals. Most chemical sprays have deltamethrin, a pesticide product that kills stink bugs.

Use a spray bottle to apply the bug spray around the windows, door frames, and other possible points of entry. However, be careful handling chemicals, as most of them can be harmful.

Pest control professionals also recommend rubbing your window sills and window screens with pungent dryer sheets and draping a damp paper towel over a lawn chair to attract bugs and dispose of them in soapy water.

Assess your exterior lighting:

As mentioned above, stinks bugs are attracted to light. To keep the insects away, switch out the exterior light bulbs for sodium-vapor lights or yellow bulbs, which are less attractive to these household pests.

You may also use a light trap to catch the home stink bugs. Put a powerful light in your backyard, and the pests will come out, then pick them up using a bagless vacuum.

Try home remedies

You may also use natural elements in your home to keep off or trap the stink bugs. For instance, a simple combination of dish soap, hot water, and white vinegar or hydrogen peroxide helps ward off and trap stink bugs.

Fill a spray bottle with 1 cup of white vinegar or 1 quart of 3-percent hydrogen peroxide, 2 cups of hot water, and ½ cup of dish soap, and spray the bugs.

Using Essential oils like mint is a natural method to keep stink bugs away. Mint produces a strong aroma that stink bugs hate, thus, acting as a repellent.

Using vacuum cleaner:

You may also get rid of the stink bugs from your home using a vacuum cleaner. Here is how you do it:

  1. If you see a shield bug in your house, do not touch or squash it, as it will produce an unpleasant smell.
  2. Grab them gently using a plastic bag and take them outside to kill them. Alternatively, you can also flush the dead stink bugs in the toilet.
  3. Vacuum them using a vacuum cleaner (if you have one). Once you’ve sucked up the bugs, remove the vacuum bag and put it in the outdoor trash.

This is an easy technique to dispose of the bugs from your home.

Enlist the help of an expert:

If the stink bug infestation doesn’t end in your home, it might be time to contact reliable and knowledgeable pest control experts. These individuals have developed the most effective and lasting stink bug removal solutions for residents.

How do I remove the stink bug smell on clothes and pets?

Yes, the stink bug’s foul odor can get into your clothes and pets! The tiny insects spray their defensive bad-smelling fluid, and if it’s you or your pet they’re defending themselves from, you’ll get hit.

The best thing is that there different ways to remove the smell from your clothes or pets. For instance, you may wash your clothes or pets, and the unpleasant odor will come off easily.

If the unpleasant fluid gets to your furniture or other fabric items, you may use a vacuum cleaner to remove the stink.

The bottom line

Although the stink bug smell can cause severe nuisance or be offensive, it’s not dangerous. Of course, getting the smell does mean you have stink bugs in your home, and that’s a problem you’ll need to handle.

This post provides several methods to eliminate the stink bug smell from your home, hands, clothes, and pets. It also equips the reader with some of the best techniques to prevent the stink bug pest infestation.

Filed Under: DIY

How To Cook Tamales In The Oven

April 5, 2022 Leave a comment

I know Thaumatin is the sweetest substance in the world, but have you tried fresh Tamales served directly from the oven? I bet you’ll sign a petition to have it added to the list of the sweetest substances in the world after trying it.

Named one of the world’s oldest foods, Tamales are made from corn dough known as masa. The dough is filled with various substances like veggies, fruits, and meat, and then the concoction is steamed in a banana leaf or corn husk.

Homemade Corn and Chicken Tamales Ready to Eat

Whether you’ve tasted Tamales or it’s your first time hearing about them, you probably would benefit from knowing how to cook them. It takes lots of time, but the good news is the investment is worth it.

This post will take you through several easy ways to cook Tamales in your home. But before that, let’s first see what the Tamales are and where they originate from.

Let’s dive right in!

What are Tamales?

Popular among the ancient Mesoamerican cultures like Mayans and Aztecs, Tamales date back to 8000 to 5000 B.C. They feature corn-based dough called masa wrapped around a filling and steamed in banana leaves or corn husk and are common among Mexican delicacies.

Tamales were traditionally filled with either pork, chicken, cheese, beef, or beans, but people add whatever they wish to the recipe. You can add veggies, various cereals, or anything else that you love.

Homemade Corn and Chicken Tamales Ready to Eat

What you need to cook Tamales in the oven

Cooking Tamales in the oven requires a few steps and some time, but the final results are worth the effort. To get started, you’ll need a few ingredients and tools, including:

Dried corn husks:

You’ll need husks that are wide enough to wrap around your tamale fillings. You may buy these corn husks online or in the Mexican or produce section at your local grocery store.

Masa ingredients:

You’ll need a few ingredients to make the masa dough, including:

  • Masa harina
  • Avocado, corn, or olive oil
  • Stock: Beef, chicken, pork, beans, veggies – whatever you want!
  • Salt, ground cumin, and baking powder to season your masa dough

You could also add additional flavors to your masa as you wish.

fresh tamales stacked on grey plate

Filling

You can fill this traditional Mexican dish with almost anything, from meat to veggies. They are perfect for using leftover meat, veggies, taco fillings, cheese, beans, etc.

You’ll need about 2-3 cups to fill your recipe, so feel free to use whatever works. You may use chicken, pork, beef, refried beans, cheese, veggies, etc.

Sauce

If your filling recipe has sauce, you may not have to add extra sauce. However, if you’re preparing meat or veggies filling, an extra sauce is crucial to add some flavor.

Salsa bought from stores is often recommended, but you may also make it at home. Some of the salsa sauces you may add to your Tamales include red salsa, green salsa, Enchilada sauce, mole, etc.

Toppings

Once your Tamales are cooked, you may load them with toppings to add to their flavor. The toppings are optional, but it’s recommended to use any combination of avocado, pico de gallo, sour cream, chopped cilantro, etc.

How do I cook Tamales in the oven?

Once the ingredients are ready, you can proceed to prepare and cook perfect Tamales. Here’s the whole process to follow:

Step #1: Assemble your Tamales

Assembling your Tamales is easy. All you need is the corn husks, your filling of choice, and Tamale dough, and then you can assemble your tamales as follows:

  1. Soak your corn husks wrappers: Find a big baking pan or a large stockpot, add several cups of water, and cover it with a lid. Leave the corn husks submerged for about 30 minutes or until softened.
  2. Mix up your masa (dough): Mix your masa using a stand mixer, a hand mixer, or hands. Mix it according to your recipe guidelines, cover it using a damp paper towel, and then refrigerate it until ready to use.
  3. Prepare your salsa and fillings: Prepare both the salsa and filling, then toss them in a bowl.
  4. Assemble the Tamales: This part may take a while, but it’s all easy if you follow the guidelines below:
  • Place the soaked corn husk on a flat surface such as a cutting board or a plate
  • Spread about a ¼ cup of masa dough on the corn husk and spread it into a rectangle using your finger or a spoon. This shape allows you to enclose your filling.
  • Add about one or two tablespoons of sauce/filling to the center of the masa dough
  • Fold the corn husk vertically to completely wrap the masa dough around the filling.
  • Wrap your corn husk until it achieves the shape of a little burrito/cylinder
  • Fold the skinny end to enclose one end of the tamal
  • Tie the tamal together

Once you’ve assembled your Tamales, you can proceed to cook them as outlined in the following steps.

Step #2: Prep your oven

Preheat your oven to medium heat to prepare it to cook your Tamales. Place the steamer rack into your oven if you have one.

Step #3: Cook your Tamales

Wrap your Tamales in several layers of aluminum foil and arrange them in the oven. Then, set your oven to about 425 degrees Fahrenheit and leave your Tamales to cook for about 15-20 minutes.

You can tell when the Tamales are ready when the corn husk changes color from white to off-yellow or when the cornflour isn’t mushy.

Step #4: Remove your Tamales

After the 15-20 minutes, or when the Tamales are cooked evenly, remove them from the oven and serve them how you like them.

Note: If you don’t have a conventional oven, you can make an improvised one using the Dutch oven or a casserole dish. If that’s the case, cook your Tamales as follows:

  • Put a steamer wire rack inside the Dutch oven or casserole dish and arrange your Tamales with the open end facing upwards.
  • Add boiling water and steam the Tamales for about 40-60 minutes to cook.
  • Don’t increase the oven’s temperature to avoid drying out the Tamales.

Other best ways to cook Tamales

Cooking perfect Tamales in an Instant Pot

An instant pot is a slow cooker, a pressure cooker, a yogurt maker, and a rice cooker all in one package. Instant pots allow you to cook and reheat your Tamales in much less time while improving their flavors.

Once your Instant Pot achieves high heat, dampen your Tamales and leave them to warm for about 10 minutes. Ensure they are spaced apart so that they’ll all be well-cooked.

Cooking Tamales in a Microwave steamer

Microwave steamer is your best bet if you have serious Tamale cravings and want a quick method to cook or reheat them. To achieve the ideal microwave Tamales, wrap them in a damp paper towel and arrange them on a microwave-safe plate.

Leave them to heat for about one to two minutes or more for raw Tamales, and then serve them how you like them. However, remember to be careful with the steaming process because this method risks drying your Tamales out. If you want moist tamales, watch out for the cooking time.

Cooking delicious Tamales using a deep fryer

This is a reliable alternative to achieving the crispiest and thickest Tamales. However, this method will increase the meal’s calories.

Here is a step-by-step method to cook your Tamales using the deep fryer:

  1. Remove your Tamales from the freezer, leaving them in the refrigerator to unfreeze.
  2. Set your deep fryer to medium heat and leave it to preheat for some time. Cooking in cold oil will leave you with limp and soggy Tamales
  3. Remove the corn husk and pat down your Tamales using a damp paper towel. This allows you to remove extra moisture that can cause the oil to bubble and pop.
  4. Place the Tamales into the deep fryer using metal tongs, leaving them submerged in the oil. Don’t drop the Tamales to avoid sustaining burns.
  5. Leave the Tamales to cook for about 2-3 minutes, or until they turn golden brown with a nice fried coating.
  6. Remove the Tamales from the deep fryer oil and leave them to cool

Note: An air fryer works just as perfect as a deep fryer to cook Tamales

How do I reheat my Tamales?

If you buy pre-cooked frozen Tamales or leftover Tamales, you can reheat them through different methods. For instance, you may use a stovetop, an oven, a microwave, or a steamer basket to reheat your Tamales.

Some best ways to reheat your Tamales include:

  1. Remove your Tamales from the bad and place them in the hot steamer for about 15-20 minutes. Leave them for a longer time if they’re frozen
  2. If you’re using an oven, preheat it to 325 degrees F. Then, remove the Tamales from the plastic wrapping, wrap them in foil, place them on the sheet pan, and leave them to bake for about 15-20 minutes.
  3. For the microwave, make a hole in the bag. Leave it in the microwave for 3-4 minutes.

Final thoughts

Tamales are some of the most ancient Mexican delicacies. They are made using a corn-based dough (masa) and filled with chicken, beef, cheese, beans, veggies, chili, or other sweet fillings.

This post provides step-by-step instructions to cook and preheat Tamales at home using the oven, deep fryer, microwave, and instant pot. Good luck as you purpose to make delicious homemade Tamales for your family or friends!

Filed Under: Food

How to Cook Fresh Kielbasa

April 4, 2022 Leave a comment

Visiting any deli near you can make your taste buds dance in excitement. The colorful variety of meats on display make you want to try each.

Oh, and the smell of a delicious Kielbasa invites you to try it. And once you taste it, there is no going back to eating regular sausages.

The good news is that you can always cook fresh Kielbasa at home and enjoy it whenever you wish. All you need is the right ingredients, tools, and the proper instructions on cooking Kielbasa.

This post will look at what Kielbasa is and provide you with easy ways to cook it at home.

Feel free to jump ahead!

What’s a Kielbasa?

Kielbasa is one of the most popular and best food in Poland. People worldwide love it, and here is why: it’s tasty, filling, and is made from the highest quality meat.

The traditional Polish Kielbasa is made of pork meat. However, you can purchase Kielbasa made of fish, poultry, and even vegetarian Kielbasa.

There are many types of Kielbasa, with the most famous ones being zwyczajna, wiejska, biala kielbasa, parowki, kaszanka, serdelki, kabanosy, etc.

Buying fresh Kielbasa

You can buy fresh smoked Kielbasa in supermarkets near you, including Walmart. Go to the sausage sections and look for a white kielbasa sausage with encased tubing.

The fresh polish Kielbasa will likely be wrapped in a plastic bag like other fresh ground meat. Ensure you confirm its date of expiry before paying for it.

If your local market doesn’t sell fresh Kielbasa, don’t fret. You can easily make your own Kielbasa at home, as discussed below:

Making a Kielbasa at home

To make a fresh homemade Kielbasa is very easy. You’ll need hog casing, black pepper, four pounds of well-marbled hog meat, garlic cloves, and teaspoon marjoram.

Grind the raw pork and mix it with spices – adding your favorite spices will make your sausage unique and tasty. Make a small batch of the sausages first to ensure that you get the right spices and the proper proportions.

Once you finish making your fresh Kielbasa sausages, you’re now ready to cook them. Let’s see how to cook a fresh homemade Kielbasa.

How to cook Kielbasa

Perfectly cooked Kielbasa is flavorful, sweet, and filling, giving you all the reasons to cook it again and again. We want you to have the best homemade Kielbasa, so we made a step-by-step guide for you.

But before we look at the procedure, let’s first look at the appliances you need to get started.

What you need

Stove:

Also known as a gas range, cooker, or ranger, a stove is a kitchen appliance that depends on direct heat to cook a meal. In most cases, the stove has an oven companion.

Oven:

This is the thermally insulated cooking appliance used for baking, heating, and drying substances. You may buy an oven from your local store or supermarket.

Slower cooker:

Also known as a crock-pot, a slower cooker is a countertop kitchen electrical appliance used to simmer at low temperatures. This device cooks food by boiling, baking, roasting, and broiling.

Saucepan:

Mainly used for boiling and stewing, this round pan has depth and straight sides.

Skillet:

Commonly known as a frying pan, a skillet is a kitchen appliance that has slanted sides, making it ideal for quick cooking and stir-frying.

Barbecue grill:

This kitchen appliance uses applied heat from below to cook meals. There are several barbecue grills, including electric grills, charcoal grills, and gas grills.

Step-by-step procedure

Before cooking your fresh Kielbasa, make sure that it is completely unfrozen. You may leave it to unfreeze for about an hour or so.

Once it’s unfrozen, you can begin cooking it as follows:

Preparing your fresh Kielbasa sausage by boiling it

This is perhaps the easiest and most common method of preparing a Kielbasa. To get started, you’ll need a cooking pan, enough water, spices, and natural flavors, and you can cook it as follows:

  1. Place your fresh Kielbasa sausage into a cooking pan and add your spices and flavors, including onion slices, garlic cloves, and peppercorns. Then, add the right amount of water into it.
  2. Set your burner to medium settings and place your pan onto it.
  3. Let the water boil for 20-50 minutes, after which you should lower the heat.
  4. Cover the pan, simmer the sausage on top of your stove and leave it for about 25-30 minutes until the water is gone.
  5. If water remains on the pan, drain it and serve your sausage on a plate. You can store your sausage for about three weeks to one month in a fridge.

Note: Although fast, this cooking method is not always recommended as your Kiebalsa sausage may lose some flavor.

Browning your Kielbasa Sausage

After boiling and preparing your sausage, you may brown it to improve its taste. You may do this using several cooking methods, including slow-cooking, oven-backing, pan-frying, and grilling.

Here is a step-by-step method for browning your Kielbasa sausage:

Method #1: Oven-Baking
  1. Preheat your oven to around 400 degrees F
  2. Add a tiny amount of oil to coat your baking pan and place your Kielbasa sausage inside
  3. Place the oven on an oven
  4. Leave your Kielbasa sausage to cook for 15-20 minutes
  5. When the Kielbasa’s outer skin expands and splits, remove the pan from the oven and serve the sausage with your favorite meal
Method #2: Slow-Cooking
  1. Cut your fresh Kielbasa sausage into 1-inch pieces
  2. Add one can of sauerkraut onto your slow-cooker
  3. Add enough water and place your sausage in the cooker. You may also use beer in the place of water
  4. Cook on low heat for about 5 to 6 hours, until the meat is soft and tender
  5. Remove it from the cooker and serve it how you like it the best.
Method #3: Pan-frying
  1. Add little oil onto a saute pan or hot skillet, spreading it to cover the pan
  2. Set your stove to medium heat.
  3. Cut your sausages into slices of your choice.
  4. Place your sausage slices onto the frying pan, place them on the stove, and leave them for some time to cook. Turn the sausage slices after around a minute and a half
  5. Once both sides are brown, serve your Kielbasa how you like.
Method #4: Grilling

This is a popular way of cooking Kielbasa. To grill your authentic Polish sausage:

  1. Set your grill to a medium-high setting and leave it for some minutes to preheat. If you’re using a charcoal grill, hold your hand about five inches above the grill to test if it’s preheated
  2. On the hot grill, begin grilling your sausage by flipping once until it’s browned and heated through. One side may take about 5-10 minutes, depending on the heat you apply.
  3. Once the sausage turns brown, serve it how you like the best.

How do I know if my Polish sausage is cooked?

Uncooked Kielbasa sausage may lead to several health complications, including trichinosis. So, make sure that your Kielbasa is well-cooked before enjoying it.

Here are the best ways to tell if the pork sausage is well cooked:

  • If the little pink color on your sausage disappears
  • If the meat’s internal temperature is 165 degrees. You can use the meat thermometer to test the temperature.
  • If the sausage’s outer skin turns rough and it explodes while cooking

Helpful tips

You can cut your polish sausage into round-sized pieces and place them inside pastry dough or rye bread for a treat. Apply small amounts of melted butter to the outside of the dough.

Then, bake your sausage inside the oven for about 20 minutes at 400 degrees F. it’ll turn brown when fully cooked.

You can then add brown mustard sauce and extra flavor when serving your sausage. You may use pepper, salt, coriander, ginger, sugar, onion, sage, and garlic for your spices and seasoning.

Serving Kielbasa

Kielbasa sausage is best served on a plate or roll with horseradish, mustard, or sauerkraut. However, you can also combine it with other stews, casseroles, soups, and sauces.

It’s gratifying to try your Kielbasa with different recipes – you may discover something better!

Can you eat Kielbasa raw?

You may or may not eat your sausage raw, depending on the type of sausage. If the meat is dry-cured, you can eat it raw.

Otherwise, cook your Kielbasa sausage well before eating it.

The Kielbasa sausage is typically smoked sausage which is cooked before packaging in the U.S. This is the same as the American hot dogs that are fully cooked before packaging instead of raw sausage links.

Final thoughts

There you have it, guys: the different easy ways to cook a fresh homemade Kielbasa sausage. After boiling it, you may grill, bake, fry, or slow cook it, depending on your preference.

Now it’s your turn to try cooking the Fresh Kielbasa sausage. Have fun!

Filed Under: Food

How to Propagate a Spider Plant

April 3, 2022 Leave a comment

If you’ve never grown a spider plant in your home, you’re missing out. These fairly common houseplants have “spiderettes” that hang down off the main plant and give off the appearance of a bunch of little spiders.

a spider plant in a white planter

The long, thin foliage of the spider plant is either solid green or streaked with white. The plant is simple to grow and take care of, which is why it is so popular for novice plant-owners.

The spiderettes, or offshoots, of the spider plant, flower in the summer and, if the flower is not pollinated, babies grow out of the little white flowers. Those that are pollinated produce seeds instead of sprouts.

Sprouts grow rapidly and can easily be propagated when their roots reach a certain size. Propagating a spider plant means collecting cuttings of sprouts from the spiderettes in order to grow more plants.

While it is quite easy to propagate spider plants, it’s still important to learn how and when to do it in order to keep the plant healthy and ensure new growth.

Keep in mind that the first and most important step of spider plant propagation is just the basic care of your plant. Without a healthy, strong, and well-grown spider plant, you won’t be able to propagate and grow more.

Here’s what you need to know about propagating a spider plant and transforming those little “spider babies” into their own plants:

When Should a Spider Plant be Propagated?

If you’ve been taking good care of your spider plant and the spiderettes are beginning to flower and grow those little sprouts, you’re getting close to propagation and growing new plants.

Pay attention to those new little shoots. As soon as they start growing their own roots, and their roots have reached a size that is sustainable, they’re ready to be propagated.

If you choose to propagate your spider plant, make sure the roots of the offshoots are strong. The best time of year for propagation is the spring and summer, which is the active growing season for spider plants, however, it can be done any time of the year.

propogating baby spider plant, recently cut off and ready to plant.

What Should I Do to Propagate a Spider Plant?

Once you have determined that the roots of the baby plants have grown to a sustainable size, it’s time to propagate. Cut the sprouts off from the parent plant carefully, so as not to damage the plant.

You can cut the spider plant from the mother anywhere on the sprout. However, you might want to attempt to cut them close to the spiderettes to avoid an excess, ugly stem from remaining.

If you do leave a stem, feel free to prune it back to the spiderette or main plant. Once you’ve cut the sprout off, nothing new will grow.

Oftentimes, people are concerned that their sprouts are not ready due to their smaller size. It is a misconception that the sprout itself needs to be large and strong before it can be propagated.

The most important part of growing a spider plant is the roots. With healthy and strong roots, you should be able to grow a plant with a long, happy life.

Instead of focusing on the sprout, keep your eye on the roots. No matter what size your sprouts are, if the roots are beginning to grow to a sustainable size, the sprout is ready for propagation.

You can either plant the sprout in soil or in a clear jar of water. People use the clear jar of water if they want to be able to see the roots of the plant growing.

Rooting Spider Plant Babies in Water

This is the easiest and fastest way to propagate your spider plants and strengthen their roots. However, if you use this method, be aware that your spider plant babies will be a bit weaker and will need to be very carefully transplanted into soil eventually.

Before you submerge the roots in water, make sure to remove any leaves that are growing under the roots or at the base of the sprout. If there is any foliage submerged under water, it will rot and could end up damaging the entire plant.

Fill the clear jar or vase with only enough water to cover the roots of the spider plant baby. If there is too much water, the sprout will be submerged too much, and will rot.

If you decide to use a jar of water to grow the roots, you’ll eventually need to transfer the plant to soil. When the roots have grown to about two inches, it’s time to move it into the soil to give it a more permanent growing area.

The spider babies will need a great deal of recovery time after being transferred into soil. Make sure and give them extra care, time, and attention as their roots begin to grow and take hold.

a spider plant in a white pot on a table

Rooting Spider Plant Babies in Soil

Plants that are rooted in soil are stronger and have a smaller risk of dying from transplant shock than those initially rooted in water. If you decide to plant your spider plant babies directly in soil after removing it from the main plant, you can either use pots or a propagation chamber.

Propagation chambers are helpful for quick, strong root growth because they keep the humidity level high, causing faster rooting. You can purchase a propagation chamber or make your own.

If you make your own chamber, add heat on the bottom and use a light soil mix, such as pumice, peat moss, or vermiculite. Regular soil will be too heavy for the babies, stifling them and making it harder to grow.

Pots can also be used for rooting spider plant babies in soil. The pots that you use for your sprouts should be small.

Smaller sprouts can share a small pot, while larger sprouts will need their own small pot for growth. The small pot is key because spider plants love to be in confined spaces, which stimulates their growth.

These sprouts grow quickly and their roots will strengthen, taking up the pot and winding their roots all over the place. This is important for the overall health of the plant, which is why using small pots is essential.

After Spider Plant Propagation

As the roots continue to grow, they continue to take up the space in the jar, pot, or propagation chamber. Eventually, it will be time for transplantation.

When transplanting spider plant sprouts, you can use a general soil. At this point, the roots should be strong enough to withstand the heaviness.

Make sure and give the newly planted sprouts water as they get accommodated with their new home. Don’t overwater them, but keep the soil evenly moist as they get established in their pot.

Another option for watering is to lightly mist the pots every day. This helps to keep the soil moist and prevents overwatering.

Transplantation can be traumatic for your growing spider plants, so make sure you’re checking on them regularly.

If your plant was transplanted from water, you need to give it extra care and attention, as it will be weaker than those that were in soil. In fact, these cuttings may actually droop when first transplanted, however, they should perk back up after just a few days.

When you finally start to see new growth on your plant, you can breathe easy. You no longer have a baby!

This is the sign that your spider plant is strong and established. You can begin to provide regular spider plant care and watch it flourish!

Looking for another plant? Check out How to Plant Easter Lillies.

Filed Under: DIY

How to Grow Strawberries Indoors

April 1, 2022 Leave a comment

A strawberry is one of the world’s most popular and healthiest fruits. Fresh, hand-picked strawberries are a delicacy, and you can use them in so many ways – turn them into jam, eat them straight from the garden, or even for your skincare routine.

You may be telling yourself that you can’t grow strawberries at home because you don’t have enough outdoor space, but you’re actually wrong! The good news is strawberries are surprisingly easy to grow both indoors and in the outdoor garden.

This post will take you through a few steps on how to plant, grow, care for, and harvest strawberries indoors.

Let’s get started!

single strawberry growing indoors

How do I grow strawberries indoors?

Growing strawberries indoors is one of the easiest options for you. It allows you to control such factors as temperature and light and eliminates the outdoor pests whose primary purpose is to keep you from enjoying your strawberries.

If you’re not sure how to plant and grow strawberries indoors, don’t fret. Here are ten important steps to help you plant, grow, care for and harvest your strawberries indoors:

Step #1: Choose the best variety of strawberries

There are hundreds of different varieties of strawberries worldwide, stemming from a few original species. These varieties differ in size, taste, canning methods, freezing techniques, container growing, etc.

For instance, the June-bearing varieties produce large-sized berries and are resistant to soil-borne diseases. On the other hand, the sparkle varieties have an intense flavor and medium-sized fruits.

For container growing, the day-neutral strawberry plants are among the best varieties of strawberries. They’re flavorful, smaller in size, and produce sweet but small fruits.

Here are a few reasons why day-neutral varieties are the best option for indoor planting:

  • They produce delicious fruits all year round in specific climates.
  • They grow in the wild, where they only see a few hours of sunlight and under harsh weather conditions.
  • They remain compact and doesn’t produce runner, making them ideal for limited indoor space
  • They produce small but very fragrant and sweet fruits.

Among the most recommended day-neutral strawberry varieties for indoor planting is the alpine strawberry. They’re an excellent fit because they cluster together, maintaining a compact shape.

Alpine strawberries are also vigorous plants that can survive in harsh weather conditions. They’re also known for their intense flavor and fragrance.

hands holding strawberry plant indoors

Step #2: Choose the perfect location for your strawberry

Any vegetable or fruit plant grows the best in full sun – and the strawberry plant is not different. Place your strawberry plants close to the glass door or on a sunny windowsill.

The strawberry plant should receive at least 5-6 hours of direct sunlight. If the supply of natural light is low, place the plant under artificial light for not more than 16 hours per day.

Ensure you don’t place your plants close to hot and cool air vents of heaters and air conditioners. Also, choose an area where the plant can grow to 12 inches.

Step #3: Propagation

Propagation is the process of increasing the number of plants of a specific cultivar or species. It’s reproducing plants into new plants.

You can propagate the strawberry plant in three different ways, including using strawberry seeds, using runners, or by plant division. Let’s see how to propagate using each of these methods:

Propagating strawberries by runners

A strawberry plant produces several runners – the horizontal stems attached to plants with new strawberry plants emerging at the end. The runners develop a shallow root system and form beautiful new strawberry plants when they contact the soil.

Propagating strawberry plants by plant division

Strawberry plants may naturally put out lateral crowns at the base of the plant. These crowns can be divided and replanted to give rise to a new plant.

Also, under ideal conditions, the genetically generative strawberry rhizomes can be divided into several pieces, with each being enough to grow into a new plant.

Propagating strawberry plants with strawberry seeds

This is perhaps the easiest and most effective method of propagating the strawberry plant. It involves growing a new plant from the strawberry plant seeds.

Here are a few tips to help you prepare your strawberry seeds:

  • Dehydrate a strawberry fruit. One fruit has about 200 seeds on its skin, which will be enough for indoor planting.
  • Use a toothpick to remove the seeds from the dry strawberry fruit.
  • Wash the strawberry seeds using cool water to remove the juice
  • Dry them using paper towels
  • Store the seeds in a cool, dry place. Rotate the seeds and change the paper towels until the seeds are scorched.

Note: you can buy strawberry plants from a nursery, but it is more fun and satisfying to propagate them yourself.

strawberry plants growing indoors

Step #4: Preparing the soil

Soil preparation plays a crucial role in your plant’s optimal growth. So, provide your strawberry seeds or plants with the nutritious soil they need.

The best soil type for strawberry plants is loam or sandy soil, with a little bit of clay and organic matter. Soil pH of 5.3 to 6.5 is recommended, but neutral soil can also suffice.

Organic compost, humus, peat moss, or well-rotated manure do magic when added on top of the soil. You may also add eggshells and coffee grounds to increase potassium and acidity.

Step #5: Preparing the planter or container

Your container choice may be affected by your plant’s location. For instance, if your strawberry plant will go on the windowsill, you should use a rectangular container to maximize the plant’s growing space.

On the other hand, if you have little space in your home, you may use hanging baskets. Hanging pots and baskets may also add to your home’s classy appearance.

However, whichever container you use, ensure it has drainage holes. Too much water can lead to root rot.

Strawberries have short roots, meaning a small container of approximately 5 inches will be enough. Fill the planter with about 4 inches of soil to prepare to add seeds.

Step #6: Planting the seeds

Place about two strawberry seeds in a container, spacing them at least 18 inches from each other. Overcrowding the plants can lead to fungal diseases, among other problems.

Do not bury the seeds. Instead, place them on the soil surface and put the container in an area with access to the right amount of light (ample hours of direct sunlight.)

You should see the strawberry seedlings in about 2 to 3 weeks if you follow these simple steps.

Step #7: Watering your strawberry plants

Strawberries plants are resilient, but they don’t perform well with underwatering or overwatering. Keep the soil slightly moist at all times but not overly drenched.

You may use your hands to check whether or not the strawberry plant needs watering. If there isn’t much light and the air around the plants is damp and cold, water only when the top of the soil is dry.

Morning hours are the best time for watering all plants, including strawberries. Don’t forget to use a container with good drainage

Step #8: Fertilize your strawberry plants

Like most indoor plants, the strawberry plants are hungry and thrive when fed with fertilizer. Use fertilizer every two weeks when the plant begins to grow a flower for the best results.

Choose organic fertilizer that’s safe for strawberry fruits. You don’t want to add chemicals to the fruits you’ll eat later.

Minimize the fertilizer dose and increase the duration between consecutive feeding when the plants begin to show symptoms of overfertilization. This includes brown leaf tips, yellowing leaves, or several dead leaves.

Step #9: Harvesting your strawberry fruits

You should have ripe strawberries a month after fertilizing if you follow these steps. The best thing to do with the ripe fruits is to harvest them and enjoy them in a strawberry shortcake or however you like them.

Don’t forget that over-ripe strawberries rot easily and attract insects, so harvest them as soon as they ripe.

You may store your fresh strawberries in the refrigerator to preserve them for a long time. Remember to wash them before using them.

Step #10: Repeat the process.

Want to enjoy the fruits all year long? Repeat the process in early summer and Spring.

Other care tips

Here are a few more tips for caring for your strawberry plants:

Tip #1: Pests and Diseases

Perhaps the best thing about indoor strawberry plants is that you don’t have to worry about pests and diseases. However, you still need to watch for common garden pests like aphids and spider mites.

Tip #2: Pruning

Prune the runners when they appear to direct the plant’s energy on the growth and production of more fresh strawberries. Also, do away with the unwanted flowers and dead leaves.

Prune your indoor strawberries after the fruiting season. You can remove all the foliage except the central young leaves.

Tip 3: Pollination

Remember, there are minimal or no agents of pollination in the house, so it’s for you to pollinate the strawberry flowers. Use a soft brush to transfer the pollen from one flower or plant to another.

The bottom line

Strawberries have innumerable benefits to the human body, from supplying it with Vitamin C to protecting your heart and increasing the good cholesterol in the body. This post provides you with steps and tips to grow your own strawberries at home.

Good luck as you purpose to use it to harness the benefits of Strawberries.

Filed Under: DIY, Food

How To Clean Shower Drain Of Hair

March 30, 2022 Leave a comment

We’ve all been there: you step into the shower, get the water running, and notice water backing up in your shower drain! If such a thing happens to you, you have a clogged plumbing vent, and you’ll need to deal with it.

Hair is the top culprit for clogged drains. Unfortunately, no matter how hard you try to avoid it, hair will inevitably get into your shower drain.

The good news is that you can clean the shower drain of hair. This post will take you through the six easy ways to clear a hair-clogged drain.

Let’s get started!

woman pulling hair out of shower drain

How do I clean the shower drain of hair?

Nobody likes to unclog hair from the drain – it’s disgusting. Some individuals gag at the sight of strands of hair trapped between their fingers as they lift it from the drain.

If you’re among the individuals that hate unclogging shower drain of hair, maybe these methods can help you:

Use boiling water

This is one of the easiest and most effective ways to remove hair from the drains. It’s simple – you boil a pot of hot water and pour it down the drain.

You may use a pouring cup or a funnel to make the process easier. Pour the hot water into the drain steadily, pause for a few seconds, repeat the process, and test your shower.

Boiling water will loosen up the grease and soap holding the hair in place, allowing it to flush away properly.

clogged shower drain covered in hair

Use baking soda and vinegar

Another effective and safe method to remove hair from the bathroom drains is to use baking soda, white vinegar, and boiling water. This method doesn’t eat away your plumbing pipes, unlike harsh chemicals like Liquid Plumr and Drano max gel.

Even better, baking soda has disinfectant properties and will remove fungi, bacteria, and unpleasant odor in your bathroom or bathtub drain. So, how do you clean a clogged drain using baking soda and white vinegar?

Here is a step-by-step guide to clean your shower drain using baking soda:

  1. Pour one cup of baking soda into the clogged shower drain. Then, pour one cup of white vinegar down there.
  2. Baking soda and vinegar will combine and begin to fizz. Wait several minutes after the fizzing stops and pour two quarts of boiling water into the drain.
  3. Check if the water is moving through the drains. If not, repeat the same process to unclog your bathroom drain.

For the best results, you should still use a cup plunger to clean any hair that’s left behind.

Use your hands

Yes, using your hands can be disgusting, but it’s one of the most effective methods to clean your hair clogged drain. All you need is to remove the drain’s cover and pull the hair out of the inside of the drain.

You can wear thin rubber gloves or go in bare if you’re brave. You may also use a flashlight to clearly spot the strands of hair trapped inside the drain.

Again, using your hands is a dirty job, but it’s one of the fastest and most effective methods to clean out stubborn clogs.

Home bath tub drain clogged by long stain of clumped hairs

Use a plunger

If your drain is large, a cup plunger might be the perfect tool to clear the hair clumps from the drain. This method is especially effective for less severe clogs.

Allow a little bit of water to run in your shower, leaving the plunger submerged. You can add small amounts of petroleum jelly around the plunger’s edge to improve with suction.

Once the plunger gets stuck to the drain, begin plunging. Do it vigorously until the hair clog clears away.

Use tweezers

The stringy nature of the human hair can make it challenging to plunge it out. So, if you tried clearing shower drain clogs and the hair seems not to come off, try pulling it out using a pair of tweezers.

First, remove the drain cover using a screwdriver or manually, depending on your drain’s nature. Then, use your needle-nose pliers to pull out the accumulation of hair from the drain.

You may use a flashlight to get a better view of the inside of the drain. Also, you may want to wear rubber gloves, as pulling out hair can get pretty nasty.

Once you’re done, pour hot water in the drain to flush any remaining strands of hair out.

Use a hook

Closely related to the hand method, the hook method is yet another effective way to clean clumps of hair trapped in your drain. As the name suggests, this method involves using a hook like a wire coat hanger to fish out the hair.

Put the wire hook into the drain, try to hook the hair, and pull it out. Do this slowly to avoid the hair breaking and falling back into the drain.

Also, use the thinnest hooks for the best results. Certain drain-cleaning chemicals come with a hook-like tool for this purpose.

Use the snaking device

If the above methods don’t seem to work to remove hair clogs, a plumber’s snake may be your only go-to device. But how exactly does the plumbing snake work?

Here is a step-by-step guide to clean hair-clogged drains using a snaking tool:

Remove the drain cover

Using a screwdriver, remove the shower drain stopper to access the actual drain pipe. Insert the screwdriver’s tip into the screw heads and twist to the left to loosen them up.

If you have a shower and a bathtub, you may remove the drain cover by pressing it down and twisting it to the left.

Use tweezers or pliers to remove visible strands of hair

If there are visible clumps of hair on the drainpipe, use tweezers or needle-nose pliers to dig them out. Empty them into a plastic bag for easy cleanup.

Use the snaking tool to clean the clogged drain

Insert the plastic drain snake into the drainpipe until its handle is at the top of the drain’s opening. Be careful handling the snaking tool, as some have small, sharp thorns that can harm you.

Then, twist the snaking tool on either side to trap hair clumps. You can buy the plumber’s snake online or at your local hardware store.

Remove the snaking tool slowly

Hold the snaking tool by its handle and slowly pull it out of the drain. To grasp as much hair as possible, you may want to twist and wiggle it around as you pull it out.

If it gets stuck, wiggle it around until it comes out easily. Discard the tool after use.

Rinse the drain and reinstall the drain cover

Rinse the drain using hot water for about 10 seconds to remove the remaining strands of hair. If globs of hair rise to the surface, pull them out using your hands and discard them in plastic bags.

Using a screwdriver, reinstall the drain cover, twisting each screw to the right. If your drain has a screwless drain guard, insert it into the drain opening, push it down, and twist to the right.

Use chemicals

Although it’s always advisable to use natural methods to unclog a drain, some are too stubborn for the natural means.

If you have tried all other methods with no success, it’s time to try out the commercial drain cleaners. Visit a store and look for chemicals that have been explicitly made to unclog drains.

Apply the chemical to your clogged drains as needed, following the stated instructions. Always wear your PPEs, including goggles, rubber gloves, and old clothes.

Important: Do not mix chemicals, as that could create deadly substances.

Call a professional

At times, the clog can’t be handled using regular methods. In such an instance, you may want to enlist the help of a professional plumber.

A plumber has the expertise, knowledge, and tools needed to remove hair clogs from your drains. They can also give you some tips to prevent a clog in the future.

Prevention tips

Prevention is the best cure, so you should prevent the clog from happening in the first place. The first step to preventing hair-clogged drains is to be aware of the amount of hair you shed and then works towards reducing it.

Here are a few preventive measures to keep your drain clear of hair clogs:

  1. Buy a shower drain hair catcher. Most hair catchers don’t have the best looks, but they work the best in trapping long hair.
  2. Run a water tap as you shave to allow the hair to flush as you go. The more water you run, the better.
  3. Brush your hair before showering
  4. Maintain a clean drain screen if you have one.

These measures will help prevent hair clogs in your shower drains.

Final thoughts

I know I’m not the only one struggling with the annoying battle between long hair and a clogged shower drain. This article looks to end your struggle by offering the nine best ways to clean the shower drain of hair.

Good luck!

Filed Under: DIY

How to Plant Easter Lillies

March 29, 2022 Leave a comment

It’s that time of year again – the Easter holiday! And as Christians gather to celebrate the resurrection of Jesus Christ, flower lovers should take this time to plant and care for their Easter lilies.

Everyone loves the Easter lilies. They fill your home with fragrant aromas and bright blooms.

The flower symbolizes new life and purity, echoing a religious holiday and the spring season. The attractive plants are super-easy to grow, but you’ll need to master several tricks to get these gorgeous blooms.

This post will take you through super easy methods to plant and take care of the Easter lilies during this growing season.

how to grow easter lily

Feel free to jump ahead!

What’s an Easter Lily?

Before we dive into how to plant Easter lilies, let’s first look at what the plant is and its origin. Lilium longiflorum, or simply Easter lily, is a white trumpet-shaped perennial bulb flower that’s believed to have originated in the Ryukyu Islands in Japan.

The plant is believed to have arrived in Western countries in the 1800s. In the United States, the plant’s supply mainly came from Bermuda, earning its other name – the Bermuda Lily.

The plant’s pure white blooms symbolize purity and new growth, connecting it to spring and the Easter holiday. The white flowers grow up to 7 inches but may take around three years to reach maturity.

Naturally, the Easter lily blooms in June and July. However, you should plant your potted plant earlier if you want it to bloom at Easter time.

white easter lillies outside

How do I plant an Easter lily?

Now comes the core part of this post: how to plant an Easter lily. It’s easy – all you need is a good guide and a few tips, as provided below.

Planting your Easter lily indoors

Taking proper care of Easter lilies when you have them indoors is the key to a strong, vigorous plant that will be easier to transition to the garden. Place your Easter lily near a bright window, just out of reach of the direct rays of the full sun.

Easter lily thrives best in temperatures ranging from 18 to 24 degrees C (65-75 degrees F.).

Water your potted plant from time to time to maintain lightly moist soil, and use liquid fertilizer on the houseplant every two weeks. Clip out the flower stem near the base as their blossom fades.

Once the Easter lily’s blossom has fallen, it’s time to transplant it outdoors. Let’s see how you go about that below.

white easter lily growing

Planting your Easter lily outside

After your Easter lily’s blooms have fallen and there is no more danger of frost, you can transplant it from the pot into a suitable outdoor spot (don’t place it in a sunny location). The plants do well in all types of soil except heavy clay.

Easter lily thrives best in indirect light and under cool, well-drained soil (good drainage is crucial for Easter lilies). So, choose a location that receives ample morning sun and afternoon shade.

Don’t forget that the Easter lilies can grow 1m (3 feet) tall or a little more, so place them in an area they’ll get ample space to grow.

Dig the planting hole wide enough to allow the roots to spread and deep enough that you can cover the bulb with a soil level of 8cm (3inches). Place the plant in the hole and add soil to cover the roots.

Using your hands, squeeze out air pockets in the soil surface and then water deeply and slowly. Plant the next Easter lily about 31 to 46 cm (12-18 inches) away from the current one.

Some flower connoisseurs use a layer of mulch to insulate the plant year-round. Make the mulch thicker during cold winter months but thin it out in late January or February when new shoots are expected to sprout

Here are a few tips to help you in transplanting your Easter lily:

Inspect the roots

If your Easter lily roots appear in a tangled mass, it’s a good idea to loosen them before planting. This will allow your plant’s root space to grow.

Spread the bulbs out

Plant the flower bulbs approximately 12 to 18 inches apart and about 3 inches deep. This gives the plant enough space to grow and absorb nutrients.

Use mulch to keep the soil cool

Use organic mulch, like shredded bark or living mulch, to insulate the surface of the soil around your lily and keep it cool. Experts recommend a 3-inch layer of mulch for the best results.

The suitable inches of mulch are excellent for weed control and keeping your plant cool.

Look for anthers

The bright yellow anthers in Easter lilies provide a lovely contrast to the white trumpet’s petals. However, removing them from your Easter lily’s blooms prolong the flower’s lifespan.

Propagate

Propagation is the process of creating new plants. You can propagate your Easter lilies in the late summer or fall after it blooms.

You can use small bulblets or scales that have been separated to create new Easter lilies. Like seeds, the bulblets and scales will take about two to three years to reach maturity.

Here is a step-by-step guide to help you propagate your Easter lily plant:

  • Gather a hand trowel, compost, and a spade shovel
  • Dig up your Easter lilies in early fall to expose the bulblets and divide them in thirds or half. You may also buy bulbs at local flower shops.
  • Dig holes at least 6 inches apart in your garden bed to plant the bulbs. Place the bulblets stem side up into each hole
  • Mix the removed soil with compost and backfill the holes that have your bulbs
  • In early spring, gently water your underground bulbs and allow them to sprout
  • Your lilies may take two to three years to mature and bloom.

After planting your Easter lily, it doesn’t end there! You should take care of the plant to achieve the best results.

Caring for the Easter lily

Planting Easter lilies is one thing and taking care of them is another. If you’ve just bought an Easter lily to brighten up your home during the spring season, you’ll need a few tips to care for your plant:

Here are a few recommendations for caring for an Easter lily:

Pick the best plant

When you buy a potted Easter lily, it’s a good idea to look for a plant almost twice as tall as the pot and has plenty of green leaves. Avoid the lilies with crinkled or wilted leaves or the ones with dark spots.

Pick the potted Easter lilies with one or two open flowers and many unopened buds – they are the best. A mature lily plant has a stem with 12 to 15 blooms.

Inspect your plant for insects and diseases

Before buying your Easter lily plant, inspect it for webbing, insects, or holes in leaves. You don’t wish to bring insects and diseased plants to your dining room table.

Bring your Easter plant home

Before planting your Easter lily outside, keep it in cool temperatures and near a bright light. Your plant will thrive in daytime temperatures ranging from 60 to 65 degrees Fahrenheit and 55 to 60 degrees F at night.

Use fertilizer when your Easter lily is not in bloom

Add bulb fertilizer into the soil during the fall season, but be careful not to disrupt the roots. Use regular fertilizer when new growth appears in the early spring growing season, but stop fertilizing when they bloom.

Water your Easter lily plants

Easter lilies do best in evenly moist soil, so water them whenever the top inch of the soil dries out. Do not allow the soil to dry out completely, but also don’t let the plants sit in water as this can make the Easter lily bulbs rot.

You should water in the morning, leaving the foliage time to dry in the full sun. Otherwise, your plant may have problems with mildew.

Deadhead the Easter lily bulbs

Cut off the flowering portion of your Easter lily’s stalk

Check for pests

Although pests are not common on the Easter lily, pests may infest the plant in some areas. For instance, the red lily leaf beetle is common among Easter lilies in New England, U.S.

The beetles also attack other plants belonging to the genus Lilium, including Fangio L.A. hybrids and Stargazer lilies. The pest can defoliate your plant to the point of killing it.

You can spray neem oil or other chemicals recommended by a professional to control the infestation. You can also handpick the beetles if you have the time.

Words of caution: use chemicals as recommended by a professional. Also, ensure you follow all the instructions that come with pest control chemicals.

Keep the Easter lilies indoor

Easter lilies can survive the winter months in pots placed outdoors in USDA hardiness zones 7 and above. However, if you live in regions experiencing harsh winters, move the plants indoors for winter protection.

The bottom line

The Easter season is finally here, and you may find yourself a recipient of the Easter lily. These eye-pleasing plants have the perfect fragrant flowers and can get you in the spirit.

Who wouldn’t want to enjoy the beauty and fragrant aromas of the Easter lily all year long? Not you, right?

This post guides you on planting your Easter lily so that it can serve you for as long as you want. Good luck as you purpose to use it to plant and replant Easter lilies this Easter holiday season and beyond.

Filed Under: DIY

How to Clean Plaque

March 26, 2022 Leave a comment

The perfect smile is considered one of an individual’s most attractive features. It radiates excitement, joy, health, confidence, and vitality; it plays a crucial role in the happiness of your everyday life.

Unfortunately, many things can harm your teeth (and smile), including irregular dental care, smoking, too much caffeine, etc. These seemingly innocent daily behaviors may cause dental plaque and gum disease problems.

Let’s dive into what dental plaque is, how to clean it, how you can avoid it in the first place, and more.

person showing how to clean plaque off teeth

What is plaque?

Dental plaque is the sticky film that forms on individuals’ teeth after the bacteria in the mouth mix with starchy or sugary foods. Everyone has a dental plaque, and it’s removed by tooth brushing and flossing.

A plaque has bacteria that can damage your tooth enamel and lead to bad breath, tooth cavities, gum diseases, and tooth loss. Removing the plaque can help you prevent tooth decay and other dental problems.

If the plaque stays on your teeth for long, it hardens into tartar. Also known as dental calculus, tartar buildup is a rough and porous coating that forms above and below the gum line.

When tartar forms on your teeth, it can only be removed by a dentist using special tools. But before it gets to this point, clean the plaque on your teeth by following the following steps.

picture of before and after teeth with plaque
Before and after dental plaque removal treatment.

What are the best ways to clean plaque?

Reducing the amount of plaque or calculus on your teeth can reduce your chances of getting cavities and other gum diseases. You can clean your teeth with baking soda, vinegar, oil, etc.

Here are the methods you may use to clean remove plaque from your teeth:

Brushing with baking soda

This is one of the safest and most effective methods for removing plaque. It’s a surefire to clean the plaque without harming your enamel.

The human mouth has hundreds of bacteria, some of which are harmful to your dental health. For instance, Streptococcus mutans is a bacteria found in the mouth that causes tooth decay.

Baking soda has antimicrobial properties, meaning it can protect your tooth from decay. In fact, research shows that baking soda can significantly minimize the number of Streptococcus mutans in your mouth.

You may use toothpaste that contains baking soda or sprinkle little amounts of baking soda powder on the toothbrush. Whichever method you decide to use, you can be sure that it’ll remove the plaque.

Another benefit of using baking soda to clean plaque is protecting against demineralization. This is a chemical process that removes calcium from the tooth enamel.

Consuming carbohydrates can reduce the pH level in your mouth, creating an acidic environment that encourages demineralization. Baking soda has a high pH, neutralizing the acid in your mouth.

You can buy baking soda online or in your local grocery stores.

tooth brush with baking sode to clean plaque at home

Oil pulling using coconut oil

Oil pulling is an ancient practice that is also very effective at removing plaque from the teeth. It involves swishing oil in your mouth to remove bacteria and promote oral hygiene.

Oil pulling is associated with a traditional medicine system from India called Auyrveda. Research shows that this method can kill bacteria in the mouth and enhance dental health.

Coconut oil is known to be the most effective for oil pulling, making because of its antioxidant and antimicrobial properties. This type of oil also has lauric acid, which is widely known for its antimicrobial properties.

A recent research study shows that oil pulling using coconut oil reduces dental plaque by 50%. The study also found that gingivitis symptoms decreased significantly, mainly because of reduced dental plaque.

Here is a step-by-step guide to oil pull the plaque:

  1. Place about one tablespoonful of warm coconut oil in your mouth
  2. Swish the oil around the mouth for about 5-10 minutes.
  3. Spit the coconut oil on a paper towel or a trash can

Note: Avoid spitting the oil into the sink as that could clog the pipes.

You may buy coconut oil online in health food stores. You may also use almond oil, sesame oil, and olive oil in the place of coconut oil.

woman getting teeth examined

Practice good oral hygiene

This is perhaps the best way to remove plaque and tartar buildup from your teeth. It involves following the recommendations of professional dental practitioners.

For instance, the American Dental Association (ADA) recommends brushing twice a day using fluoride toothpaste. The organization also recommends that individuals floss at least once per day.

Flossing helps you remove food pieces and plaque trapped between the teeth and the hard-to-reach areas. After flossing, the toothbrush will help you remove the plaque on the surface of the teeth.

Here is a step-by-step guide to help you brush your teeth effectively:

  1. Use fluoride treatments or toothpaste
  2. Start cleaning the top molars at the back of the mouth.
  3. Use short, circular brush strokes
  4. Brush the back and front surfaces of the upper teeth
  5. Repeat the process 1-3 times.

Although manual toothbrushes can effectively remove plaque on teeth, research shows that electric toothbrushes can do much better work. For the best results, use an electric toothbrush with an oscillating head.

You may rinse your mouth with mouthwash after flossing and brushing your teeth. Mouthwash with fluoride is recommended for extra protection against tartar and plaque.

You should use a stronger type of mouthwash if you have gingivitis. However, it’s always advisable to visit a dentist to prescribe the right mouthwash for your condition.

Clean the plaque with white vinegar

White vinegar is yet another effective method for cleaning plaque on your teeth. All you need white vinegar, warm salt water, and a glass.

To get started:

  1. Using a glass, mix two tablespoonfuls of white vinegar with warm salt water and stir
  2. Gargle the resulting solution to remove plaque and tartar

The acidic nature of white vinegar helps in killing bacteria and preventing infection. However, this method may promote the demineralization of calcium in your mouth and teeth.

Using orange peels for plaque and tartar removal

You can use the orange peels you throw away after eating an orange to remove plaque and tartar deposits. The peels contain pectin, vitamin C, gluconate, soluble fiber, and limonene that effectively remove plaque and whiten your teeth.

The orange peels are easy to use. You’ll take inside of an orange peel and rub it along the gum areas and teeth.

You can also make a paste from the mashed bits of the orange peel and use it to clean your teeth. Mash the orange peels and mix them with small amounts of warm water, then use the resulting thick solution to brush your teeth.

Tips to Help Control Tartar

Of course, the best way to clean plaque and remove tartar is to prevent it before it starts.

Here are a few methods to remove tartar deposits from your teeth:

  • Brush your teeth regularly using a toothbrush with soft bristles. Dental hygienists recommend brushing twice a day for 2 minutes, ensuring you clean every part of the mouth.
  • Although manual toothbrushes can help remove tartar and plaque, electric-powered toothbrushes are recommended for best results. These toothbrushes have undergone quality disease control and safety tests, passing all.
  • Buy the tartar-control toothpaste with fluoride to help repair the damaged enamel. Other kinds of toothpaste gave triclosan – a substance that fights bacteria in plaque.
  • Regardless of how good your dental cleaning is, don’t forget to floss your teeth. Flossing helps remove plaque buildup between your teeth and keep tartar away from the hard-to-reach areas.
  • Using an antiseptic mouthwash, rinse your mouth daily to kill bacteria that cause plaque.
  • Watch your diet. The harmful bacteria in your mouth do well on starchy and sugary foods – they release harmful acids when you consume sugary products like soft drinks.
  • Refrain from smoking. Research shows that individuals who consume tobacco products are at high risks of developing plaque and tartar.

Although not a home remedy, you should see a dental hygienist regularly. You should get regular dental checkups, e.g., after every six months.

The oral professional cleaning will remove any plaque or tartar that might have formed to avoid other oral diseases. The doctor will also recommend the best ways to minimize symptoms and prevent further damage if they notice cavities or gum inflammation.

The bottom line

Plaque and tartar can suck the perfect smile out of you. Plaque leads to yellow teeth and may become the much-evil coating called tartar that can cause dental problems.

The good news is that you can clean the plaque before it becomes a disaster. This post provides you with 5 of the best methods to remove plaque from your teeth and restore your smile.

If you have a dental problem related to plaque or tartar buildup, you should schedule an appointment with an oral health practitioner. This will help you address the issue before it becomes hard to treat.

Filed Under: Health & Wellness

How to Make Candle Wicks

March 25, 2022 Leave a comment

Are you obsessed with candles? Do you enjoy tea light on special occasions? Approximately $3.14 billion in annual sales of candle products says you’re not the only one.

Whether you’re planning to make homemade candles to earn a living or just for fun, you can make your own candles right at home. All you need is soy wax, bowls, saucepans, essential oil blends, candle molds, and more, importantly, a candlewick.

And although you can buy candle wicks, making your own candle wick gives you the ability to choose the right size that fits your specialty candles. But how exactly do you make your candle wicks at home?

This post discusses a candle wick and outlines some best ways to make homemade candle wicks.

Let’s get started!

What are candle wicks?

A candle wick is a coated cotton that holds the flame of a candle or an oil lamp. It follows the capillary actions to work, drawing the liquefied wax up into the flame to burn.

Although the wicks are mostly made using cotton strings, you also can use old t-shirt scraps, reusable fabrics, or wooden sticks. Whatever type of candle wicks you use, ensure you find the right wick size for your candle.

A properly wicked candle burns cleaner and provides reliable burn times and fragrance throws. It works perfectly to enhance the mood in the room.

Choosing candle wicks

You can make a candle wick using a cotton twine or a small piece of wood. If you choose to make your wick from the cotton twine, you may use it alone or soak it in different materials, including salt, borax solution (most recommended), or olive oil.

As mentioned above, the size of the candle wick, type of wax, among other factors, also affects your final candle product.

Here are the things to look for when choosing your candle wick:

  • Minimal or no blooming of carbon deposits
  • Your flame size
  • Minimal or no dripping
  • Container temperature

Candle wicks treated in borax solution are the most common wicks, but you can use other materials for your wick.

How do I make candle wicks?

Craft projects such as making homemade candles are therapeutic – they can be vital in reducing tension and relieving stress. Making candle wicks and handling essential oils, perfumes, and colors is a surefire anxiety-reliever.

Here is one of the best DIY wicks guides for making the different types of candle wicks at home:

Making Borax candle wicks

As the name suggests, Borax candle wicks are made using the borax solution. Also known as sodium tetraborate or sodium borate, Borax is a powdery white substance used as a common household item for cleaning or as a booster for laundry detergent.

To make your own wicks using this powder, here are the steps to follow:

Heat water

The first step is to heat about 1 cup (250 ml) of water using a tea kettle or a small saucepan. Let the water reach a simmer, but not a thoroughly boil

Make the Borax solution

The next step is to pour the water into a small glass bowl and add three tablespoonful (45 ml) of Borax and one tablespoonful of salt. Stir to dissolve and form the Borax solution.

Important:

  • The Borax solution allows you to make long-lasting candles that burn brighter
  • The Borax solution also reduces the amount of ash and smoke produced by the candle
  • Borax should be kept away from pets and children. The product is toxic and may cause complications when inhaled or ingested.

Also, store the Borax powder as indicated in the manual that comes with it.

Soak the cotton twine

Submerge the cotton twine in the Borax solution and leave it for about 24 hours.

Important:

  • Ensure that the cotton twine used is longer than the height of the container. If you’re unsure how tall the candle will be, soak up to 1 foot of cotton twine and trim its size later.
  • Although the butcher’s cotton twine is recommended for candle wicks, any thick cotton cord should work just fine. You may use a torn piece of cotton cloth embroidery cotton, or a shoelace
  • Leaving the twine soaked for a long time is key for the best results. You may remove the string from the Borax solution as soon as after 30 minutes, but the results will not be as perfect.

After 24 hours, your cotton twine will be ready for drying and use.

Dry the cotton twine

Using tweezers, remove the cotton twine from the Borax solution. Hang it and leave it to dry for two to three days.

Note: You can place an aluminum foil beneath the drying twine to trap the excess Borax solution. Make sure that the cotton twine is fully dry before you continue.

Melt the wax

Melt about 60 ml to 125 ml of beeswax candles

using a double boiler setup. You can use a small saucepan or a clean metal in the place of the double boiler.

Heat some water in the saucepan, letting it simmer without boiling. Then, place the metal can inside the hot water and leave it for about a minute to heat before adding the wax.

Important: Melted wax can lead to severe candle burns, so handle it with care throughout the process.

Add the treated cotton string

Dip the dry Borax treated cotton twine in the melted wax—coat as much of the string with the wax as possible.

Note: You can use the Borax-treated string without adding wax. However, the wax makes it easier stiffer and allows the flame to catch easily on the wick’s end.

Dry the twine

Hang the cotton string and leave it for several minutes to dry. You may place an aluminum foil below the twin to catch excess drippings.

To make stiffer and thicker wicks, you can repeat the process– dipping it in melted wax and drying it.

Inset it in a candle

Your wick should be now ready to be inserted into a candle. Enjoy the resulting flame and fragrance.

Crafting wooden wicks

You may also use balsa wood sticks to make candle wood wicks. You need a wooden stick, a pair of scissors, a container, and olive oil, and you’re ready to go.

Here is the step-by-step guide to making balsa wooden candle wicks:

Trim down the balsa wood sticks

Using a pair of scissors, trim down the length of the balsa wood so that it’s at least 2.5 cm (1 inch) taller than the container you plan to make your own candles with. You can find the thin (1.25 cm to 3.75 cm wide) balsa wood strip in any craft store nearby.

Place the balsa wood in olive oil

Soak the trimmed balsa wood into a shallow bowl and add enough olive oil to cover the wood. Although the wooden strip is flammable, adding olive oil allows it to burn evenly.

Leave the wooden strip soaked in the oil for about 20 minutes. You may decide to wait up to one hour for the best results.

Note: you may use vegetable oil or oil lamp in the place of olive oil.

Remove the excess oil

Remove the wooden strip from the oil and wipe the excess oil using a paper towel. Place the wooden strip on a plate covered with paper towels and leave it for several minutes to dry.

The wood wick should feel damp and slightly oily when ready. But make sure that the strip doesn’t leave an oily residue on your hands.

Use your wood wick as needed

At this point, the treated wooden wick should be ready for use. These wicks are preferred by people that love the scent of burning wood.

Making movable candle wicks

You may also make a movable candle wick by first letting the wax melt.

Melt about 60 to 125 ml of a candle or paraffin wax using a double boiler. If you don’t have a double boiler, you may use a saucepan with water and add a metal bowl.

Then, trim the pipe cleaner and dip it into the melted wax. Repeat the process several times for better results.

At this stage, your candle should be ready for use.

Other methods for making candlewick:

You may also make your candlewick through the following methods:

a. Cotton Ball Method

This is yet another simple method of making candlewick. You’ll need a cotton ball and some twine or string to get started.

Then, wrap the string around the center of the cotton ball until it’s fully covered. Then use the cotton wicks as they are, or trim them down.

b. The wire method

This is yet another popular method of making your own candle wicks. It requires more precision and patience than the cotton ball method, resulting in a much neater and cleaner wick.

You’ll need nose pliers and a thin gauge wire to make this candlewick. Wrap the wire around the wick’s base, then use the needle-nose pliers to twist the two wire’s ends.

Insert the wick into the wax, and let there be light!

The bottom line

Homemade candles are a great way to light up a home. They also play a quintessential role in uplifting individuals’ moods. But without a candle wick, the candles are useless. This post shows you how to make your homemade candle wicks. Good luck as you purpose to use it.

Filed Under: DIY

  • « Previous Page
  • 1
  • 2
  • 3
  • 4
  • 5
  • 6
  • 7
  • Next Page »

Popular How To’s

How to Contact TikTok About a Banned Account

How To Cook Frozen King Crab Legs

How to Pick a Mini Watermelon

How To Care For Air Plants

Categories

Food

Travel

DIY

Finance

Parenting

Technology


Copyright ©2026, How to Knowledge. All Rights Reserved. Custom design by Pixel Me Designs