• Parenting
  • Food
  • Do it Yourself

How to Knowledge

  • Travel
  • Finance
  • Technology
  • Home
  • DIY
  • Finance
  • Food
  • Parenting
  • Technology
  • Travel

How to Make Waterproof Matches for Camping

February 12, 2022 Leave a comment

Waterproof matches could very well save your life.

When you’re camping, especially during periods of inclement weather, being able to make a camp fire is one of the most important skills you can possess. 

If you’ve ever camped when the air was moist, though, you know that even wooden matches are often not easy to use, and carrying fuel lighters adds to the weight you have to haul through the woods.

When you go camping, there is often no guarantee that everything is going to stay dry. Things may get wet because of unexpected rain or because you are too close to the water.

No matter what the reason is for things getting wet, however, you will still want a nice, cozy campfire to enjoy while you are out.

This is why it is so important to have some waterproof matches with you when you go, and while you can buy them, it is often cheaper to make your own. It also guarantees the quality of your waterproof matches.

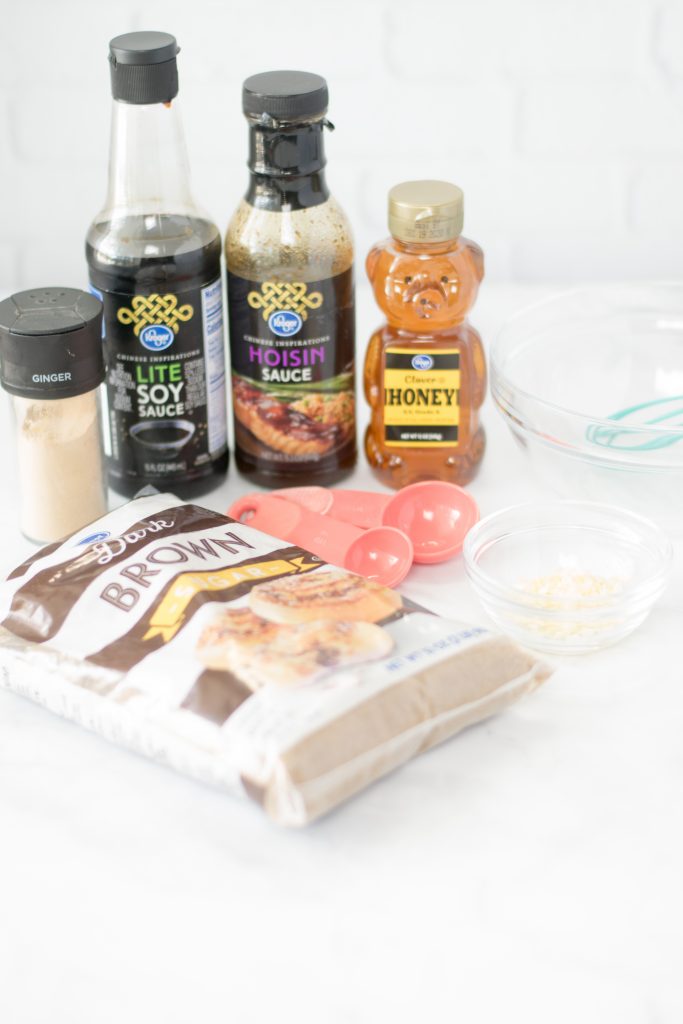
In order to make waterproof matches, you will need the following tools:

  • Wooden matches (preferably the strike anywhere kind)
  • Paraffin Wax (can be purchased at most grocery, discount, or even craft stores)
  • Double boiler
  • Tongs or pliers (for removing matches from wax)
  • Wax or parchment paper

How to Make Waterproof Matches for Camping

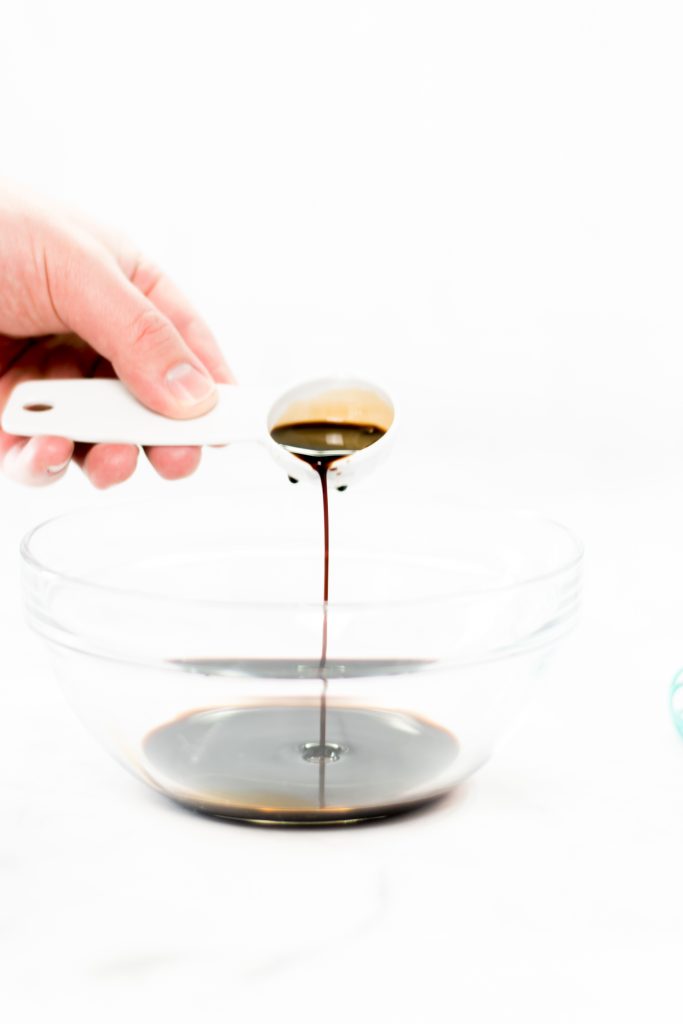
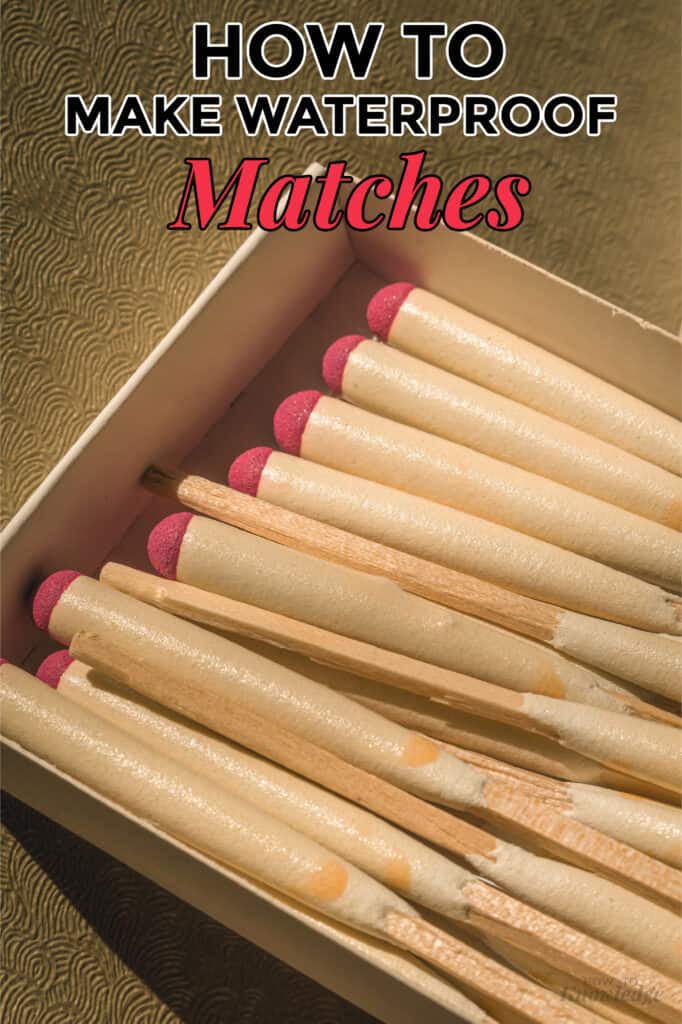
When you have all of your supplies together, spread out a piece of wax or parchment paper on a flat surface, and melt the wax in a double boiler.

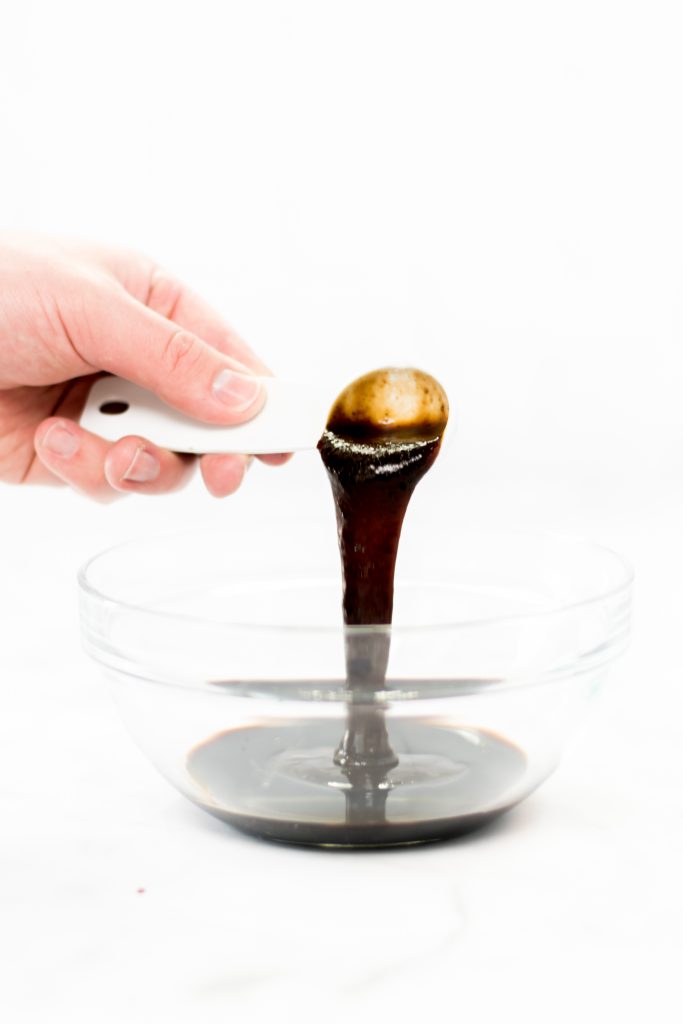
Put the matches into the melted wax, making sure that they are completely coated, and remove them one at a time from the wax with the tongs.

Place them on the paper to cool and dry. Do not let them touch one another as they dry because they will stick together.

When they are cool and dry, you may either place them back in their original container or you may place them into a waterproof container.

A waterproof container is your best bet, and you can get a waterproof match container at most outdoor supply stores.

How do waterproof matches work?

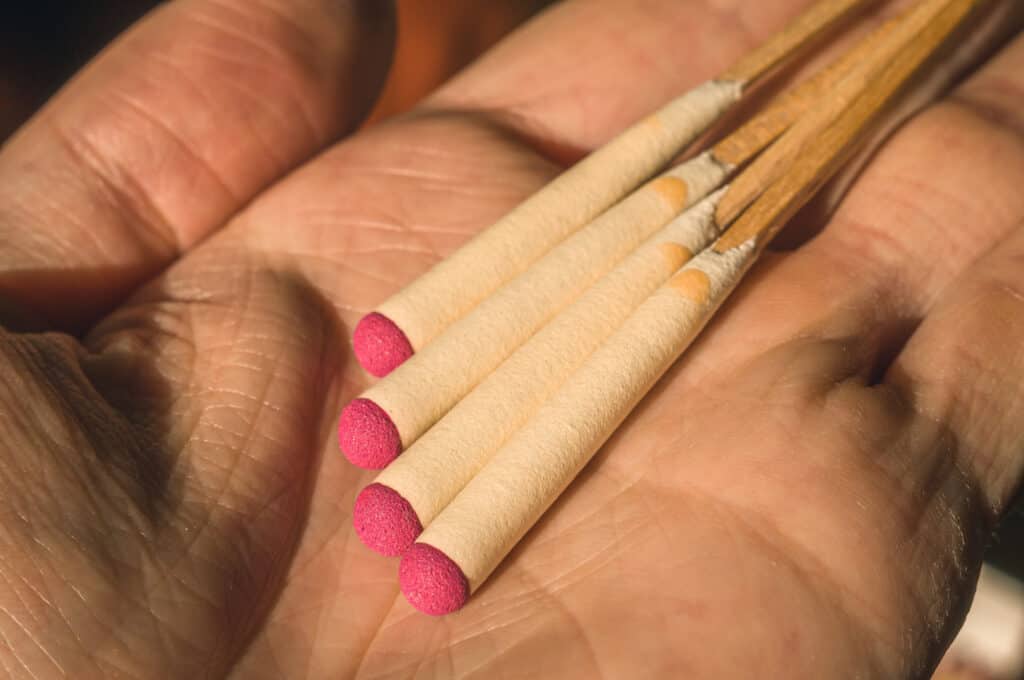
The thin layer of wax keeps the heads of your matches from getting wet, which will allow them to strike under any circumstances. Do keep in mind that while waterproof matches are slightly more difficult to light than regular matches, they will still light.

It just may take a couple of strikes, as the first strike usually wears away enough of the wax that it lights the second time easily.  

Waterproof matches can be a real lifesaver when you are out camping. There are so many ways that things can get damp or wet, even up to and including condensation in the air. They are also an essential part of any survival kit, inside or outside the home. It can also be fun to make waterproof matches, and once you know-how, you will not forget.

Filed Under: DIY, Travel

How to Change Your YouTube Channel to A Kids Channel

November 19, 2019 Leave a comment

If you are a YouTube creator, chances are, you received an email stating YouTube needs to comply with the laws surrounding if a video is made for kids or not.

Not only is this vital for YouTube, it’s actually the law.

According to the email sent to creators, YouTube states:

Starting today, all creators are required to tell us if their content is made for kids in order to comply with the Children’s Online Privacy Protection Act (COPPA) and/or other applicable laws. To help you comply, we are introducing a new audience setting in YouTube Studio.

Depending on the amount of made for kids content on your channel, you can set your audience at either the channel level or the video level. For those who are setting at the channel level, it is just one click.

YouTube

How do you know if your channel is made for kids?

Well, if you think your target audience is kids or for parents with kids, it’s safe to choose that it is made for kids.

If you primarily talk about and post about adult content, use profanity, violence, etc. you need to make it is not made for kids.

How to Change Your YouTube Channel to A Kids Channel

Once you’ve decided if your channel is made for kids or not, you need to change the settings to tell YouTube and viewers what the content of your channel is made of.

Here is how to change your YouTube Channel to a Kids Channel:

  1. Sign-in on your computer and click on your icon on the top right.
  2. Click “YouTube Studio”
  3. Click “Settings”
  4. Select “Channel” then “Advanced Settings” and click “Yes, set this channel as made for kids. I always upload content that’s made for kids.”
  5. Click “Save”.

Your channel now complies with the law and will be ready for the content you upload.

Now, if your channel is not for kids, you’d select that option or if it’s a mixture of kid content and non-kid content you’d select that option.

Note: Setting that your channel is for kids, will lower the amount of ads serving to viewers (there is a disclosure shown when you select this option) that looks like this:

Do I Need to Select An Option for My Channel?

Yes, according to YouTube’s terms:

As a YouTube creator, you are required to set future and existing videos as made for kids or not. Even creators who don’t make content for kids need to set their audience. This will help ensure that we offer the appropriate features on your content. 

The bottom line is, every content creator needs to change their settings in YouTube to comply with the law. It only takes a few minutes to complete and can save you loads of legal fees and headache.

Filed Under: Featured, Technology Tagged With: new youtube settings, youtube kid settings, youtube settings

How To Teach Your Kids Time Management

June 3, 2019 Leave a comment

We all want our kids to succeed. In today’s fast-paced world it can be difficult for kids to keep up and get things done.

With screens to distract them, basic time management becomes even more of a challenge for kids.

These simple tips will give you ideas on how to teach your kids time management.

Limit your child’s screen time.

So often children get hooked on their phones, tv, or video games and quickly waste away large chunks of time without even realizing it.

When parents set limits on these things children have more time to work towards goals, find a hobby they are passionate about and get school work done and turned in on time.

Help your child set goals and make a plan to achieve them.

Goal setting and constant reminders of goals are a great way to motivate your kids to use time wisely and get things done.

Sit down with your child to set goals and to evaluate them often as kids can change their minds quickly and an outdated goal will not encourage them.

Teach your child basic routines to use throughout the day.

From morning hygiene to afternoon chores and a relaxing bedtime routine these can help your child get more done with less effort and stay on top of tasks that need to be performed daily.

When you keep up with these tasks you waste less time catching up later.

Give your child a paper-based planner to organize school, sport, and goal-related information.

While trying to keep up with things that need to be done most people struggle with remembering everything that needs to be done.

This can lead to fixing forgotten tasks and wasted time that could have been used for something productive or enjoyable.

Set a good example for your kids.

When children grow up in a home where good time management skills are displayed they are more likely to adopt these skills.

Often the most important part of parenting is to show your child how to do things by becoming a living example.

Filed Under: Parenting

How to Make Homemade Teriyaki Sauce

May 1, 2019 Leave a comment

When it’s time to make some Teriyaki chicken, steak or pork you might find yourself down the condiment isle looking for Teriyaki sauce.

Let me stop you right there…

Make your own Homemade Teriyaki Sauce and I promise it will take your dish to an entirely new level!

This easy homemade teriyaki sauce is going to be your new favorite sauce.

It’s great on meats such as chicken, beed and pork but it’s also amazing when drizzled over fresh vegetables. Did someone say stir fry?

How to Make Homemade Teriyaki Sauce

Here is what you’ll need:

  • 4 Tablespoons Soy sauce
  • 2 Tablespoons Hoisin Sauce
  • 2 Teaspoons Honey
  • 1 Teaspoon Brown Sugar
  • 1 Teaspoon Freshly Minced Garlic
  • 1/2 Teaspoon Ground Ginger

How to make this homemade teriyaki sauce recipe:

Once you’ve minced your garlic, set it aside in a small bowl.

Start by adding your soy sauce into a large bowl.

Now add your Hoisin Sauce to the bowl.

Now add your brown sugar.

Now add your honey.

Now add your ground ginger.

Finally, add your minced garlic.

Stir everything well and make sure it is not clumpy.

Your sauce is now ready to use immediately or can be stored in the refrigerator for future use.

Note: If you find your sauce is too thick, you can add a cup of water and mix it in to thin out the sauce a bit.

Yield: 1

Homemade Teriyaki Sauce

Homemade Teriyaki Sauce

Learn how to make your own homemade teriyaki sauce that tastes better than store bought!

Prep Time 2 minutes
Additional Time 3 minutes
Total Time 5 minutes

Ingredients

  • 4 Tablespoons Soy sauce
  • 2 Tablespoons Hoisin Sauce
  • 2 Teaspoons Honey
  • 1 Teaspoon Brown Sugar
  • 1 Teaspoon Freshly Minced Garlic
  • 1/2 Teaspoon Ground Ginger

Instructions

  1. Once you’ve minced your garlic, set it aside in a small bowl.
  2. Start by adding your soy sauce into a large bowl.
  3. Now add your Hoisin Sauce to the bowl.
  4. Now add your brown sugar.
  5. Now add your honey.
  6. Now add your ground ginger.
  7. Finally, add your minced garlic.
  8. Stir everything well and make sure it is not clumpy.
  9. Your sauce is now ready to use immediately or can be stored in the refrigerator for future use.
© Brittanie

Filed Under: Food Tagged With: easy teriyaki sauce, homemade teriyaki, how to, How to Make Homemade Teriyaki Sauce, teriyaki sauce

How to Make Slime With The Perfect Slime Recipe

March 24, 2019 Leave a comment

How Do You Make Slime? Well, This is my favorite way to make the stretchiest slime of all!

how to make slime

You should know that while anyone can make some version of slime, making the best slime takes a little bit of practice and science.

We’ve got tips on how to make the best slime in easiest way possible.

We like to think of ourselves as slime experts.

I mean, after all, we did write a book that has a ton of slime recipes called 101 Kids Activities that are the Ooey, Gooey-est Ever!: Nonstop Fun with DIY Slimes, Doughs and Moldables so, to say that we’ve made lots of slime in our time, would be an understatement.

Now that you know we are somewhat of an expert when it comes to making slime, let’s dive right into how to make the perfect slime, every time.

What is slime?

Slime is a squishy, ooey, gooey and stretchable substance that is fun to play with. It can be a stress reliever and offer kids a fun way to be creative through play.

Slime can be made all sorts of ways and with many different ingredients.

how to make slime, slime instructions

Fluffy slime, borax slime, slime with contact solution, edible slime and magnetic slime are just a few of the ways you can do it.

All of these slimes are different and can be temperamental meaning if you don’t follow the recipe exactly, your slime won’t turn out the way it’s supposed to.

And that is no fun.

So, if you are just getting started on your slime making journey, we have the easiest and BEST recipe to ensure you make the perfect slime every time.

the best slime recipe

How to Make Slime

There is a few basic ingredients you will need to make the perfect slime recipe, these include:

  • Baking Soda
  • Glue (White or clear glue will do depending on how you want your slime to look, and Elmer’s glue is the standard, but any glue is fine.)
  • Saline Solution (the kind that says buffered)
  • Mixing Bowls
  • Stirring Stick
  • Mix in’s (glitter, mini toys, food coloring, etc.)
slime ingredients

How to Make The Perfect Slime:

To make perfect slime every time, start by pouring your glue into a bowl. Depending on which type of glue you chose (clear or white) your glue bottle will be about 4 oz. – 5 oz. Just pour the entire bottle into the bowl.

This is hands down without a doubt the stretchiest slime recipe I know.

Remember that kids might need adult supervision making this. It can get pretty messy.

Next, add 1 teaspoon of baking soda to your glue mixture and mix well.

Now, if you want colored slime, it is time to add food coloring and glitter if you’re using any. Stir really well.

Finally, it’s time to add the magic solution that makes it become slime – the saline solution! Just add a few squirts to your glue mixture and mix, mix, mix.

the best slime recipe

You’ll notice the mixture starts to form into slime right before your eyes.

Continue adding the saline solution until you reach the desired consistency. It will take about a tablespoon (you may use more or less).

And last but not least, add in any toys or other mix in’s you want to your slime.

Remember to always wash your hands after playing with slime! The stuff in slime isn’t really edible, and you don’t want to accidentally eat it.

Why is this the best slime EVER?

best slime recipe

Simply because you can customize it to your liking. If it’s too sticky, you can add more saline solution for a thicker consistency or less saline solution for a more slimy, gooey consistency.

This slime recipe is FOOL PROOF.

The problem with borax slime recipes is that you can entirely ruin your slime if you use too much.

the stretchiest slime recipe

Saline solution is so much easier to add and it’s really hard to ruin your slime when using this ingredient.

Besides, out of all of the slime recipes we’ve made, I think contact lens solution (remember you want the kind with boric acid – it will probably be called sodium borate) turns out the best.

It just makes an overall, stretchy and non-sticky texture that my kids love to play with! It’s basically the same thing as using the borax solution slime recipe everyone uses, but it’s like the solution is already made for you.

the easiest slime recipe

What’s so fun about this slime is, when you’re playing with slime, you can do all sorts of things to make this slime different. We love to add glow in the dark paint, or change out school glue for glitter glue, and even drop in sequins!

If you want your slime to be more of a fluffy slime, then you can even add in some shaving cream. Just squirt it right into the slime mixture.

easiest slime recipe

Filed Under: DIY, Featured Tagged With: easiest way to make slime, easy slime recipe, how to make slime, how to make the stretchiest slime, how to slime, slime, stretchy slime

How to Stop a Bloody Nose

March 23, 2019 Leave a comment

Do you want to know how to stop a bloody nose? These are some of the quickest and easiest ways to stop the bleeding.

What should you do if you have frequent nosebleeds? Have you ever had one of those embarrassing nose bleeds at one of the most inconvenient times?

Like that time when your child has had a nose bleed in the middle of the store or of course when company is over. No matter when it happens, a nose bleed is no fun. People used to think just tipping your head back would stop a nose bleed, but other remedies have come around that prove to be more effective. Here are some ways on How to Stop a Bloody Nose in it’s tracks!

There are different kinds of nosebleeds. The anterior nosebleed and the posterior nosebleed, depending on where the nosebleed is coming from. Anterior means front which is more in the front of the nasal cavity and posterior means back, which means the bleeding comes from the back of the nasal cavity. Blood flow is usually much heavier in anterior nosebleeds.

How to Stop a Bloody Nose

How to Stop a Bloody Nose

  • Sit up Straight: Recent studies thought that lying down would stop a nose bleed, but in all reality, it just makes it worse by running down the back of your throat.
  • Tilt your Head Forward: Instead of backward, you should tip your head slightly forward. Swallowing blood can irritate your stomach and cause vomiting that will make your nose bleed worse.
  • Pinch Your Nose: You want to apply pressure to any wound, and that includes your nose. Using your forefinger and thumb, pinch the soft part of your nose closed (both nostrils). Remember to breathe through your mouth as you pinch your nose closed for about 10 minutes. If it’s a lot of blood, this way might not work, just because it might stay too wet to properly clot.
  • Use an Ice Pack: Once you have pinched your nose, apply an ice pack or anything cold from your freezer. Cold restricts your blood vessels and helps them to clot faster.
  • Check Your Nose: After 10 minutes of ice and pressure, check to see if your nose is still bleeding by gradually releasing the pressure and un-pinching your fingers. If your nose is still bleeding, continue pressure and ice for another 10 minutes. If not, take steps to prevent another nose bleed.
  • Moisten Your Nose: Once your nosebleed has stopped, it’s important to put a thin layer of saline or nose gel into your nostrils. You can use a nasal spray for this. This will help soften the membranes inside your nose and help prevent further nose bleeds. Do not blow your nose for the next 12 hours.

It is important to take care of a nosebleed fast, yet effectively to prevent further nose bleeds. What other tips have worked for you at stopping a nose bleed?

Remember that nasal decongestants are often times designed to dry out your nose, which means that they can contribute to nosebleeds. You want to skip them if at all possible.

I find that if your nose is going to bleed again, it’s probably going to be within 30 minutes. So, try and sit still for at least that long to help with the blood clotting. Nose bleeds can be tricky that way. If your nose is bleeding for longer than 30 minutes or so though, we suggest you seek medical advice, because nose bleeds can be a sign of high blood pressure.

How to Stop a Bloody Nose2

One of the things about nose bleeds is that not only do you want to stop them fast, but there are things you can do to actually prevent nosebleeds that are easy and don’t take up a lot of time.

Why does my nose bleed? Most of the time it’s because it’s too dry inside your nostrils.

One of the things you can do to prevent a bloody nose is to put a little petroleum jelly or antibiotic ointment on a cotton swab and run it around just inside your nostrils. You don’t need to go super high up where it feels like it’s in your brain or anything, you just need to get in there to protect the sensitive skin of your nasal membranes.

You just want to keep your nose moist. When the skin breaks, often times that is what will cause your nose to bleed.

Filed Under: Health & Wellness Tagged With: bloody nose, bloody nose hacks, bloody nose remedies, how to stop a bloody nose, stop a bleeding nose

How to Teach Your Toddler to Wipe Their Own Butt

November 24, 2018 Leave a comment

Potty training is tough and a big old mess. You’ve got the pee handled and possibly even #2 but can you imagine a world where your toddler knows how to wipe their own butt? A world where they don’t come running to you when they need help after pooping? That would be glorious!

I’m going to tell you that there is light at the end of the tunnel and your life can be whole again! Continue reading on How to Teach Your Toddler to Wipe Their Own Butt!

How to Teach Your Toddler to Wipe Their Own Butt - the best way to get your kids to use the bathroom entirely by themselves! #parenting #parentingtips #parentinghacks #pottytraining

How to Teach Your Toddler to Wipe Their Own Butt

#1. Help your toddler at first.

Don’t leave your toddler to fend for themselves. Help your toddler wipe their butt for their first couple of weeks. You’ve been there and you know it can be tough. As you help your toddler wipe their own butt, talk them through the steps of it all. Let them know how they do each step.

#2. Help your toddler understand they must be done pooping.

Your toddler cannot wipe in the middle of pooping or at the start, they have to be all of the way done. Make sure you emphasize this when teaching them.

#3. Emphasize front to back.

If you don’t let your toddler know that they need to wipe from front to back, it could be disastrous. Make sure your child knows how to do this. Wiping from front to back also helps to eliminate the spread of bacteria.

#4. Use flushable wipes.

When potty training toddlers and teaching them to wipe, it is much easier to use flushable wipes. The thing about toilet paper is that it sticks to everything, which isn’t always good when you’re first learning to wipe your own booty. Using flushable wipes, you can get more of the mess cleaned up, in a quicker time frame.

#5. Give it some time.

No toddler is going to be a pro at wiping their butt in just a matter of days. Stick with it and in no time your toddler will be the best butt wiper on the planet. Just think of the freedom you will have when your toddler can wipe their butt and everyone else’s toddler still cannot. O’ the freedom that lies ahead!

#6. Use a reward system.

Something you may want to keep in mind when it comes to teaching your toddler to wipe their own butt is a reward system. When your toddler does their best with wiping their own booty, a sticker or a piece of chocolate is always nice. It motivates them to want to make do a good job the next time they wipe their own butt.

Teaching someone to wipe their own butt isn’t always the easiest thing, but at the end of the day, it’s worth it. What are some tips you have to teaching your toddler to wipe their own butt? I’d love to hear your tips!

Filed Under: Parenting Tagged With: how to potty train, how to teach kids to wipe butt, kids poop, wipe butt

How To Make Your Home More Elegant and Sophisticated – 5 Budget-Friendly Tips

August 19, 2016 Leave a comment

Having a high-end sophisticated-looking home is challenging especially if your decorating budget is tight. Fortunately, there are affordable ways to get the high-end, elegant and sophisticated look you desire. Here are 5 simple and budget-friendly tips from GoHaus.com on How To Make Your Home More Elegant and Sophisticated to enhance the look of your home.

How To Make Your Home More Elegant and Sophisticated - 5 Budget-Friendly Tips

How To Make Your Home More Elegant and Sophisticated

1.) Choose a Sophisticated Color Palette

Paint color can completely transform the appearance and feel of your home. Some colors add instant glamour to a space. To make your space more elegant choose either a bold and dramatic hue or a soft and understated tone. These hues make your home look more stylish and luxurious. Consider painting interior doors black; this instantly creates an expensive and sophisticated feel. Black doors should be complimented by black accessories that help tie the overall design together.

luxury vinyl flooring

2.) Add pillows for elegance and comfort

If done right, adding pillows throughout your home adds a little extra comfort on the couch and also provides a layered and cozy feels to your room. Go for large, overstuffed pillows to create a plush but stylish appearance that is visually striking.How To Make Your Home More Elegant and Sophisticated - 5 Budget-Friendly Tips2

3.) Window Treatments are an indispensable accessory

A home lacking window treatments looks both cheap and unfinished. Luckily there are a wide variety of visually appealing window treatments that are affordable. Apart from adding elegance to a home they also provide much-desired privacy. Avoid unlined flimsy materials which tend to look cheap. To make your home more sophisticated, settle for elegant materials such as linen, cotton and natural silk. Keep in mind that man-made fabrics and polyester look cheap.

You have a wide array of options to choose from when it comes to window treatments. Viable options include wood blinds, woven bamboo shades or drapery.

4.) DIY Flooring such as vinyl plank and laminate flooring

Luxury vinyl flooring is a popular choice for enhancing the look of your home. An added advantage that makes it ideal is the pristine appearance and superior resistance to moisture. Vinyl is 100% plastic hence completely resistant to water. This means apart from enhancing your homes sophistication, this kind of flooring is also highly functional particularly in water-prone rooms such as bathrooms and kitchens.

Laminate flooring is also another great flooring option that can add class to your home. It is not only affordable but also easy to maintain, easy to install and adds a feeling of warmth to a space. Additionally, it is consists of 99% wood meaning its moisture resistance is reasonable. What more! It is naturally resistant to bacteria and mold growth. Consider going for a dark hue for a more luxurious feel.

If you are still wondering what the difference between vinyl and laminate is check out this article that explains in depth before you make your choice.

5.) Add accessories to your home

How To Make Your Home More Elegant and Sophisticated - 5 Budget-Friendly Tips3

image source: FreshHome

Contrary to popular misconception, accessories don’t necessarily over-extend a decorating budget. They can actually be an affordable way of adding style and elegance to your home. Gold colored accessories are a great option that usually play well with most color schemes. This means specs of gold strategically placed in your home can instantly add sophistication and elegance to a space; the trick is moderation.

Making your home more sophisticated and stylish does not have to be expensive and time consuming. With these simple tips, it can be both fun and budget-friendly.

Filed Under: DIY Tagged With: design how to, elegant home, how to design, sophisticated home, vinyl flooring

How to Shop Flooring Like A Pro

July 31, 2016 Leave a comment

In a long list of items that add value to a home, one of the tried and true housing updates to increase your home’s value is new wood flooring. According to Realtor.com, 54% of homebuyers will pay more for a home if it comes with wood flooring. However, not everyone knows or understands the best way to shop for flooring, and they many not even know the key terms to look for and ask about. We’ve teamed up with our friends at GoHaus to cover the basics of How to Shop Flooring Like a Pro.

How to Shop Flooring Like A Pro

How to Shop Flooring Like A Pro

You’re going to get asked a lot of questions when working with a flooring specialist. To make the process run as smoothly as possible, answer these questions for yourself before starting to work with a flooring specialist.

  1. What flooring to do you want? Aside from the variety of wood species available as flooring, there is the choice of between a solid wood floor and an engineered wood floor. There are pros and cons to both; on the one hand solid wood can be refinished several times, while an engineered floor typically can’t; on the other hand, engineered wood tends to be a more stable solution when changes in humidity occur. To read more about engineered hardwood vs. solid hardwood click here.
  2. Which room do you need flooring for? The answer to this question will indicate material that is recommended. If you want to install flooring in your basement, solid wood is not the answer.
    GoHaus Flooring
  3. Will you hire a professional installer? This is an important question to answer because, once again, it can determine which floor material is recommended. Nailing down a solid wood floor is an intricate process that requires an experienced professional. Some wood flooring is designated as a “floating floor,” which is easier for less experienced people to install. Speaking of professional installation – always carefully read the warranty to know what it does and does not cover. In the case of self-installation, some manufacturers may not cover that.
  4. Do you know your true cost? Typically, this question comes in the form of “what is your budget?” However, the average consumer may only be thinking about the cost of the flooring itself. There are other factors you have to consider that impacts your price per square foot. Factors such as installation materials (nails, glue, underlayment), installation cost, and shipping costs. Add all of these factors up and divide by your square footage and you’ve now successfully identified your true cost per square foot.
    hardwood flooring

Image Source: GoHaus

Don’t forget to research common wood flooring terms you’ll hear during your shopping process. You will want to know what these terms are and what they mean. Words such as:

  • Janka Hardness rating – a rating that indicates the durability of wood species. The higher the rating, the more durable it is considered.
  • Wood Veneer – in reference to engineered wood, a wood veneer is the top layer of the floor (the layer you see and walk on once installed). This is also referred to as the “wear layer.”
  • CARB Compliant – ensures that composite wood products strictly adhere to the formaldehyde emissions limits and indoor air quality standards set by the California Air Resources Board.
  • Lacey Act Compliant – Ensures that illegitimate wood products do not enter the Unites States. Meaning, that a wood floor was not illegally sourced.

Now that you have the basics of shopping for flooring like a pro, it’s time to get to work! Happy shopping!

Filed Under: DIY Tagged With: choosing the right flooring, flooring, hardwood flooringw, home flooring, how to shop flooring, shopping for flooring, wood flooring

How to Layer Patterns and Colors In Your Home

July 8, 2016 Leave a comment

When your pad has no pattern layers, color scheme or any semblance of a thought out design, it can make everything seem one-dimensional. This leads to a pretty boring and unwelcoming space. Once you’re out of your parents’ home and no longer living with 6 friends in a 2-bedroom bachelor pad in college, it’s time to start taking interior design a little more seriously!

You don’t have to be a professional interior designer to make a space vibrant and welcoming. By layering patterns and colors in the proper way anyone can make their apartment … well more adult like! We partnered with the interior design company GoHaus.com to share How to Layer Patterns and Colors In Your Home to really bring your space to life!

HOW TO Layer Patterns and Colors In Your Home

How to Layer Patterns and Colors In Your Home

Start Small!

Layering patterns and colors can be a daunting task. At first you think about all the things you need to consider: floors, walls, window coverings and drapes, upholstery, accessories… the list goes on. Our first tip is to start small!! Don’t be discouraged at the amount of stuff you think you have to change. We recommend starting with throw and floor pillows and small area rugs. You can get these items on a budget and play around with different pattern and color ideas before changing some big priced items in your apartment. You’d be surprised at how changing a few small things like throw pillows can really change the look and feel of a space.

engineered hardwood flooring

Make Color Edits

One of the very first things you should start with is choosing the proper colors. We suggest to start with A LOT of colors and edit down from there. Grab some fabrics in a wide array of colors that you like and lay them all out. Start by tossing a few out right off the bat that clearly clash or do not go well in your space. Narrow it down until you have a main color scheme. A major color in every home is the floor. You should always take this into consideration when choosing a color scheme. If you’re thinking about changing that anytime in the near future we suggest grabbing some flooring samples in various colors and adding those into your color board to make sure your choices don’t clash with the biggest canvas in your home, your flooring!! Most retailers will send free flooring samples with no credit card information needed, making it a no brainer to add into your color board.

GoHaus Flooring

Add Contrast 

Now that we’ve decided on the main color scheme, it’s time to add in some contrast. This means both pattern and color contrast. If you don’t know what contrasting colors work with your chosen color there is an awesome Adobe Color Tool online. You can input the color you chose and it will give you direct contrasting colors, the monochromatic color, complimenting colors, compound colors and anything else you need to match with that color.

The Perfect Mix of Scale 

Most people get through the color and shapes fairly easily but find varying the scale of patterns to be the hardest task. We usually divide scale into three sizes: small, medium and large, and you want to vary these with your fabrics across any given room. As a general rule, try not to mix more than one fabric or item of both small and large scale. Small scale patterns clash like oil and water. If you look at the image below you can see a lot of small scale patterns together. It’s tough for your eye to decide which one to focus on…. Our point exactly. Stick with one small scale design.

pattern swatches

Image Source

Large scale patterns don’t seem to clash up-close but when you step back 10 feet or so you can see how large scale patterns will look like they are trying to eat each other! Stick with one large scale pattern within a room as well.

How to Layer Patterns and Colors In Your Home2

The exception is medium scale designs. You can do multiple of these across a room as long as you mix the shape and pattern. You want them to be drastically different, so the more varied the pattern for medium scale the better. Don’t mix similar style and geometrically shaped medium scale designs.  

Those are our basic tips to get your started! Remember don’t be overwhelmed by all the options and items that need to be layered, start small and work your way up. You can make big changes with a few small design edits!

Filed Under: DIY Tagged With: GoHaus, home decor, home design, interior design, layer patterns and colors, mixing patterns and colors

  • « Previous Page
  • 1
  • …
  • 4
  • 5
  • 6
  • 7
  • Next Page »

Popular How To’s

How to Contact TikTok About a Banned Account

How To Cook Frozen King Crab Legs

How to Pick a Mini Watermelon

How To Care For Air Plants

Categories

Food

Travel

DIY

Finance

Parenting

Technology


Copyright ©2023, How to Knowledge. All Rights Reserved. Custom design by Pixel Me Designs